
A little over a year ago, in December 2015, I printed a ‘twisted heart’ vase for my wife, using Gyrobot’s ‘Twisted_Heart_Vase_Hollow_-_Hi_Res.stl’ file from Thingiverse (http://www.thingiverse.com/thing:42570/#files). At the time, I had been 3D printing for about a year using a Printrbot Simple Metal and I had just purchased some bright Magenta PETG 3D filament. As usual I printed several versions to get the one I (actually, my wife) wanted, and wound up with a small 30% scale model that my wife used as her daily pill cup.
As it happens, this model wound up in the hands of a grand-daughter, so my wife asked me to print her a new one. “Piece of cake” I thought; after all, I have a better printer – a dual extruder PowerSpec 3DPRO (FlashForge 3D Creator Pro knockoff) with enclosed build space and a heated print bed with PEI, the top-of-the-line Simplify3D plater/slicer, and plenty of PETG magenta filament remaining – what could go wrong? 😉
So, I tracked down the print file I used last time, threw it into S3D, scaled it down to 30%, and voila – NOTHING – WTF!!?? After some experimentation, I found that any time I scaled the print below 50%, the sidewalls disappeared – ugh! After some due-diligence Googling, I finally gave up and posted to the S3D support forum, and in very short order I had a couple of replies. Turns out the answer was that the sidewall thickness was getting scaled with everything else, and once it got below about 1/2 extruder thickness – it got rounded down to zero thickness – duh! Fortunately, poster Brian had the answer – tell S3D to make the object a solid model, and then set the infill to 0% and the sidewalls to 1 perimeter width – yay!
So, this got me to the point where I could actually slice the model and send it off to the printer, where I discovered an entirely different set of problems. I don’t remember having any real problems with my old trusty Printrbot, but I sure was having them with the PowerSpec. The PETG filament was sometimes refusing to stick to my PEI print bed surface, and when it did stick, it had a tendency to stick to itself and ball up in to a huge blob after several to many layers. When it didn’t do any of these bad things, I would get ugly inclusions and/or voids in the sidewalls – not the kind of thing I wanted to show my wife – yuk!!
So, back to Google, looking for advice on printing with PETG. Fortunately, after just a short hunt I came across a very detailed treatment for PETG printing by ‘Jules’ at XYZFabs. The good news – it was very detailed and thorough, so it was very likely to cover my problem; the bad news – it was very detailed and thorough, and so required a lot of concentrated study to follow.
In my case, the problem resolution was to do the following, as suggested in the above article
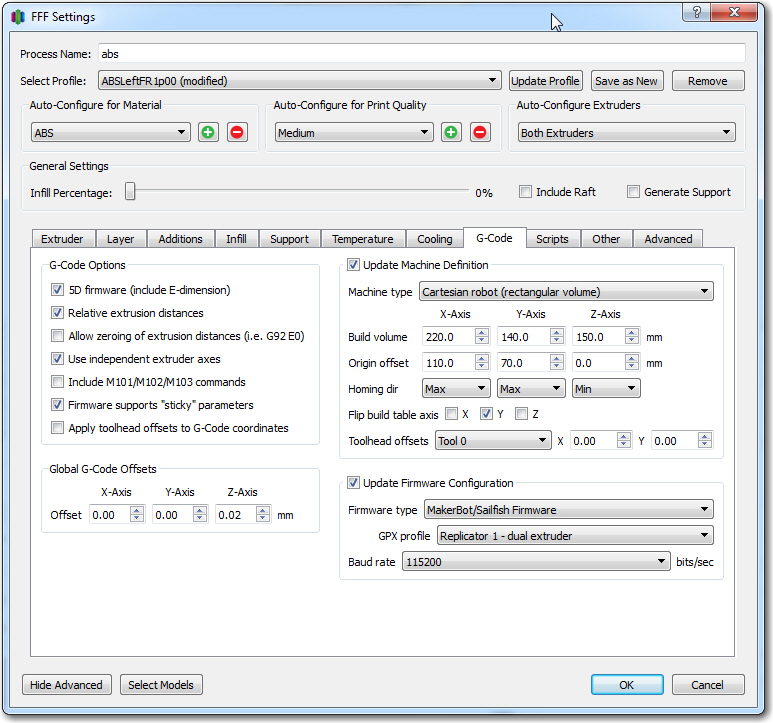
- Modified the Z-axis calibration in S3D’s G-code section to move the extruder another 0.02mm away from the print bed, to accommodate PETG’s enhanced stickiness.
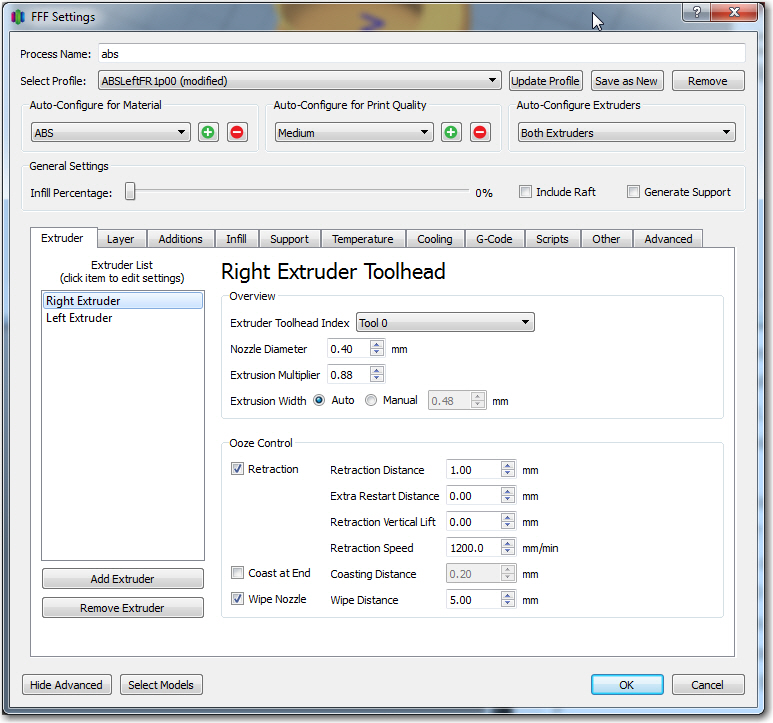
- Enabled the ‘wiping’ feature, and confirmed that I had ‘retraction’ enabled
- Set the extrusion multiplier to 0.88 to significantly under-extrude. Before reading this article, I had had other occasions to over-extrude slightly with others filaments, but this was the first time I had a reason to under-extrude.
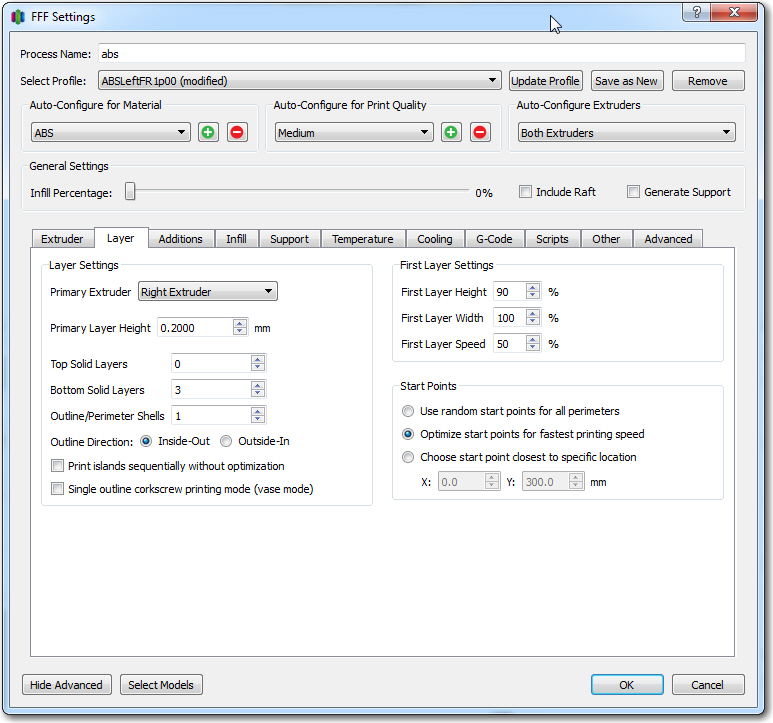
- Switched back from ‘high resolution’ (0.1mm layer height) to ‘medium’ (0.2mm layer height). Not sure this was really necessary, but it seemed that the theme for PETG was ‘keep the layer separation as high as possible without actually air-printing’, so…
- Slowed the print speeds down slightly. Again, not sure this was absolutely necessary, but the combination of this and all the above were definitely going in the right direction.
As a result of these changes, print quality improved dramatically, to the point where my next 30% scale print was a ‘winner’ – one that I could proudly present to my wife and accept my reward (“well, it’s not as good as the one I had before, but I guess it’ll have to do”) ;-). Hey, after almost 50 years of marriage, that’s about as good as it gets!!
I have included some photos of some of the failed versions, and a couple of the successful one.
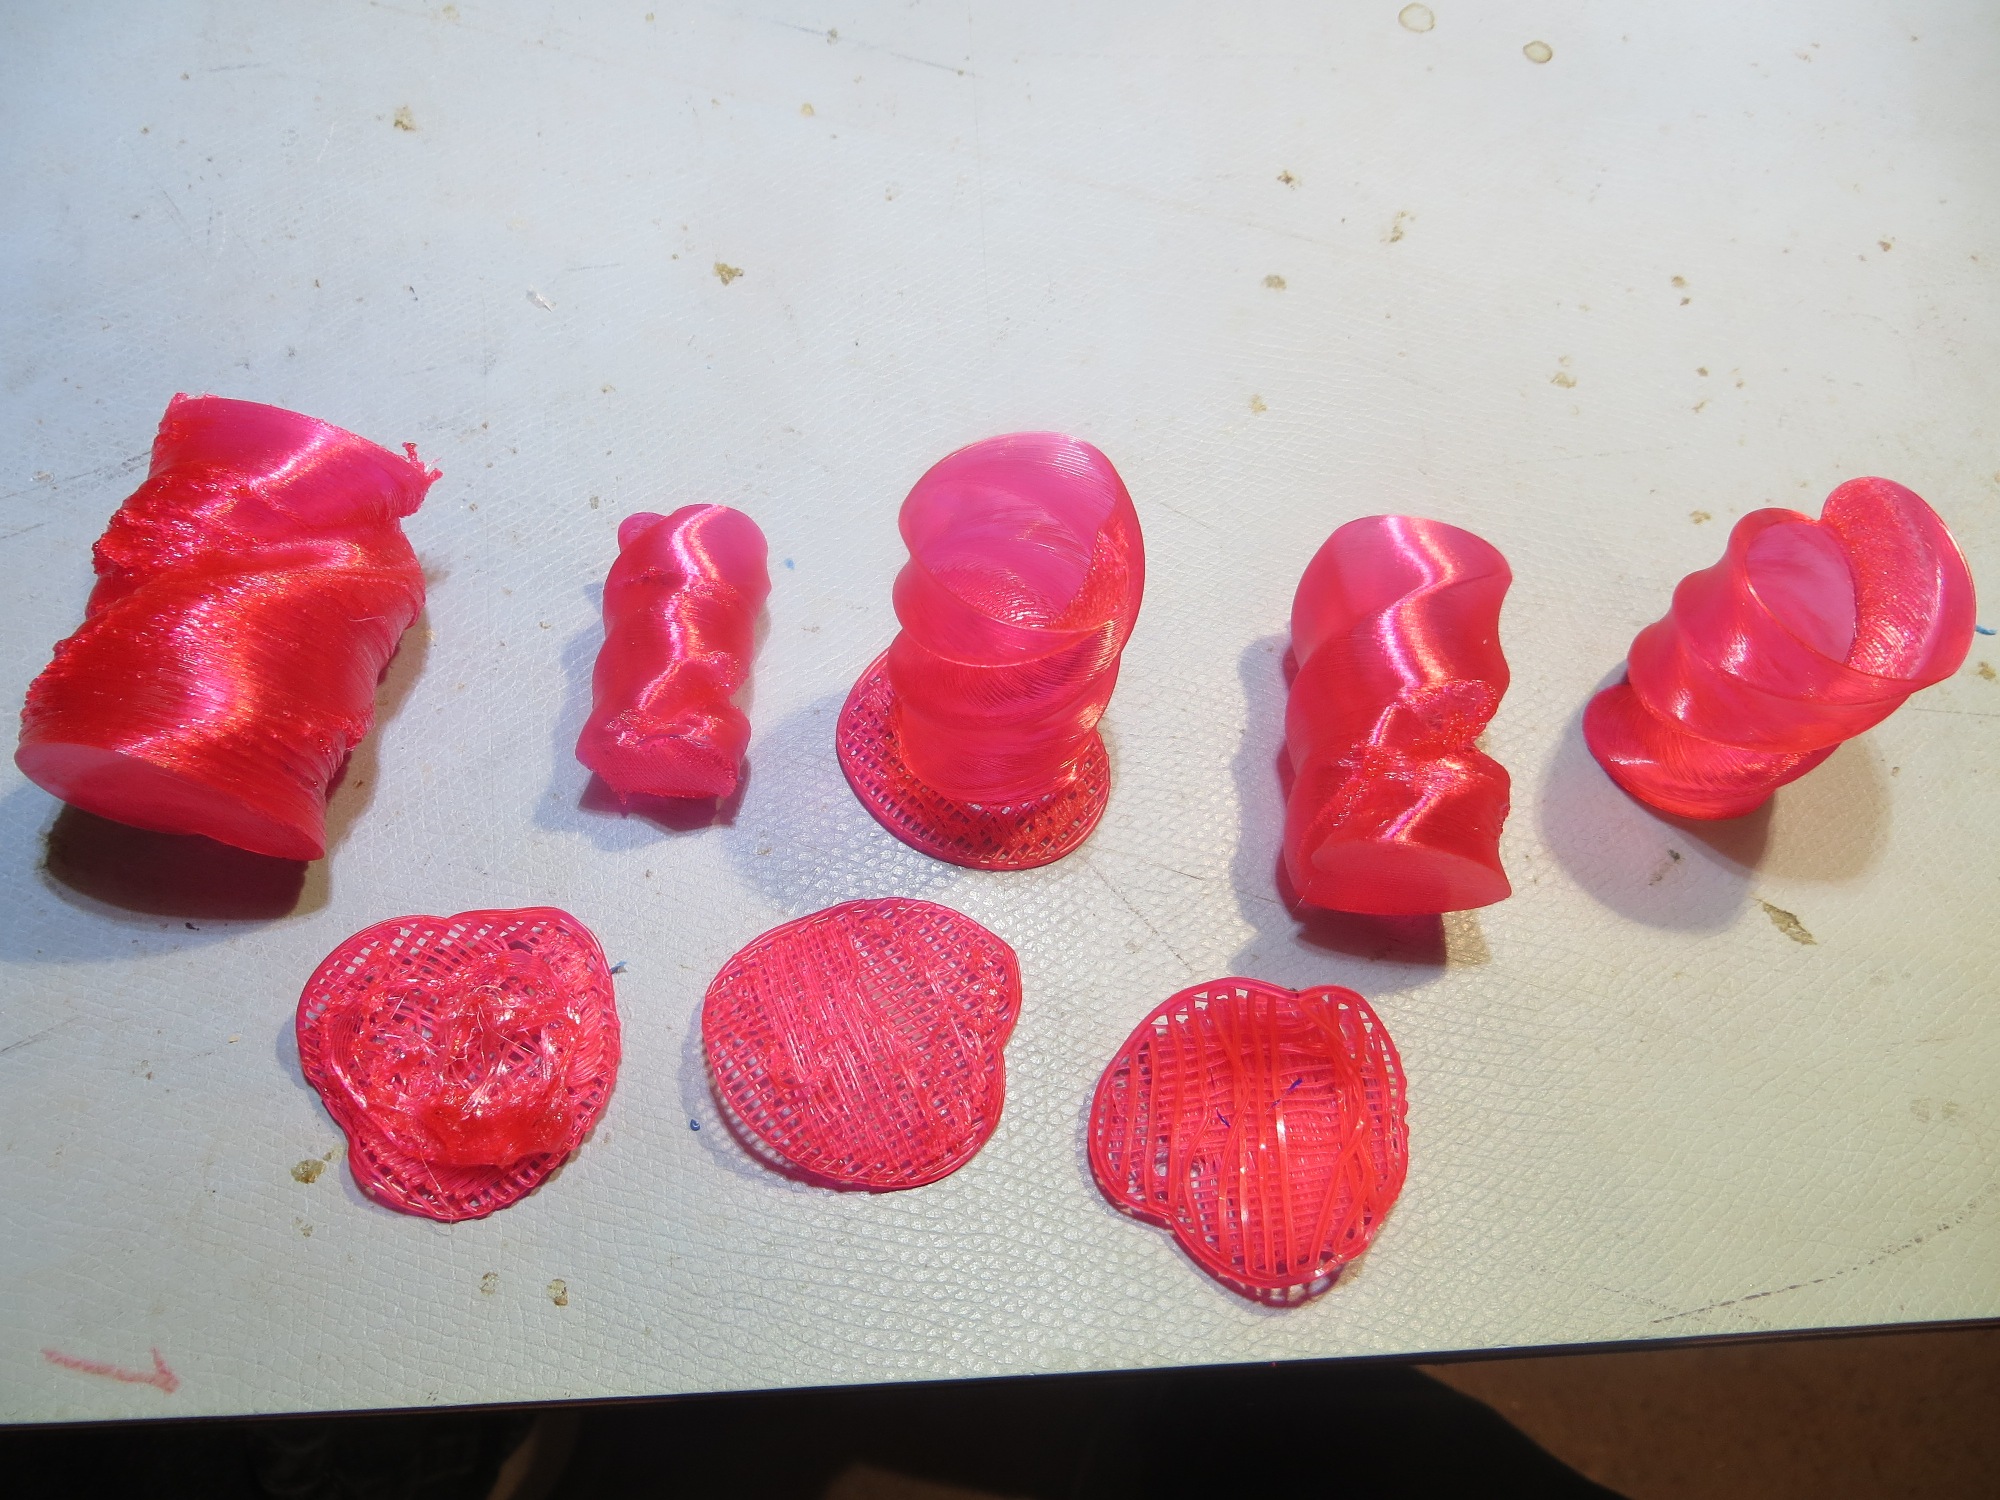
The twisted-heart menagerie. The successful print is shown on the far right
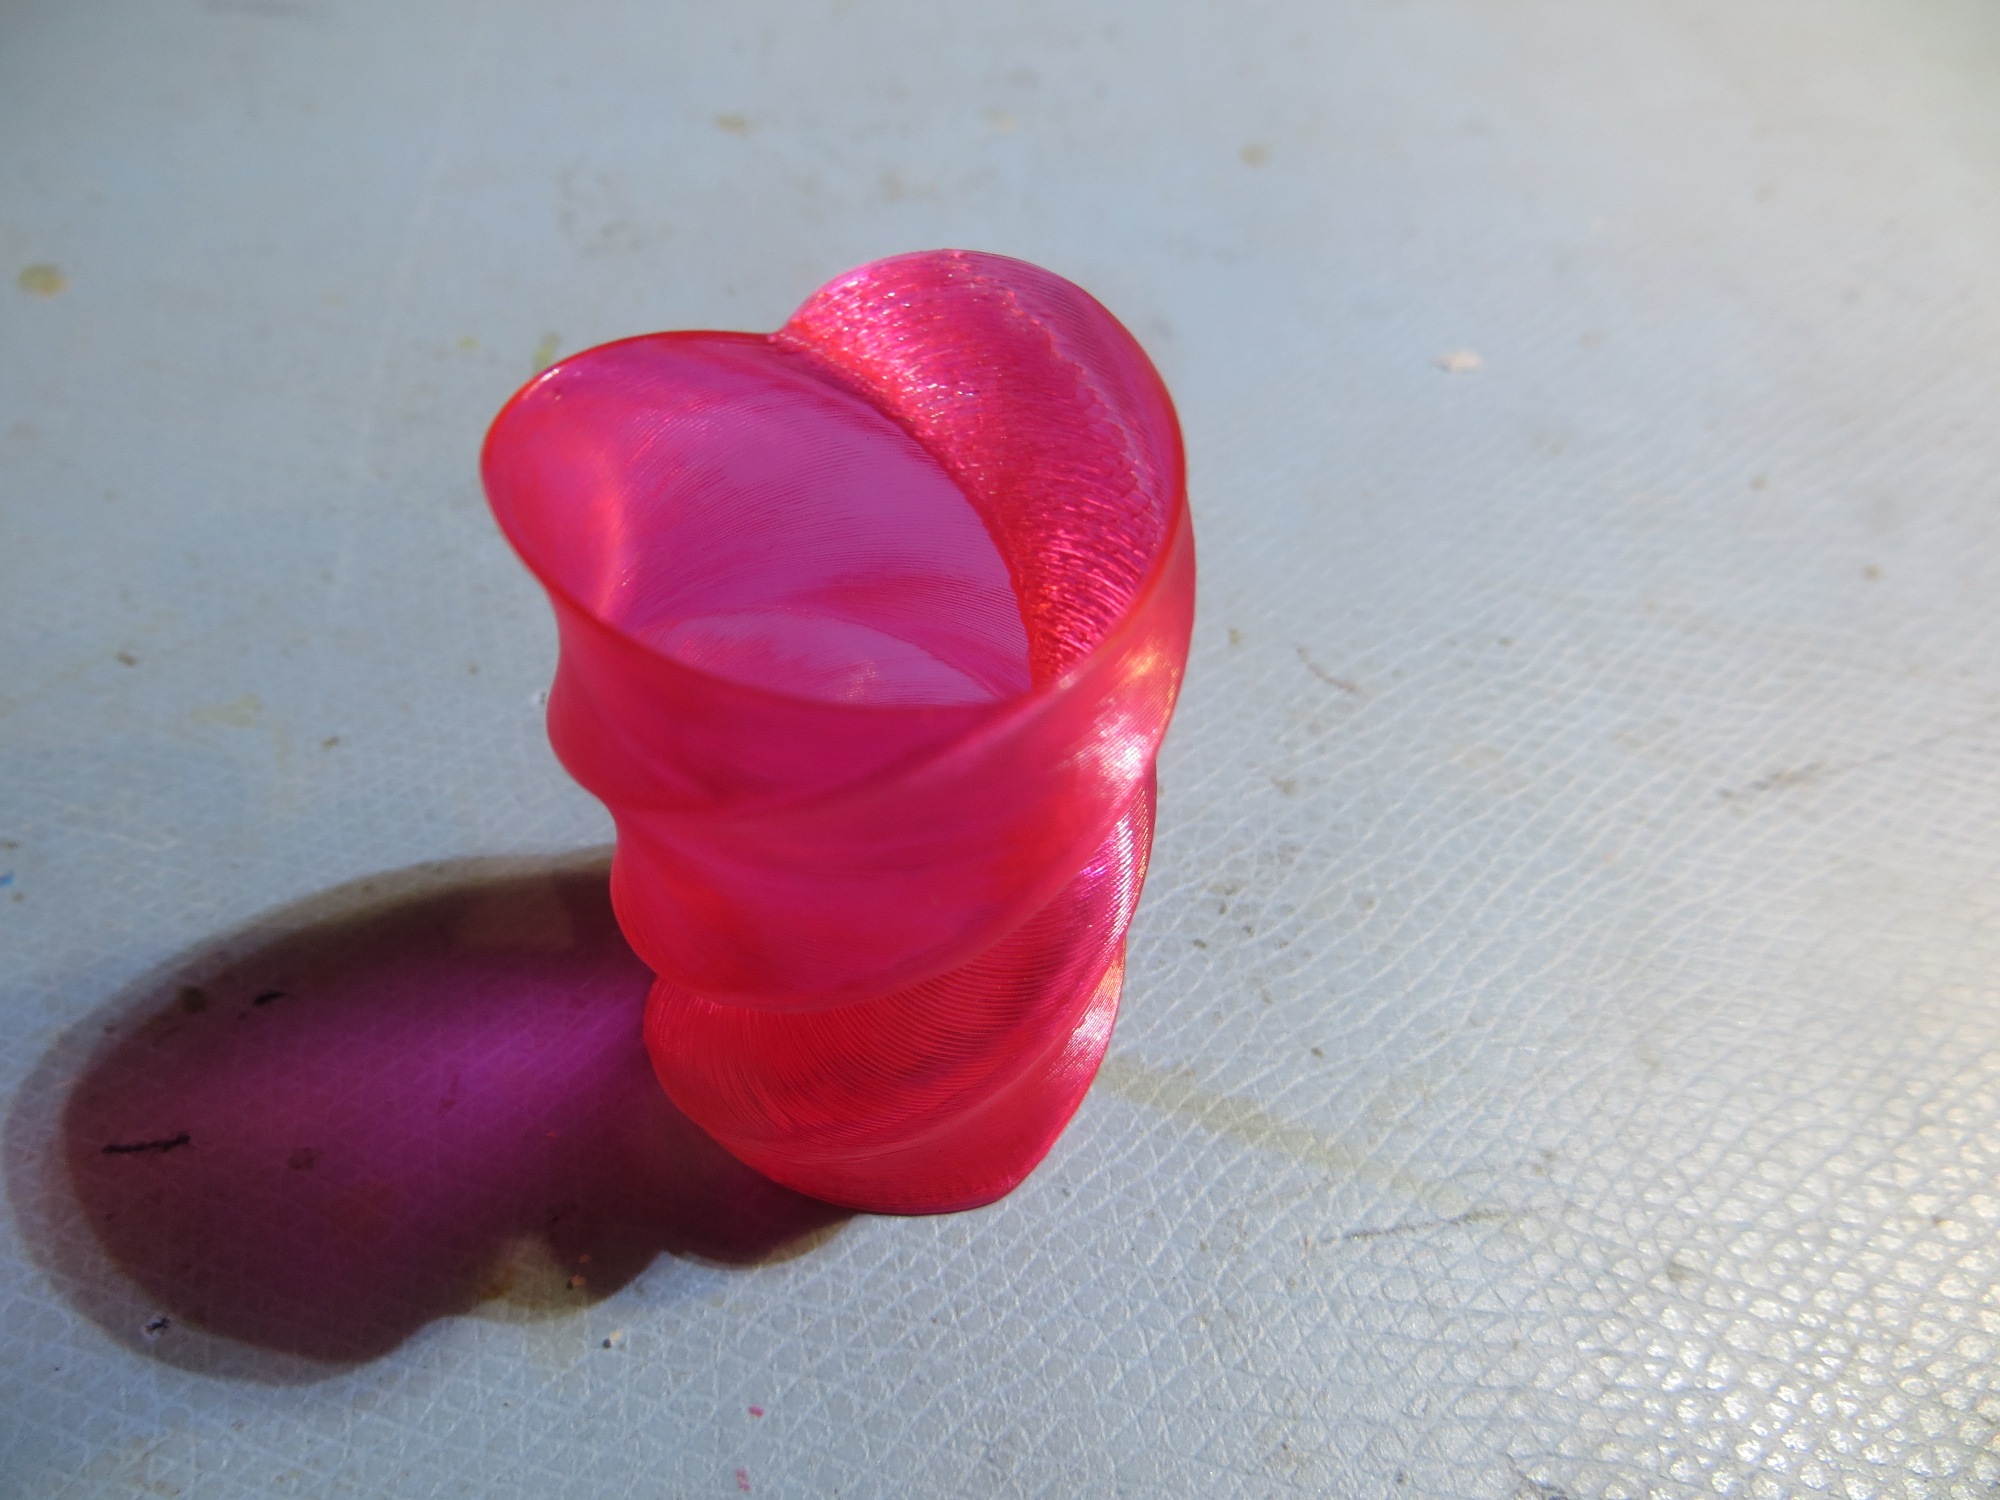
Successful 30% scale twisted heart print, using magenta PETG
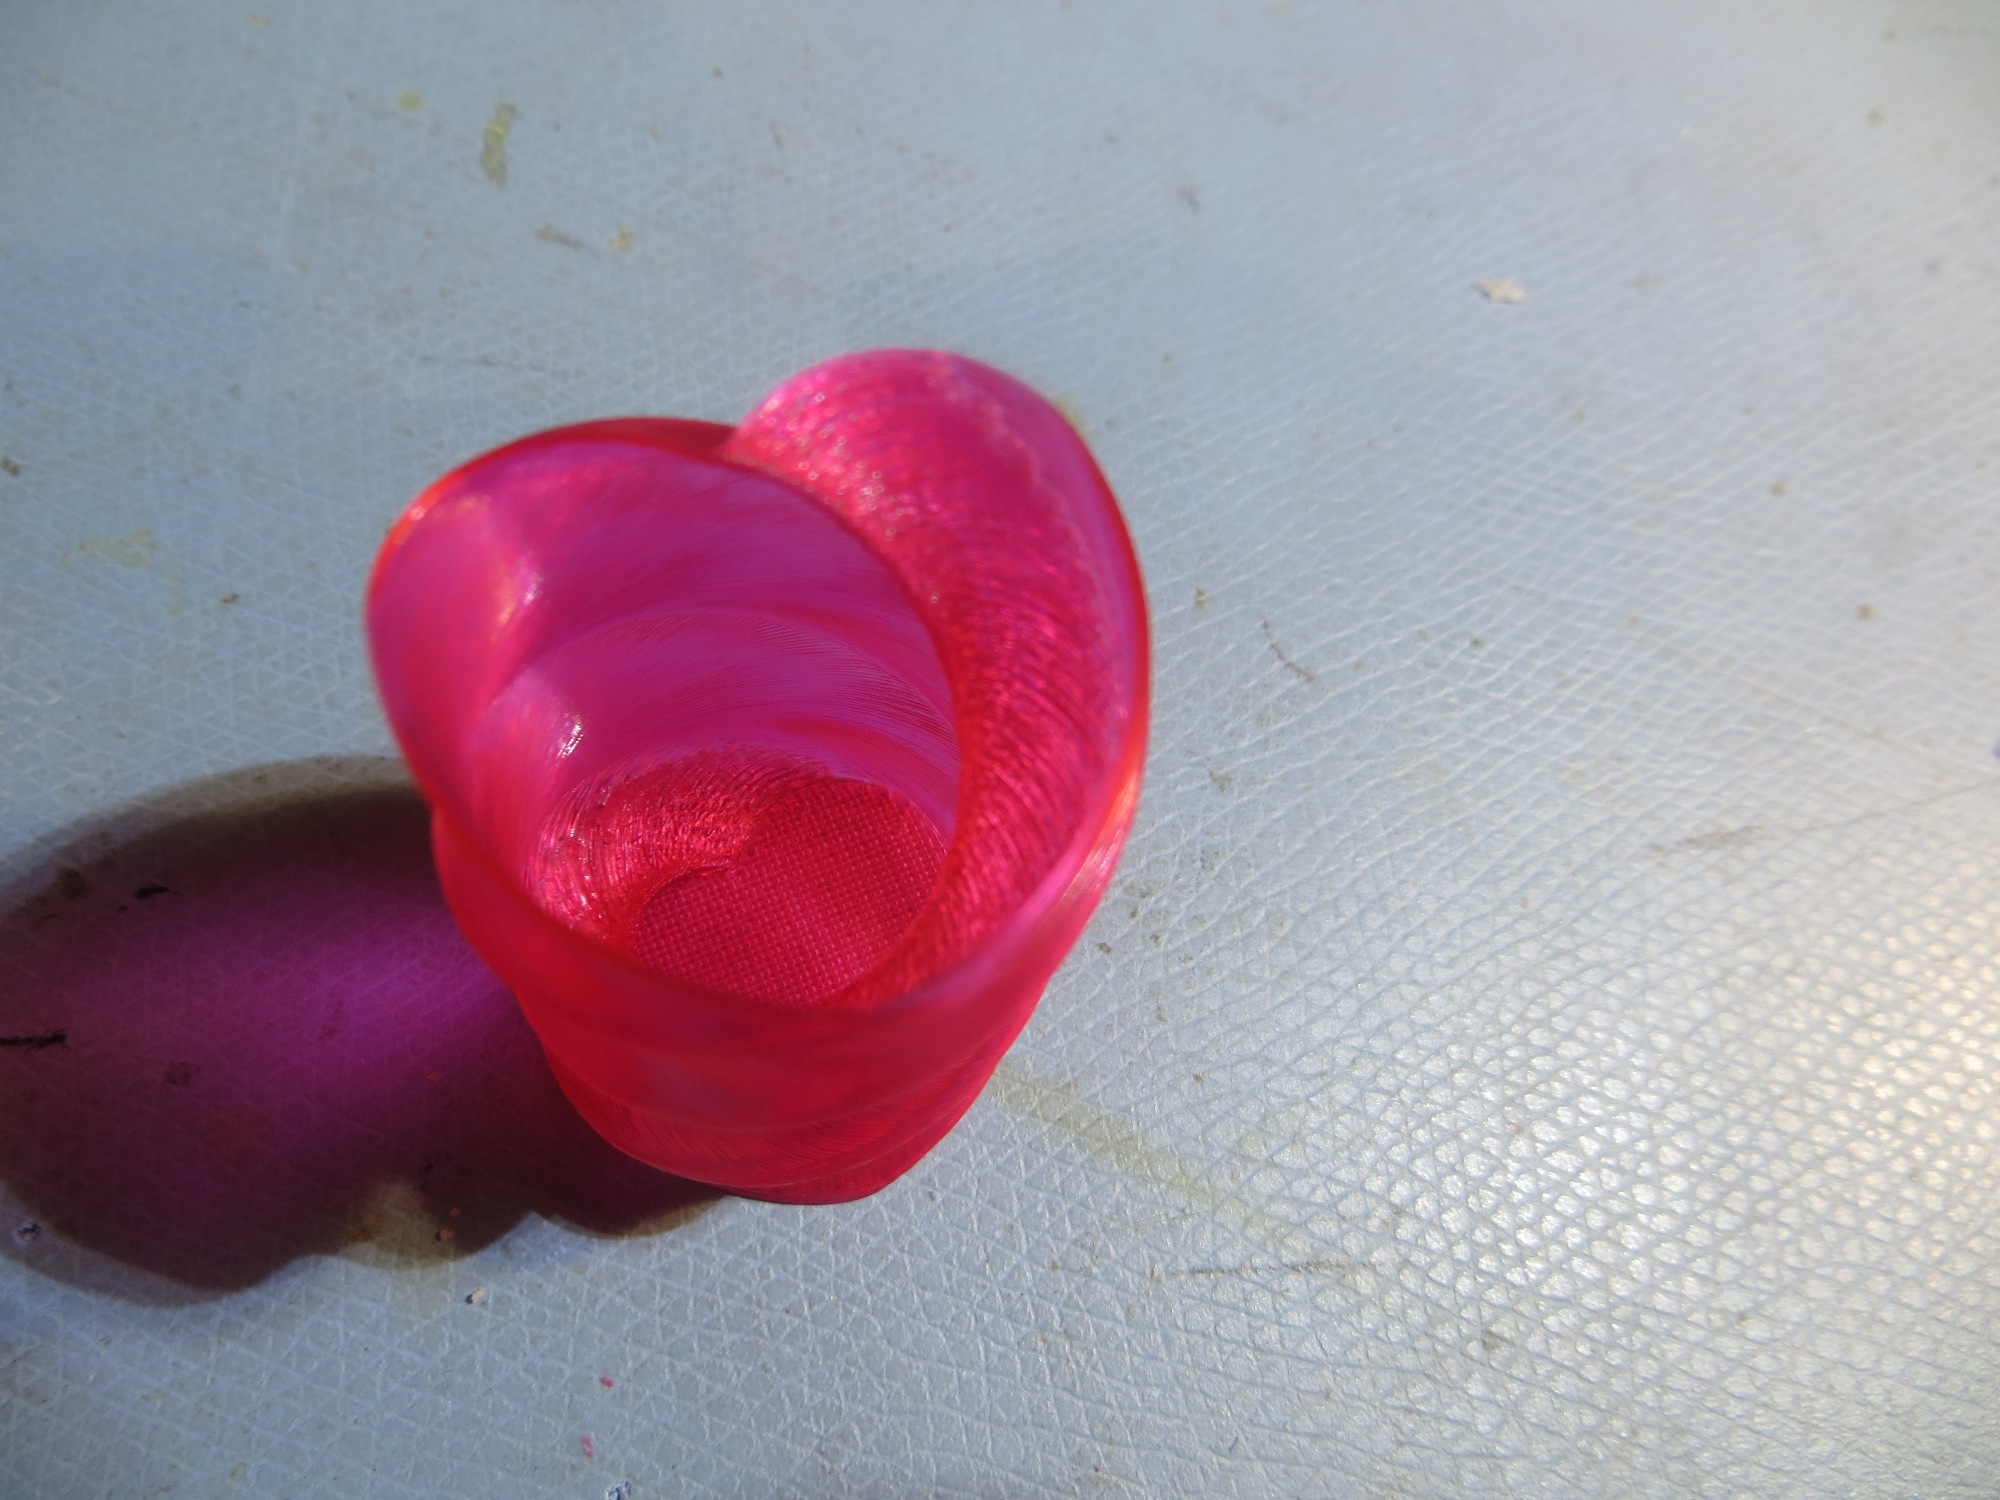
Successful 30% scale twisted heart print, using magenta PETG
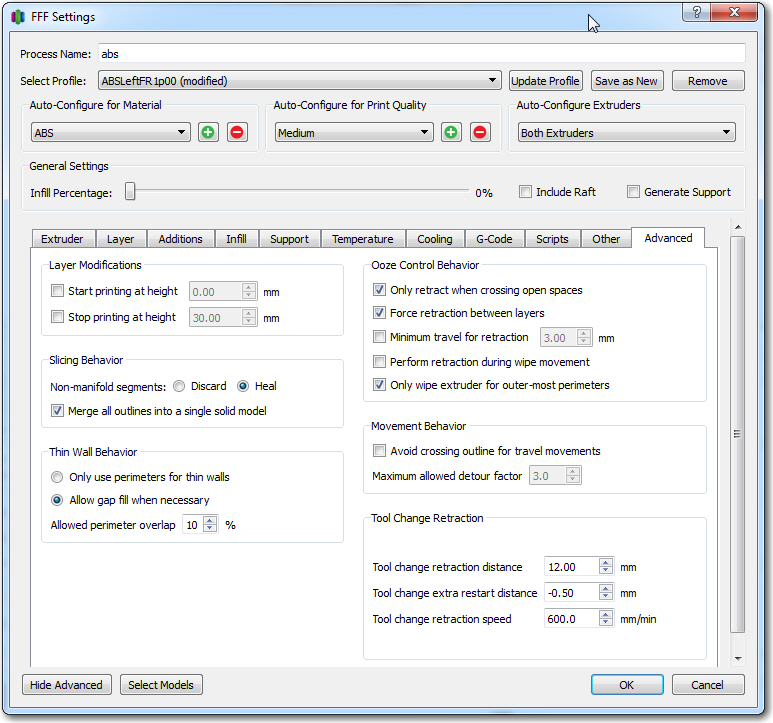
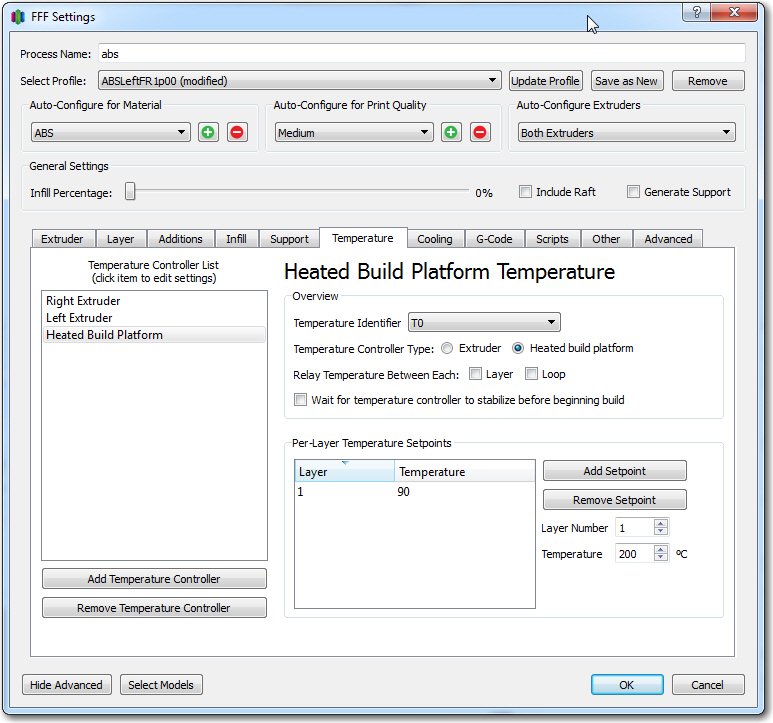
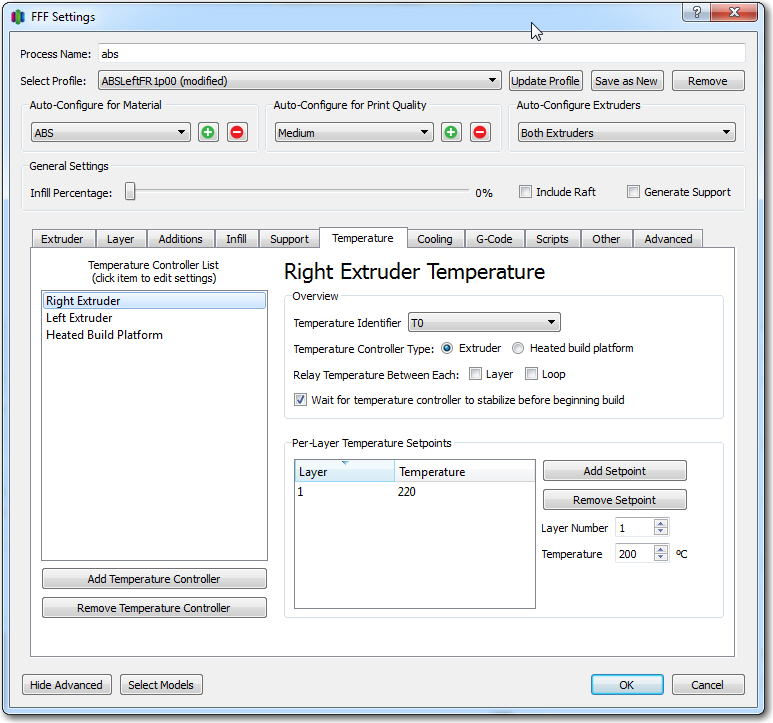
I have also included screenshots from my S3D setup for the successful print.
Frank