Posted 18 January 2017
In my last post on this subject, I had discovered two major problems with my current strategy to free Wall-E2 from the need for human assistance. The first problem was how to get Wall-E2 disengaged from the charging station, and the second was how to transition from charging power to on-board battery power without going through a power-cycle reboot. As noted there, I decided there were two things I needed to do – install a MOSFET switch in the coil circuit so I could switch the relay back from ‘charge’ mode to ‘run’ mode before the external +5V charging voltage disappeared, and to connect the external +5V charging voltage through a blocking diode to the Arduino Mega’s +5V buss so the controller could continue to operate while the batteries were charging.
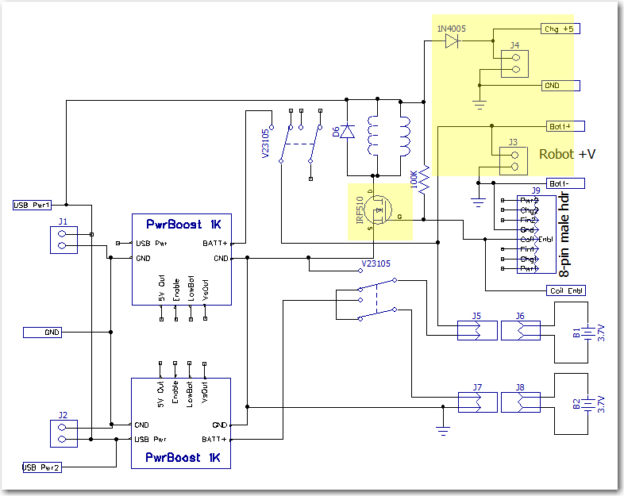
So, I made the above changes to the charger module, as shown in the image below (changed areas highlighted). For reference, the ‘original’ schematic has also been included
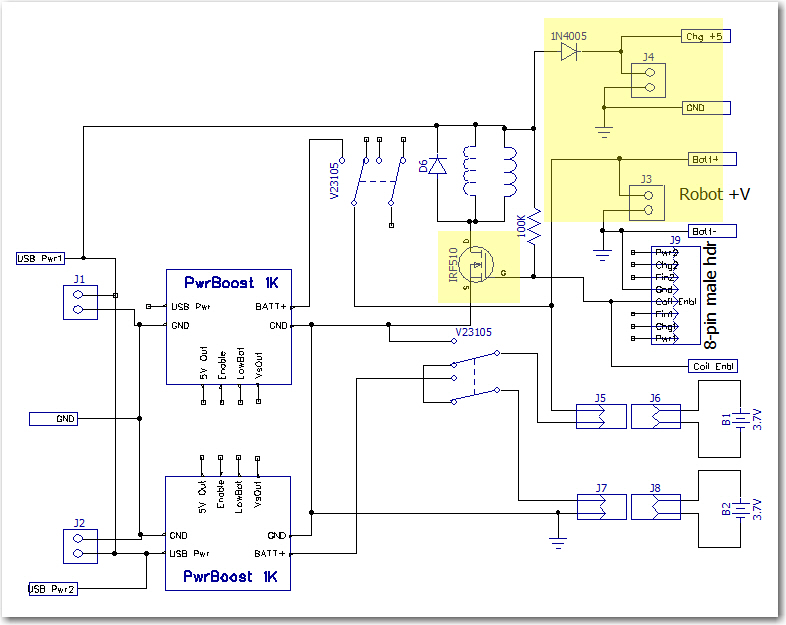
Dual Cell Charging Module with changes highlighted
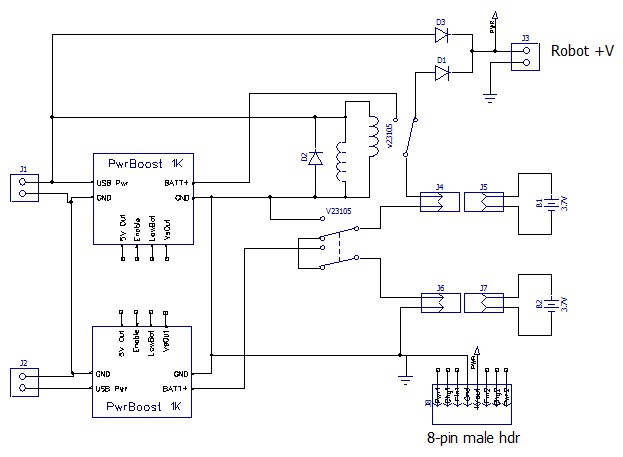
Dual cell balance charger. Note the two Axicom relays ganged to form the required 3PDT switch
As can be seen above, there are two major changes
- Added a IR510 n-channel enhancement mode MOSFET to control relay coil current via a new ‘Coil Enable’ signal rather than directly from the external +5V line. A 100K pullup was added so that the default configuration of the MOSFET switch was ‘ON’. A LOW signal on the ‘Coil Enbl’ line will switch the MOSFET to ‘OFF’, thereby switching the 3.7V cells from ‘charge’ (parallel) to ‘run’ (serial) mode.
- Removed the blocking diode from the +7.4V ‘Robot +V’ line, and added a separate ‘Chg +5’ 2-pin terminal with a blocking diode.
After making these changes, I set up an experiment where I could simulate the process of connecting the robot to the charger (thereby switching the batteries from the ‘run’ (serial) to ‘charge’ (parallel) configuration, with Arduino power being supplied by the external +5V line, and then disconnecting it using the new MOSFET circuit to switch the batteries back to ‘run’ (series) configuration before mechanically disengaging the external +5V plug.
Before conducting the experiment, I wanted to confirm that the reboot problem still existed. I set the robot up a small block so the wheels were off the ground, turned on the main power switch, waited while the robot booted up and the wheels began to turn (the program was configured for continuous half-speed motion), and then engaged/disengaged the external +5V charging plug. As expected, when the plug was engaged the wheels stopped turning but the Arduino continued to operate (confirmed by noting that telemetry readouts continued uninterrupted). However, when I disengaged the plug, the wheels started turning again immediately, and the telemetry readouts continued unabated, indicating that no power-cycle reboot had occurred! I ran this experiment several more times with the same result – after making the above changes, I could not get the robot to reboot in either direction – from ‘run’ to ‘charge’ mode or from ‘charge’ to ‘run’ mode. Amazing!
OK, so what caused the different behavior? When I ran this same experiment before the changes, I saw an approximately 50msec gap between the time the external +5V line went away, to the time when the Arduino +5V line was again stable due to the +7.4V power via the regulator block. AFAIK, there were only three significant changes made to the charging module:
- The IR510 MOSFET was added to enable/disable the coils under computer control, with a 100K pullup to keep it in the ‘ON’ (low resistance) mode by default.
- The external +5V line and its associated blocking diode was removed from the ‘Robot +V’ terminal to a new ‘Chg +5’ terminal
- The blocking diode between the battery stack and the ‘Robot +V’ terminal was removed
So, what’s the deal here? AFAICT there are only two possibilities:
- I didn’t/don’t fully understand the mechanism producing the 50msec power gap in the previous configuration
- I don’t fully understand why the current configuration doesn’t have a 50msec power gap
Previous Configuration:
I am 100% certain that I observed a consistent, repeatable power-cycle reboot when switching from external +5V to internal battery operation, and I got the 50msec number from scope measurements . To make the scope measurements, I triggered the scope trace on the falling edge of the external +5V line, and measured the time lag from that trigger to the time that internal battery voltage was available to the Arduino. The reboot phenomenon was verified by noting the long (5-10 sec) delay between the time the external power was removed to the time when the motors started running again, and by watching the interruption on the Arduino serial port. The 50msec or so gap is consistent with the idea that it takes some time for the relay coil field to collapse after external power removal, plus the time required for the relay contacts to physically move from the ‘engaged’ to the ‘disengaged’ contacts. During this interval, the only thing powering the Arduino is the charge left in the 680 uF power supply filter cap. Assuming a current drain of around 100mA, it would take only about 5-10msec to cause a 1-2V drop on the +5V buss. With the measured current drain of about 68mA, I measured about 30msec for a 2V drop using my trusty O’scope, so this all tracks.
Current Configuration:
In the current configuration, after the 2V drop, the voltage drops only very slowly, so the current drain must also drop significantly – could that be the answer? Maybe most, if not almost all of the measured current drain is the coils themselves – so that after the blocking diode gets reversed, the drain out of the filter cap goes down by an order of magnitude or so, thereby letting the Arduino live on until the internal battery takes over? Lets see – the specs for the Axicom V23105A5476A201 relay show 30mA for the coil current, times two relays gives about 60mA total. The measured current with the relays engaged was about 68mA, meaning that when the diode blocks, the drain from the cap goes from 68 to 8mA, meaning an additional delta of 1V (from about 4.5 to about 3.5) should take 680X10-6/8X10-3 = 85msec, which is reasonably close to what I’m seeing on my O’scope.
That’s my story and I’m stick’n to it!
OK, so now my story is this: In the previous configuration, the Arduino 6800uF filter cap supplied relay current all the way down to zero volts, which meant that the voltage across the cap (and consequently, the Arduino working voltage) dropped to below 3V in less than 20msec, well less than the time required for the internal battery source to take over operation. In the new configuration, the blocking diode between the external +5V supply line and the Arduino isolates the Arduino from the charging circuit after a drop of about 2V. After this, the Arduino is powered solely by the 6800uF cap, but because the Arduino’s current drain is much smaller than the 60-70mA required by the charging circuit, the cap can power the Arduino for another 100msec or so, which is plenty of time for the internal power source to come on line.
One implication from this story is that the MOSFET circuit may not have been required at all. As evidence, the gate of the MOSFET is tied to external +5 through a 100K resistor, so by default it is ON (low drain-source resistance) all the time, unless deliberately switched from the Arduino. During all this testing, that control line has been left open, meaning the MOSFET is just sitting there, doing its best to emulate a short length of wire. However, I’m reluctant to take it out or deliberately short around it for three very good reasons (actually only one good reason, and two not-so-good ones); first, it is just barely possible that the MOSFET actually turns OFF at some point in the process, maybe hastening the relay change from energized to de-energized (that’s a not-so-good reason). Second, it is a major PITA to disassemble the robot down to the point where I can access the MOSFET and install the short (another not-so-good reason). Finally, even if I do properly understand what is going on now, it is still possible that increased Arduino loads in the future will cause the reboot problem to re-appear; in this case, being able to de-energize the relays before disengaging from the charger will be a life-saver (that’s the good reason). In addition, I’m unwilling to screw around with something that appears to be working just like I want it to (in other words – “if it’s working, don’t screw with it!!”)
Where to from here?
As it stands, I have a robot that can be charged through its front-mounted external power jack, and should be able to (assuming appropriate information availability) switch to internal battery power and disengage itself from the charging station. Now I need to actually implement the entire solution, generally as follows:
- Confirm that the proposed engagement/disengagement strategy will actually work. To do this, I’ll need to modify the operating software to
- recognize when the external power plug has engaged and is supplying power
- switch back from external to internal power
- disengage from the external power plug.
- Build up the fixed portion of the charging station, including mounting the IR LED and supplying 5V power
- Simulate the entire IR track/side-rail capture/engagement/disengagement cycle on the bench
- Modify the operating system to implement the required additional tracking/movement modes
Independently of the above, I need to revisit the issue of how the charging station connects to the robot. Originally, the idea was to connect via an array of contacts on the underside of the robot. These contacts would mate with spring contact fingers on the top surface of a raised section of the fixed charging station, which would also contain status LEDs for the two embedded Li-Po chargers. Unfortunately, I have been unable to come up with contact fingers appropriate for the application, despite trying three different contact finger ideas (EMI shielding finger stock, TE connectivity spring contact fingers, and Mill-Max spring-loaded contacts). Fortunately, in the meantime I was able to successfully demonstrate automatic external charging power connection using a guide funnel for the front-mounted external power jack and a semi-flexible probe tube with the mating external power plug mounted at its end.
The advantage of using the front-mounted jack for automatic power connection is that all I have to do is to get that one jack/plug pair engaged/disengaged, as opposed to the nine underside contacts. This is a huge simplification of the problem, and one that I have already demonstrated to be feasible. The major disadvantage of this option is that all the charge-related decision making will have to be done by the robot, as the fixed part of the charging setup won’t know what is going on at all. If I want to monitor charging status, I’ll have to do that via the onboard Arduino. In the previous configuration (pre-MOSFET) this disadvantage was compounded by the fact that charging power could only be removed by physically disengaging the external power plug, which could only be done by some external physical mechanism since (by definition) the onboard wheel motors weren’t available during the charging process. Since I now have a way around that dilemma (i.e. the robot can now unilaterally switch from external to internal power by means of the MOSFET switch and then use the onboard motors to effect physical disengagement), this huge problem goes away entirely. I still have the problem of how (or if) to display charging status, but this is trivial compared to the problem of physically disengaging the charging plug.
If I decide to abandon the underbelly contact array idea, then I can re-purpose the 8-pin header on the charging module to route charging status information to the Arduino instead of to the underbelly contact array. This header is shown in the image below:
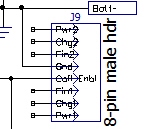
Charger module 8-pin male status/control header
As shown, there are 3 status pins for each cell charger, a ground line, and the new ‘Coil Enable’ line. The status pins show whether or not the charger is receiving power (PWR), and whether the cell is still charging (CHG) or has finished (FIN). In the original charging station design, the six status lines were brought out to individual LEDs via the contact array. If the underbelly array strategy is abandoned in favor of the single front-mounted connector, then these LEDs will have to be mounted somwhere/somehow on the robot itself. Originally I was thinking that each status line would consume an Arduino Digital I/O pin, but now I’m not so sure. All of these lines are actually already ‘powered’ from the charger modules themselves – all that is required to illuminate the CHG and FIN LEDs is +5V – the status line is tied to an open-collector output through a limiting resistor. The PWR status line is simply the +5V power to each cell charger, so a limiting resistor is required. All the required signals and connections are available, so all that is needed is some sort of mounting arrangement on the robot – perhaps it could be integrated into the mounting for the front-mounted IR phototransistors in a manner similar to the ‘backup light’ mount at the rear?
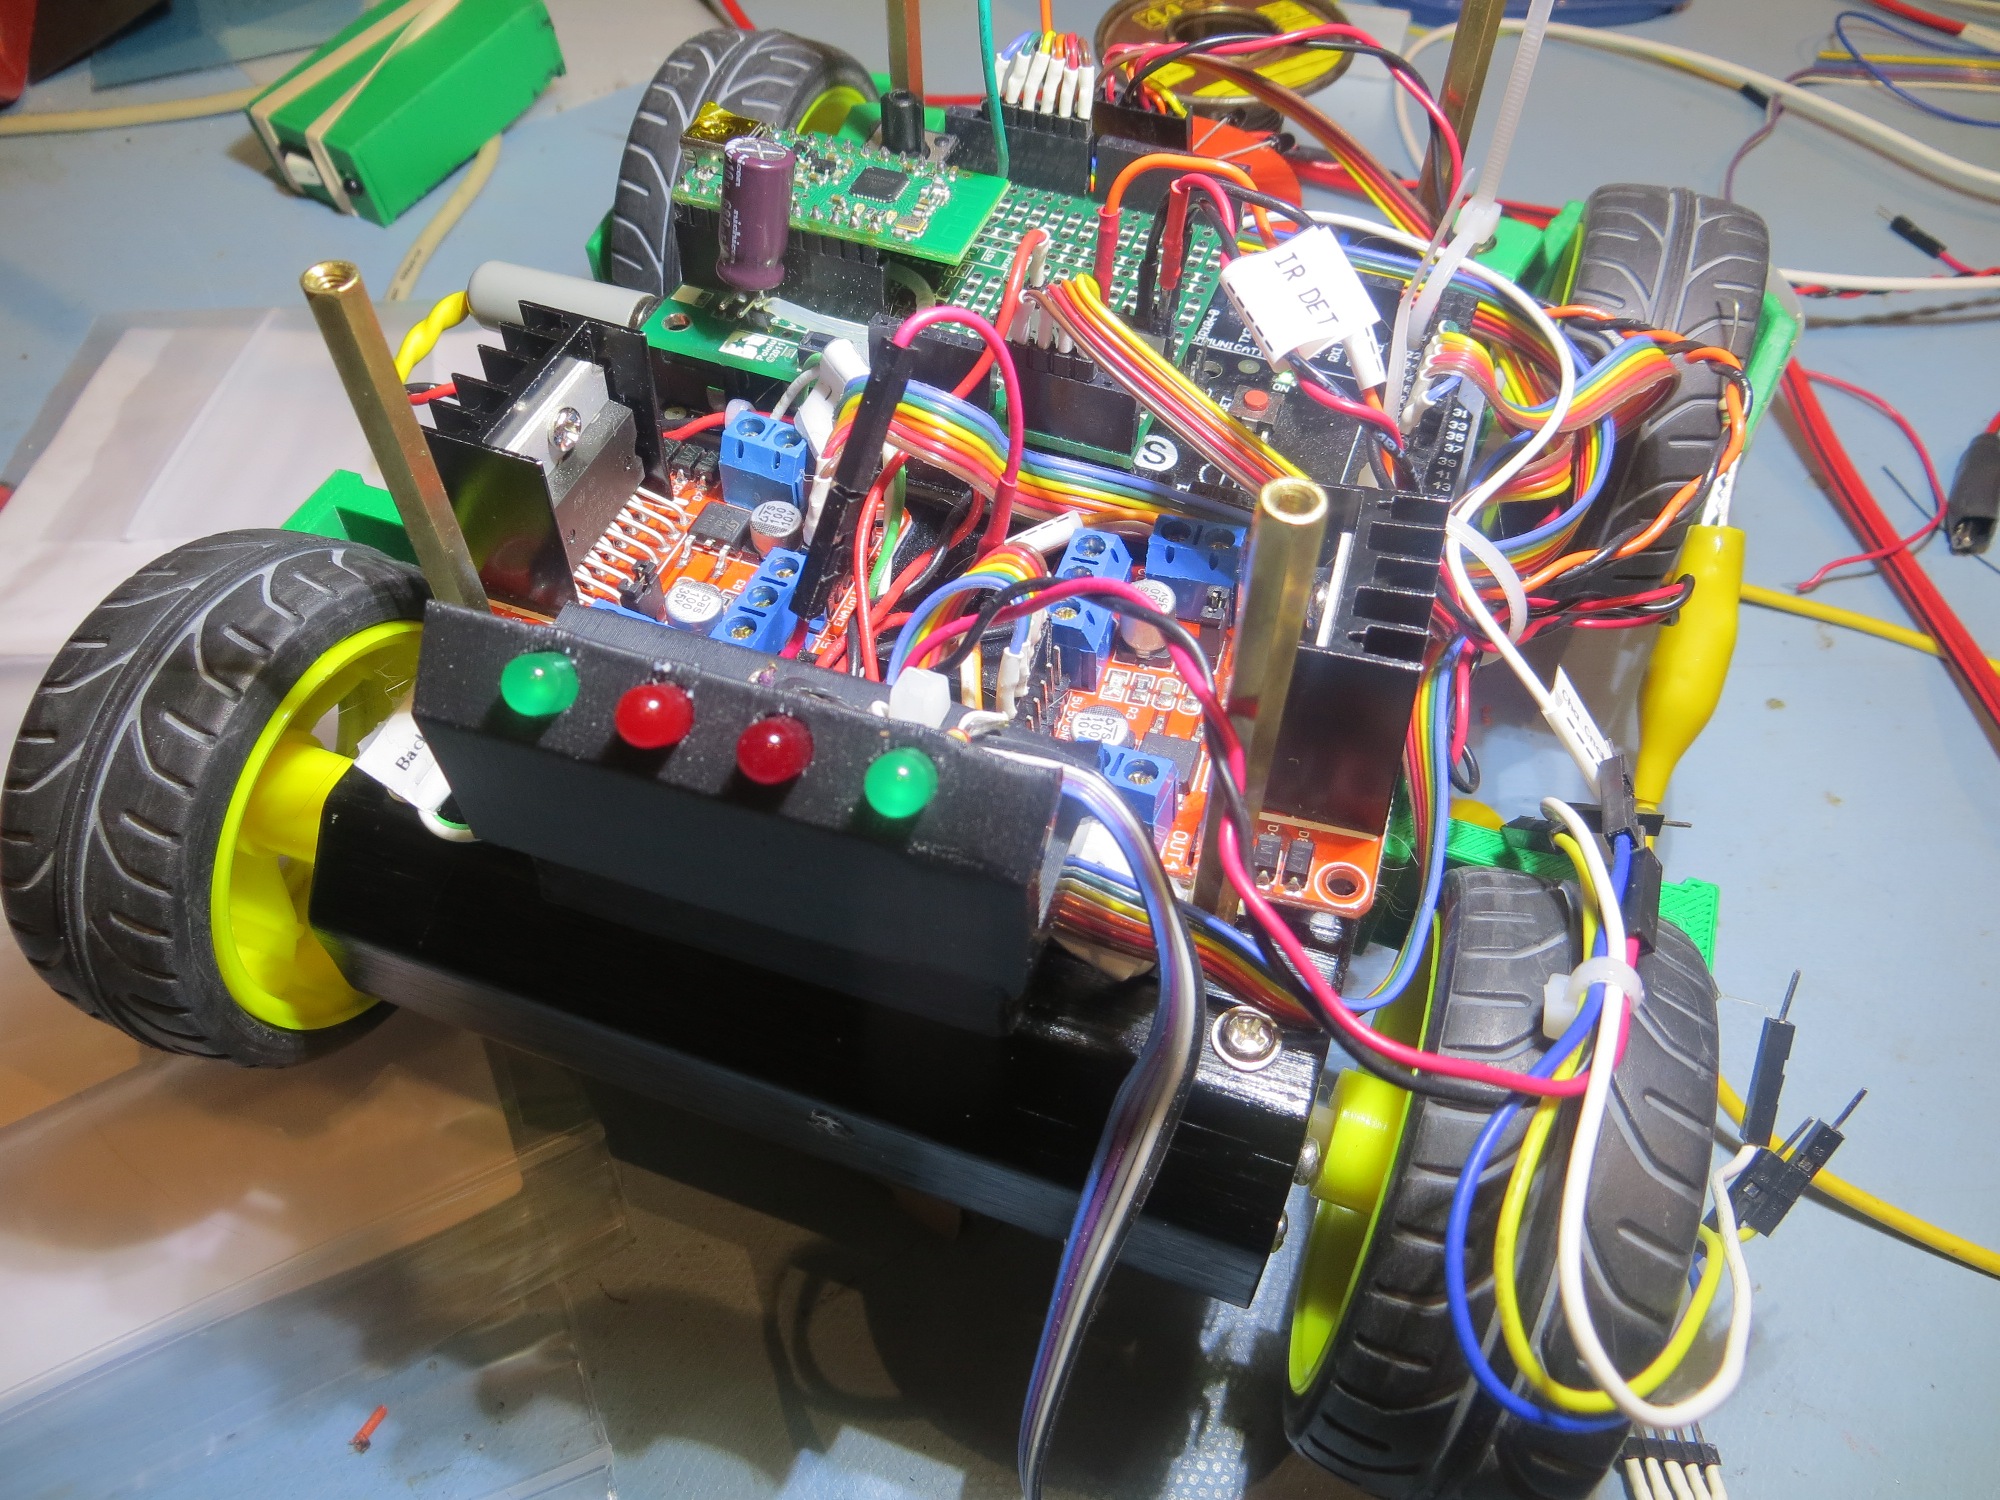
‘Backup Lights’ mounted to rear of the robot

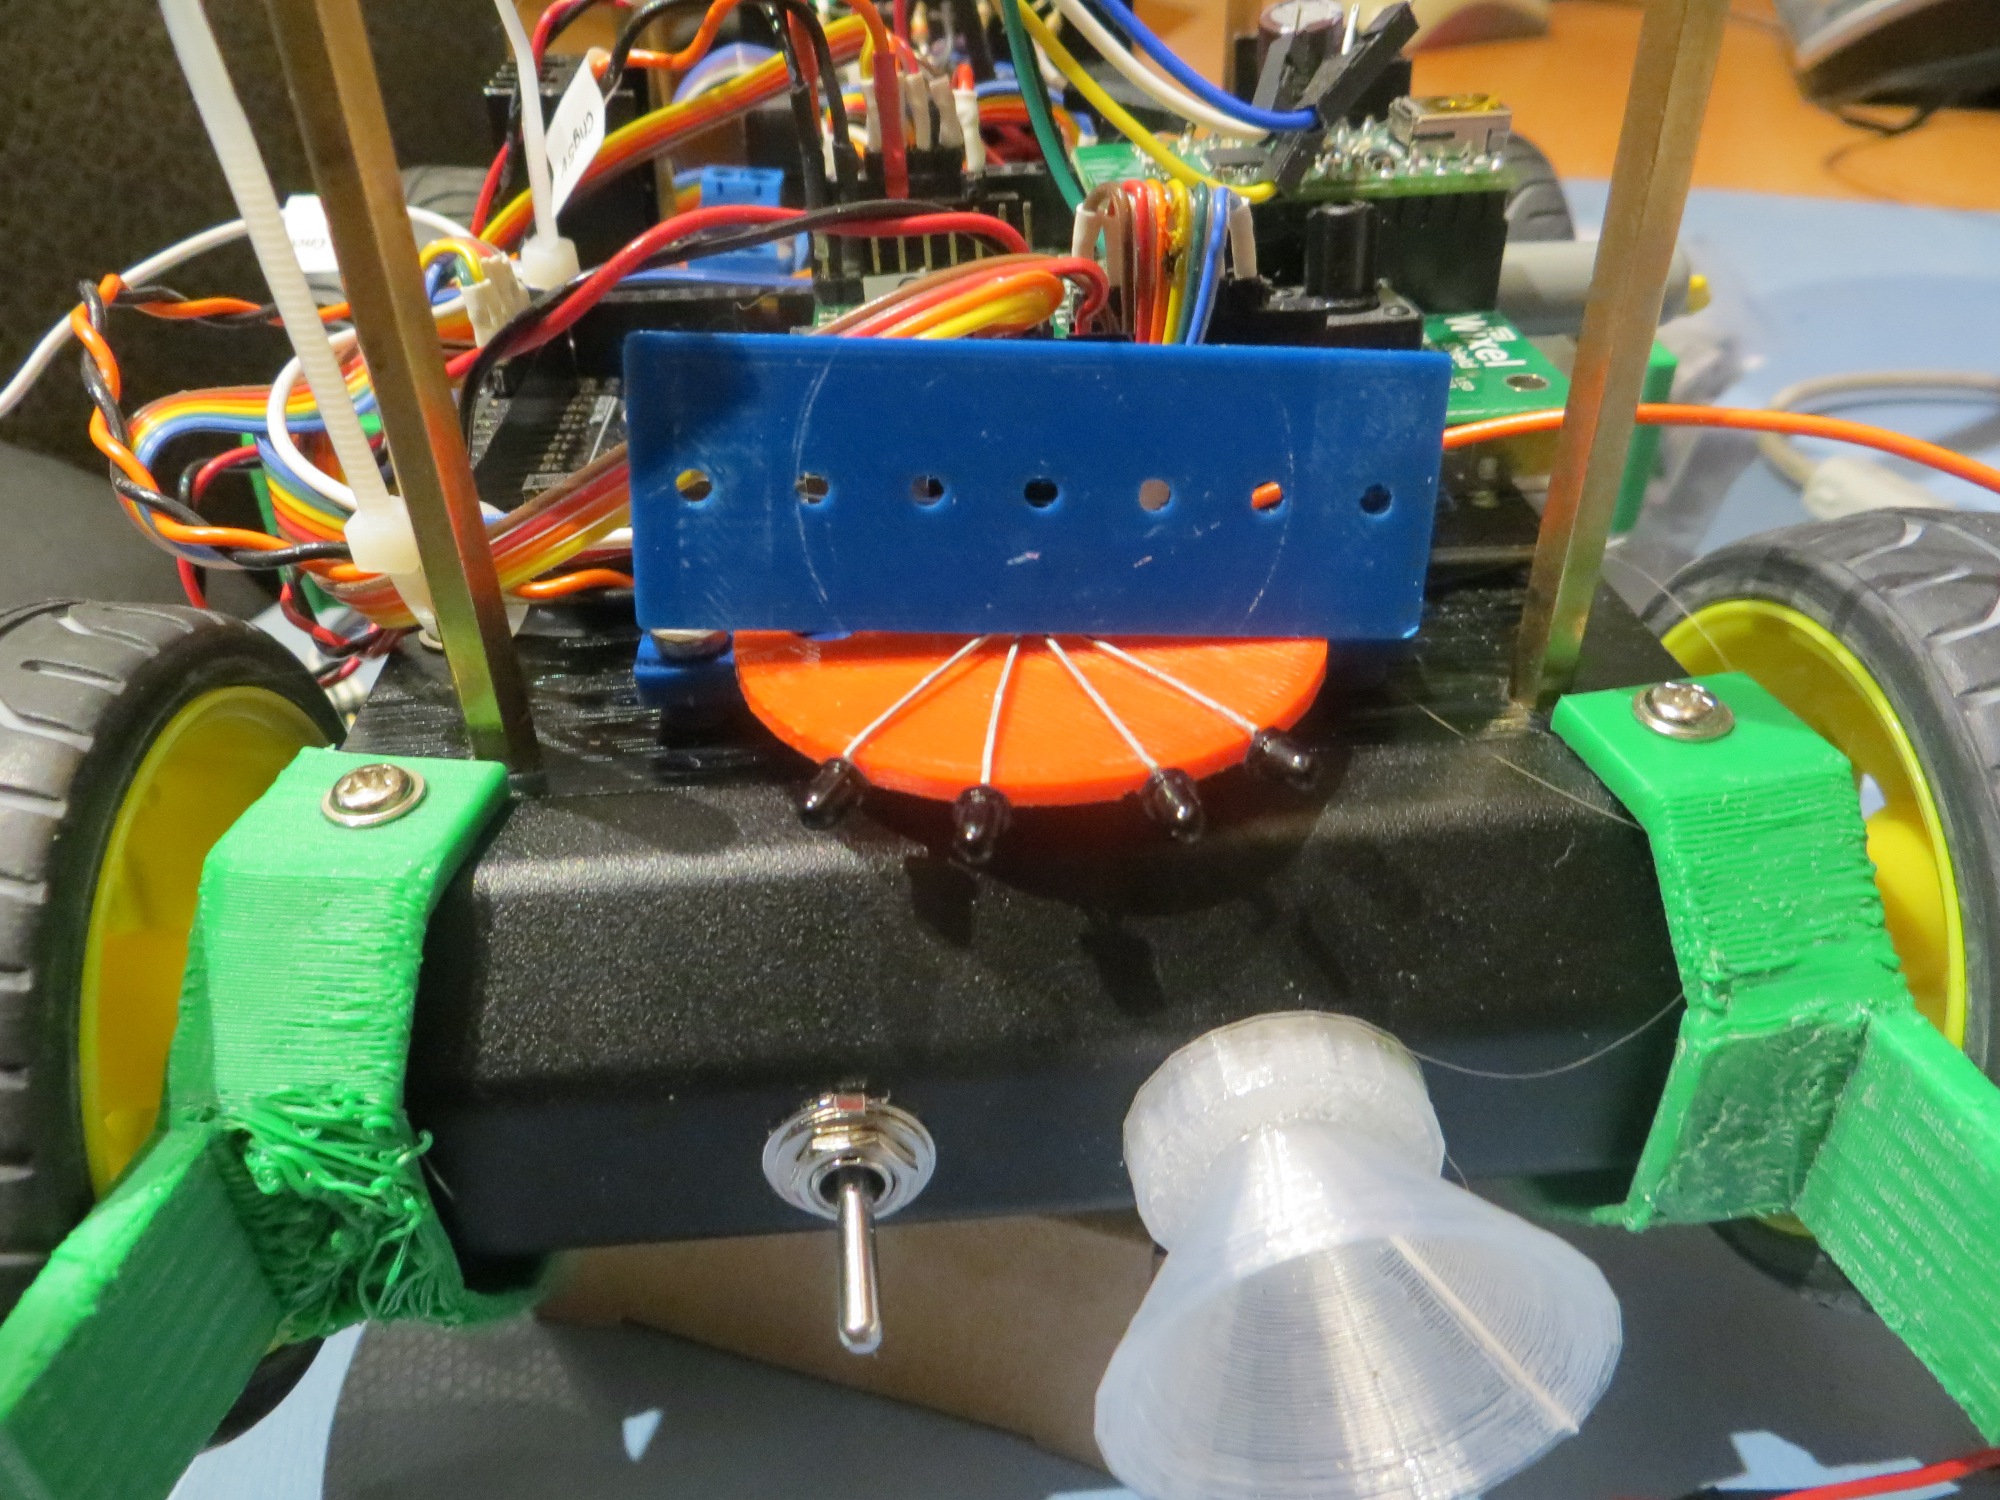
IR phototransistor mounting at the front of the robot
there would be more LEDs (7 vs 4) but each LED would be much smaller (3mm vs 5mm). On the same 56mm panel, 7 LEDs could be spaced 6mm apart, with 6mm spacing on the ends, something like the following
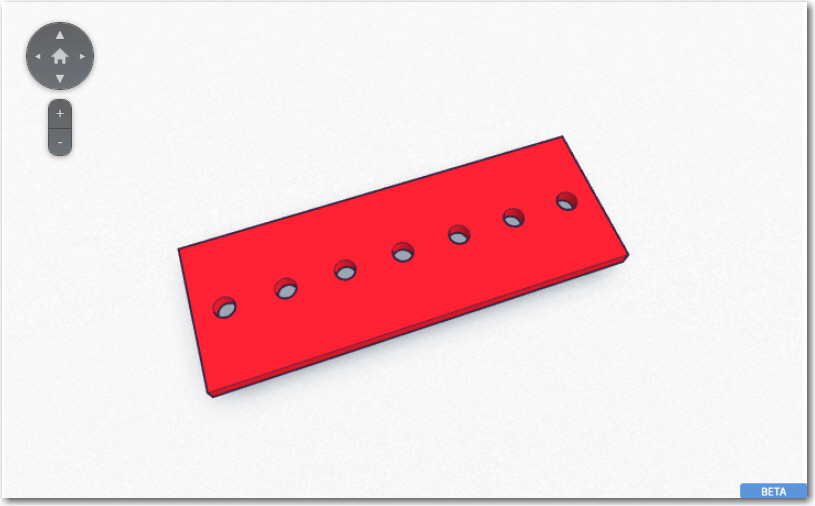
Prototype for a charging status LED panel
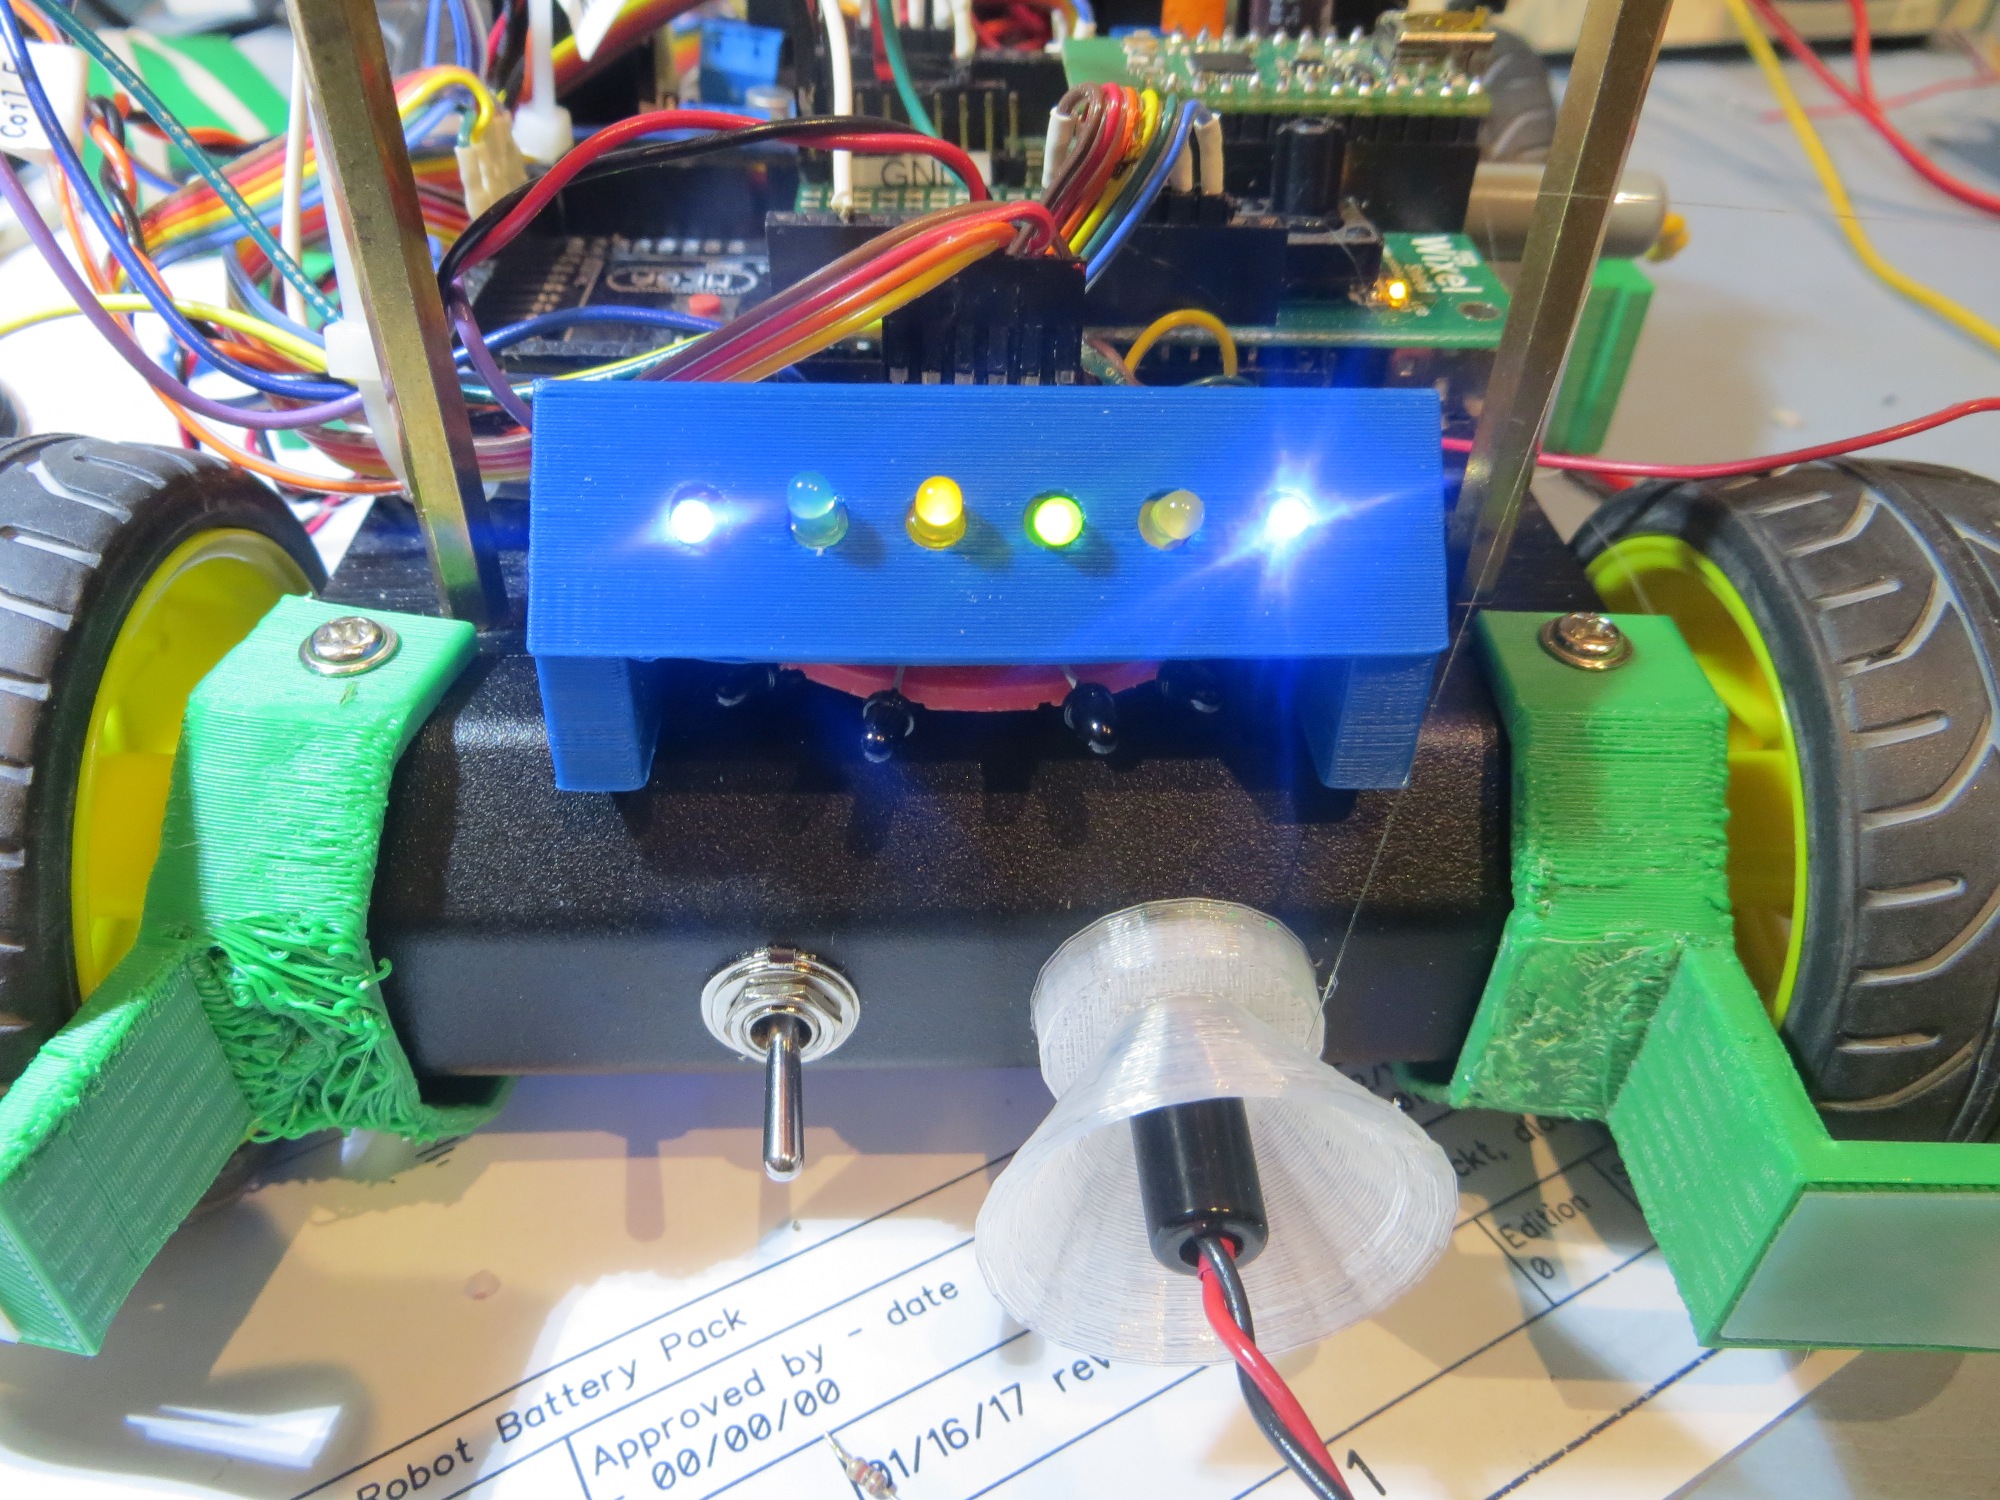
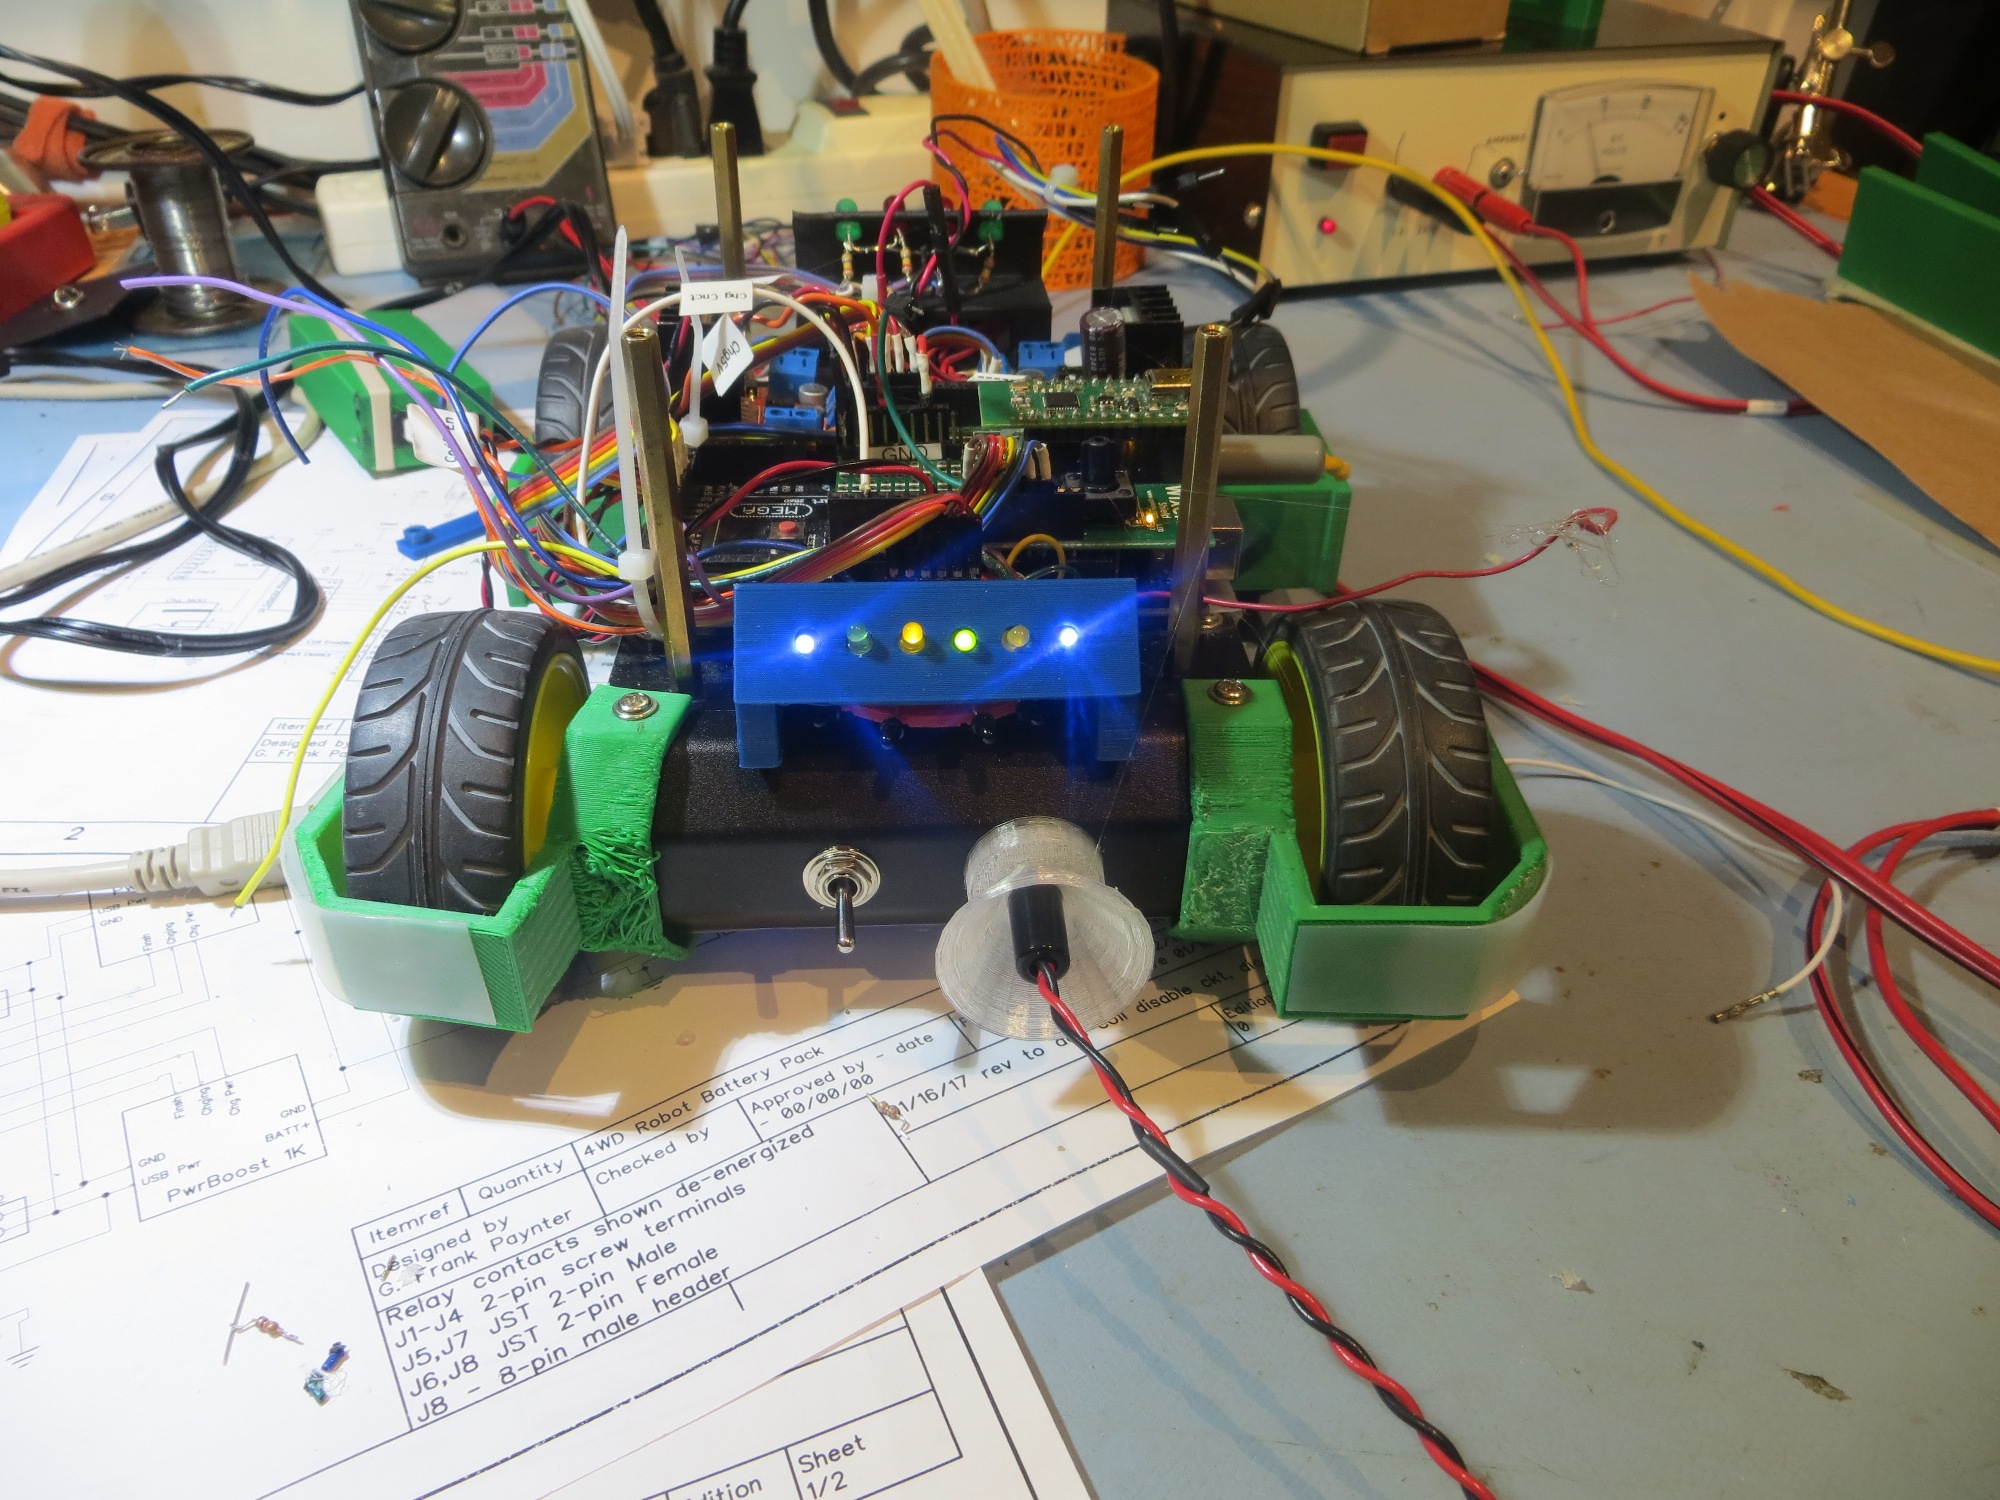
And, with my trusty PowerSpec PRO 3D printer I printed out a full-scale feasibility assessment panel in just a few minutes, as shown below. Of course much more work would be required to make this into a fully functional panel, but just this piece shows that all 7 LEDs can be accommodated in a panel that is generally the same dimensions as the IR sensor module.
Charge status LED panel full-scale feasibility model
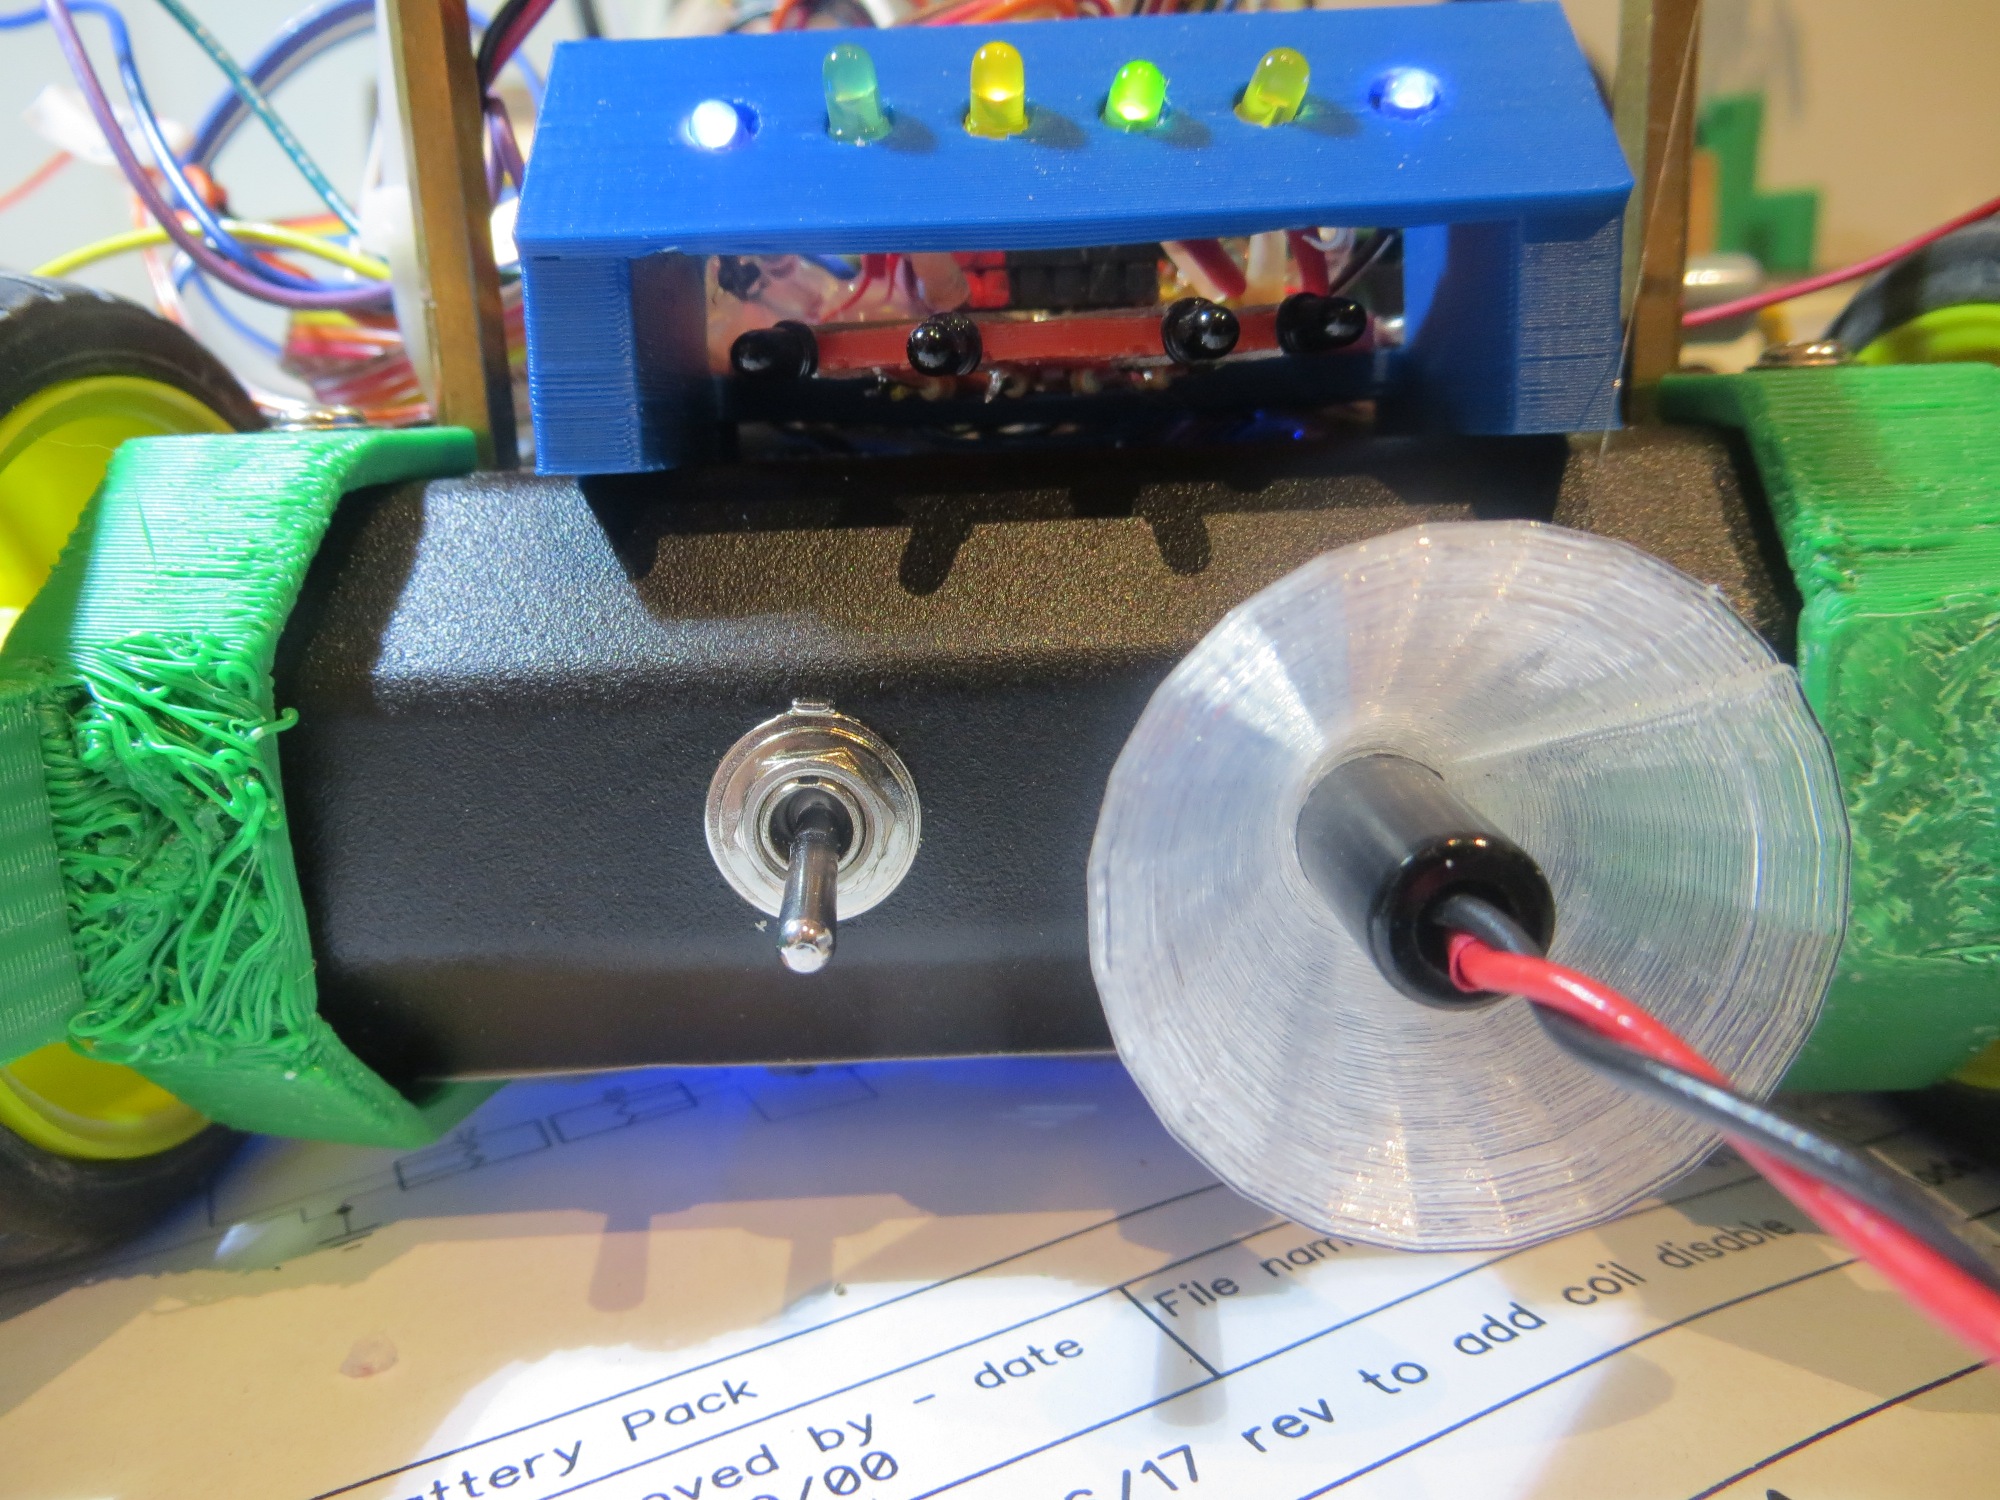
Charge Status Display Panel Update
After the normal number of trials, I came up with a charge status display panel that could be co-mounted with the current IR detector assembly, as shown in the following images:
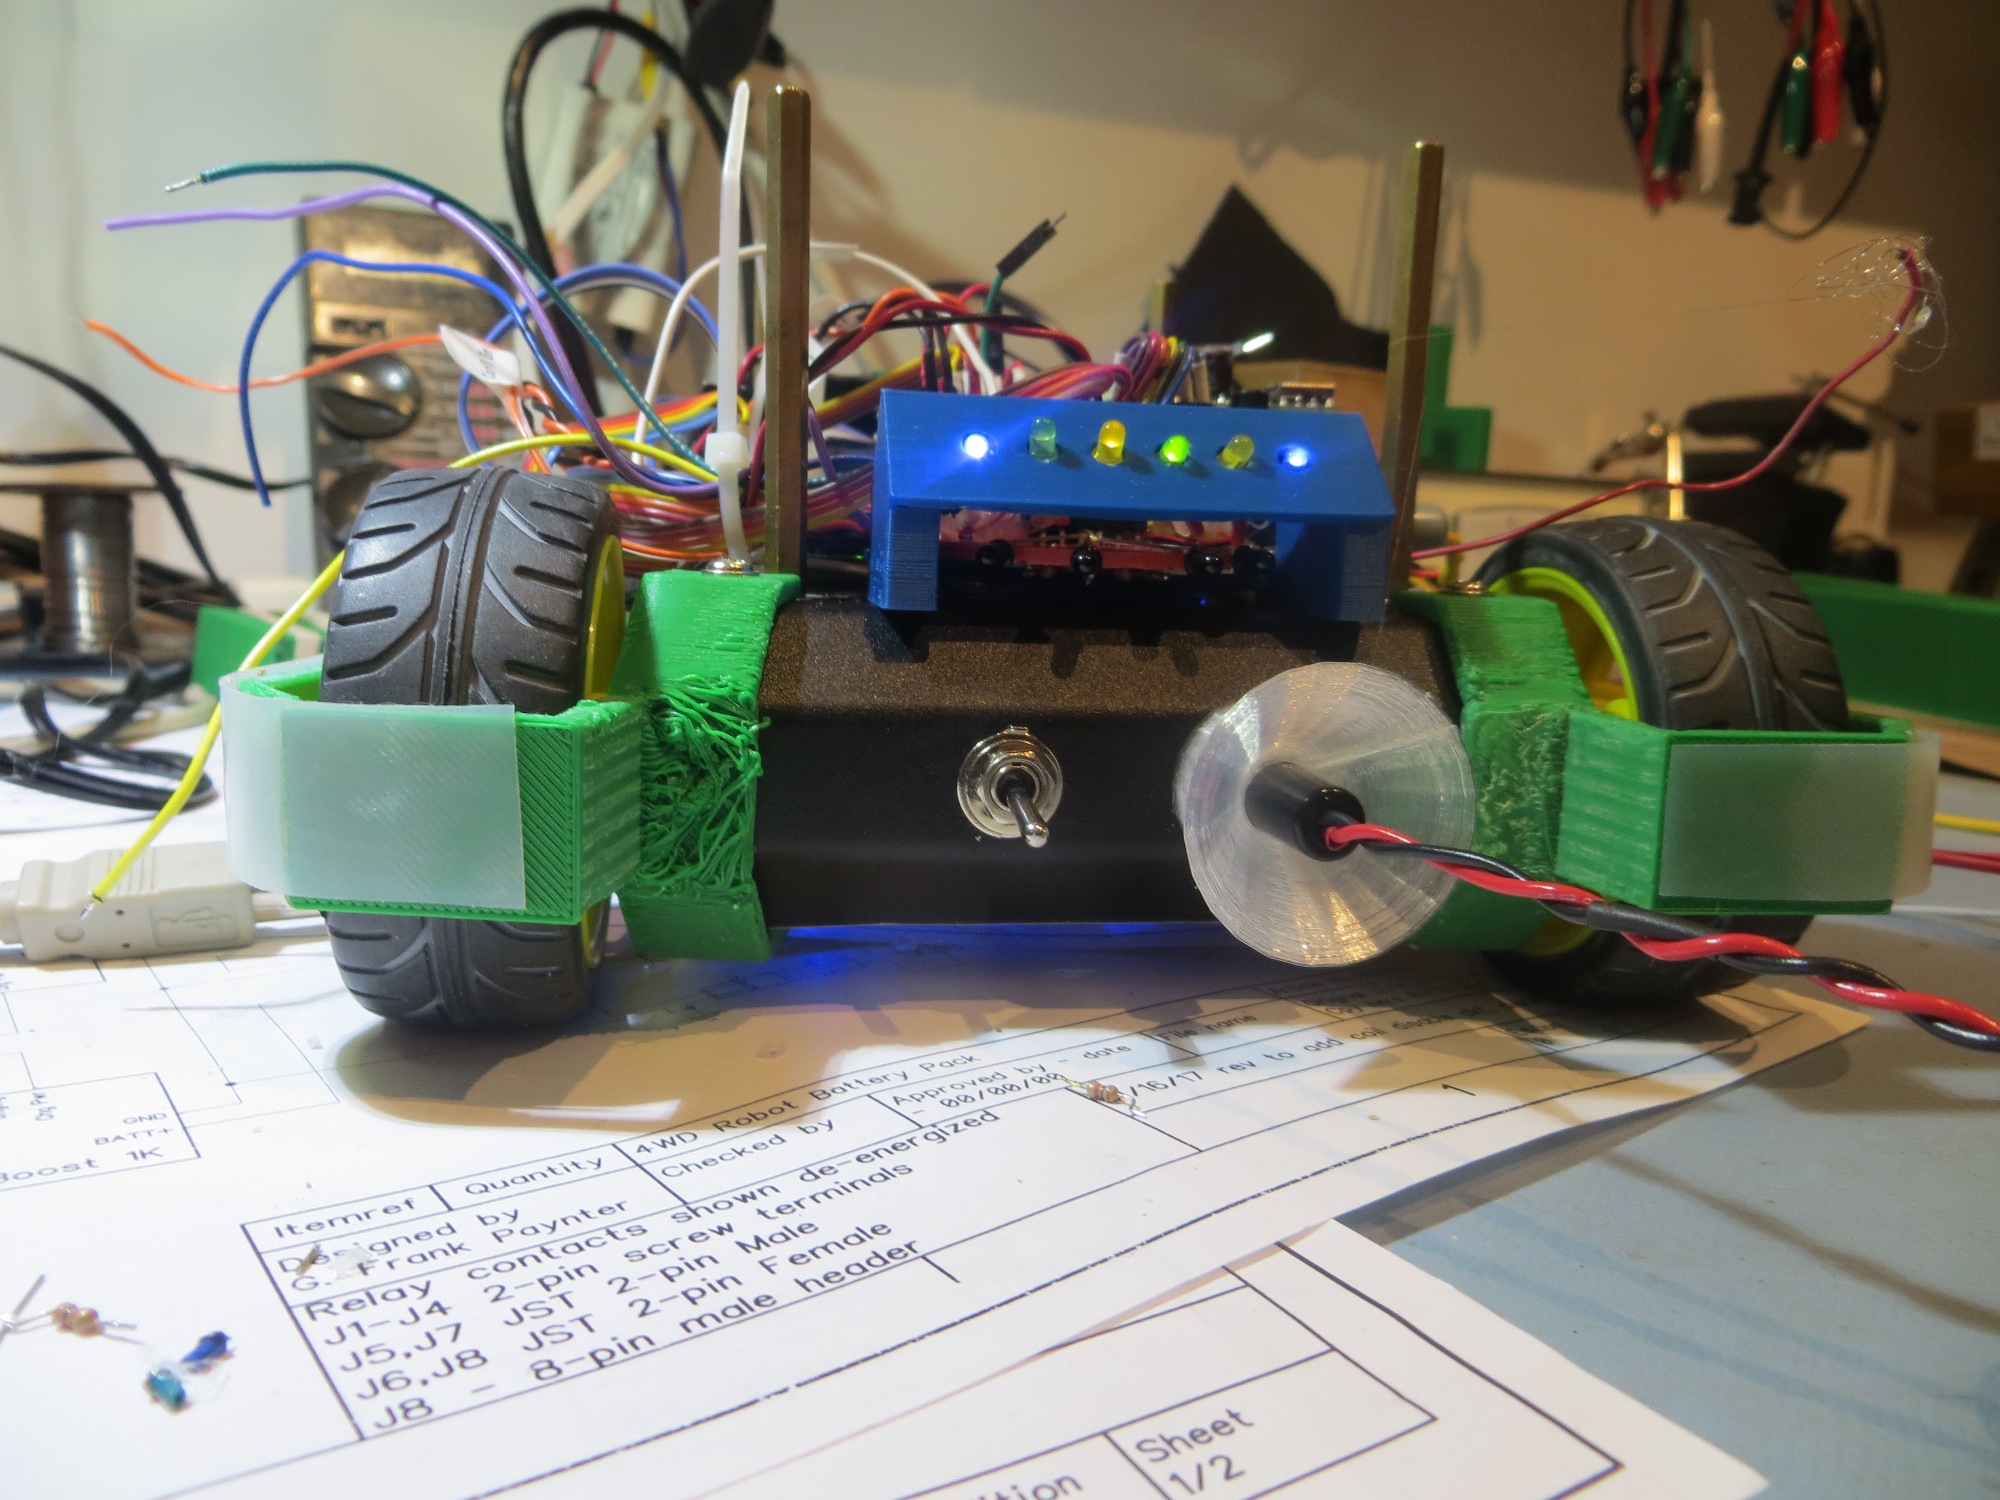
Stay tuned!
Frank
Pingback: Charging Station Design, Part X - Paynter's Palace