Posted 20 March 2018
I think it is important that Wall-E2 have an accurate measurement of battery voltage, so that he knows when he should be looking for his next charging fix, and more importantly, so he can stop and yell for help if the battery voltage gets dangerously low. In addition, I would like to monitor the battery voltage during charge, so Wall-E2 can report & display charging progress to any interested humans (like me). ;-).
From what I’ve read, it appears a LiPo cell can go down to about 3V without damage, or 6V for my 2-cell stack. So, my operating voltage range is from full charge (approx 8.4V) to empty (6.0V). My first cut at battery voltage monitoring was a simple 1/3 – 2/3 resistive voltage divider tied to an analog input; simply measure the voltage, multiply by 3, and voila – battery voltage!
Only it didn’t work that way; once the battery voltage dropped below about 7V, the drop across the Arduino Mega’s voltage regulator wasn’t sufficient to maintain regulated 5V, so the Mega’s bus voltage began to drop. At Vbatt = 6V, the Mega was still running OK, but the bus voltage was down to 4V, and the A/D reference was no longer what it should be – rats!
In addition, once I started looking at this issue, I realized I was throwing away most of the A/D dynamic range with the divider idea. with a 5V A/D reference and a 1/3 divider, the A/D input voltage only varies between 2.0 and 2.8V for an input range between 6 and 8.4V. In other words, I’m only using 0.8V of the available 5V range or about 16%.
So, I thought that maybe I should implement a level shifter, so the sensed voltage varies from 0 to 2.4 as the battery voltage varies from 6 to 8.4 – and then use the Mega’s internal 2.56V reference for the A/D operation. This would mean an immediate increase in dynamic range usage from 16% to almost 94%, and would increase resolution from about 15mV/count to about 2.5mv/count. To do the level shifting, I’ll need a 6V zener, such as the 1N5233B, available from Mouser for a few pennies each.
One last voltage issue to be addressed is the problem with the Mega’s onboard regulator dropping out for battery voltages between 7 and 6V – this is almost half of the available voltage range. Eventually I decided to address this problem by replacing (or rather, bypassing) the onboard regulator with a low dropout (LDO) regulator such as the LF50CV-DG , available from Mouser for less than $1 each. The LF50CV-DG can maintain 5V output down to well below my 6V battery voltage cutoff limit, so it is a good match.
23 March 2018 Update:
I just received the LF50CV-DG regulator and 1N5233B parts from Mouser, so I’m in the process of installing them onto Wall-E2. The regulator will take the place of the MOSFET low-drop diode I installed on the Pololu Wixel Shield some time ago as part of my old PB1000C-based charging subsystem, and is now no longer needed. The following photos show the installation:
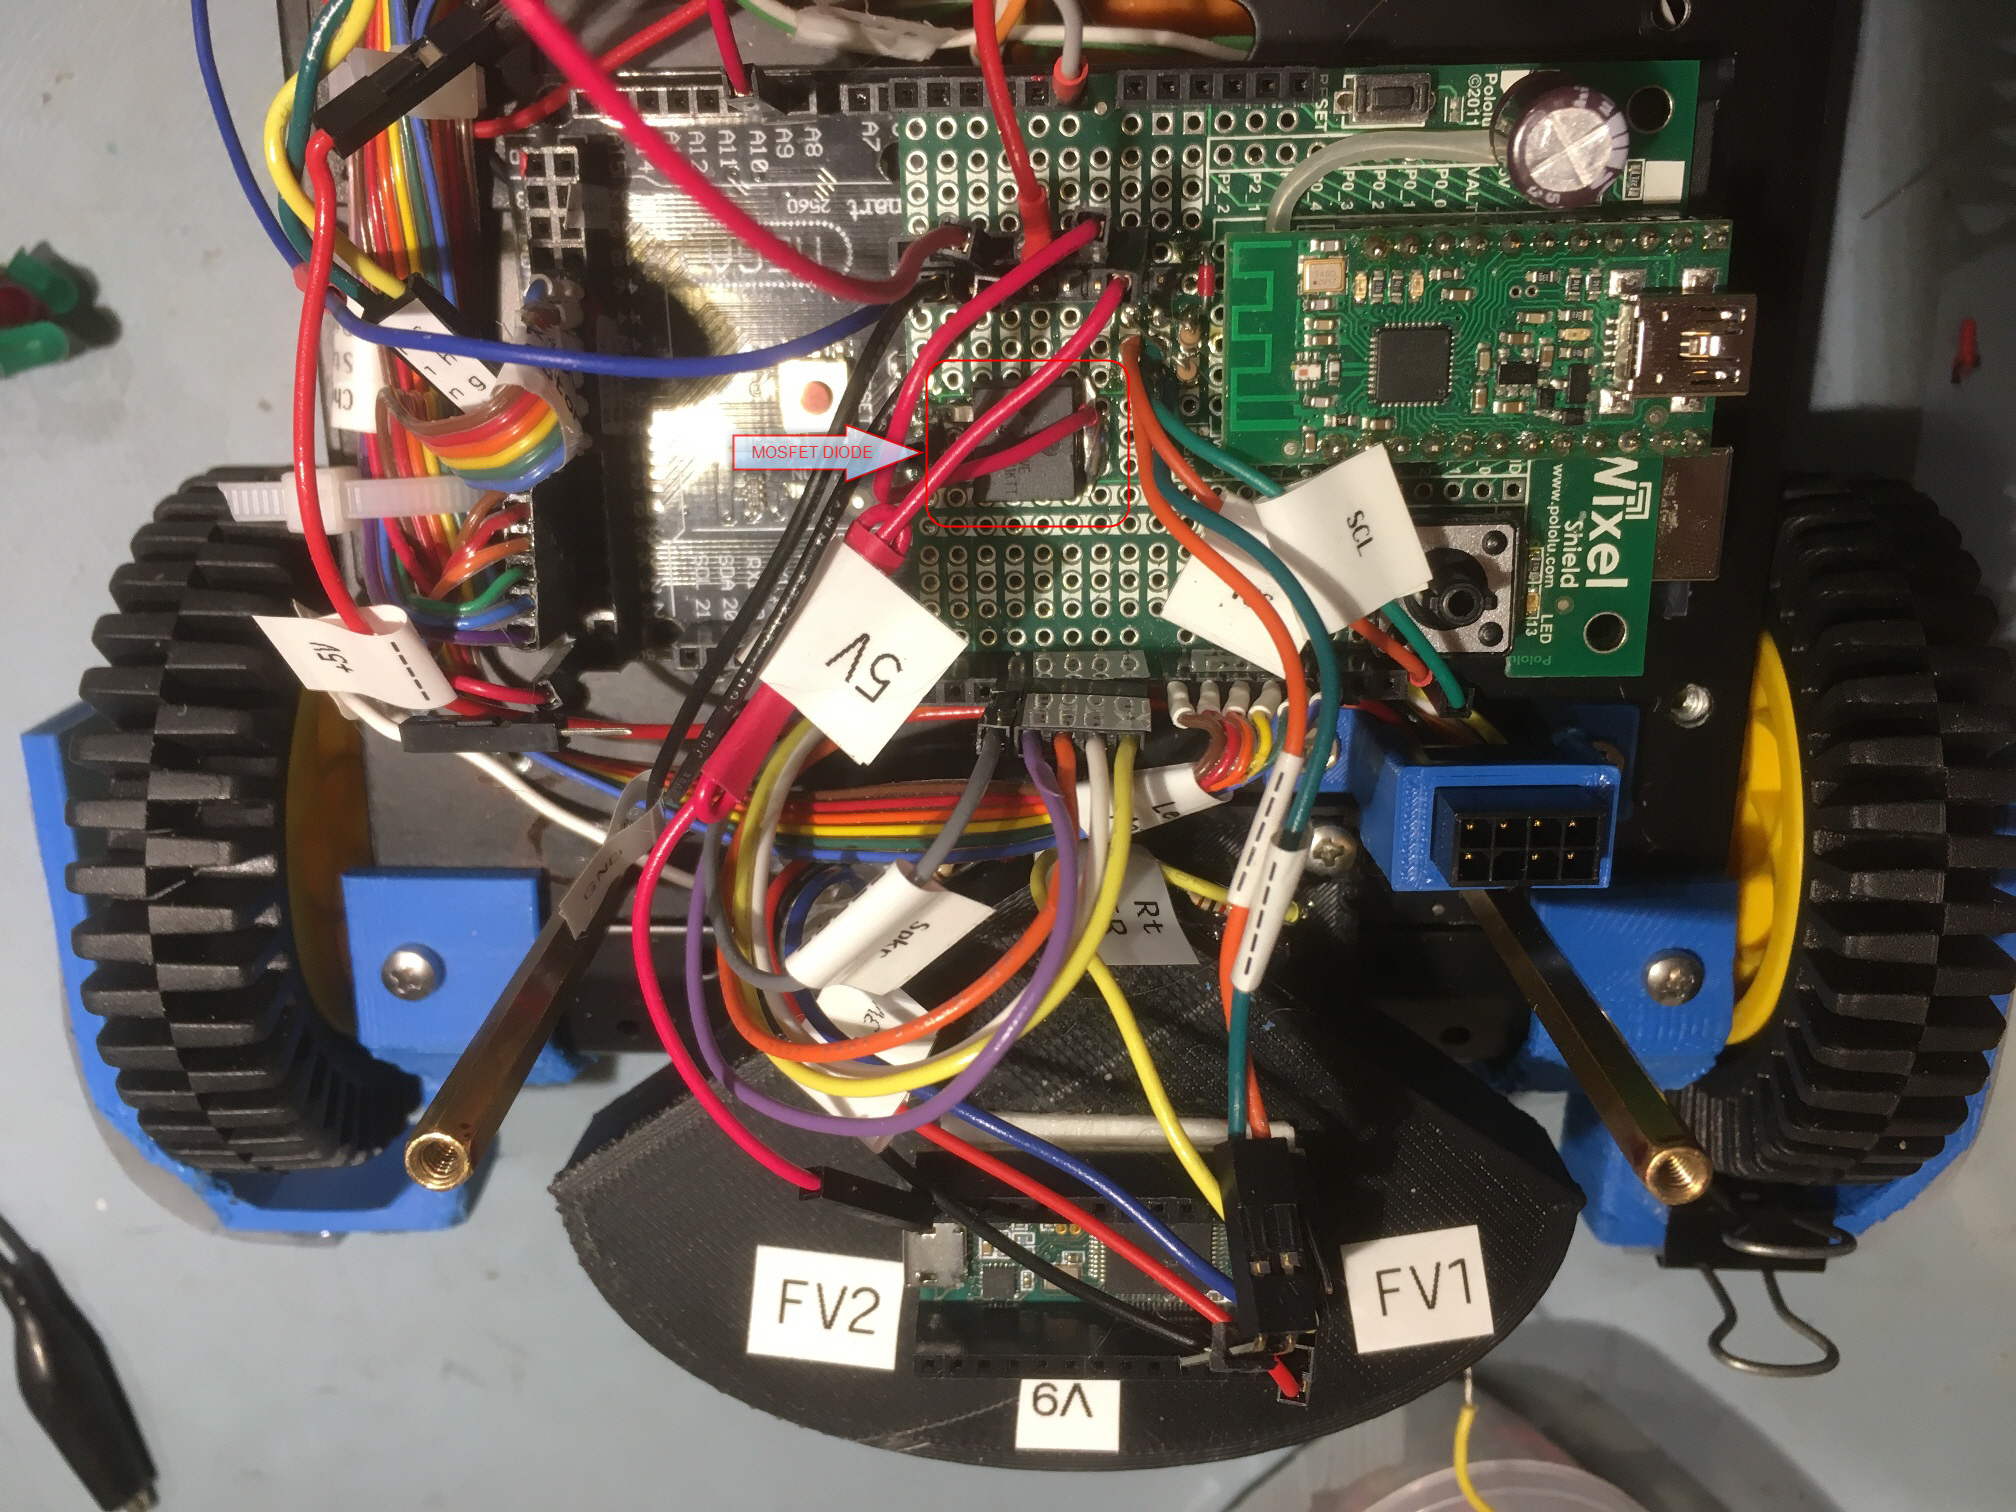
Wixel shield showing MOSFET diode to be replaced by LDO 5V regulator
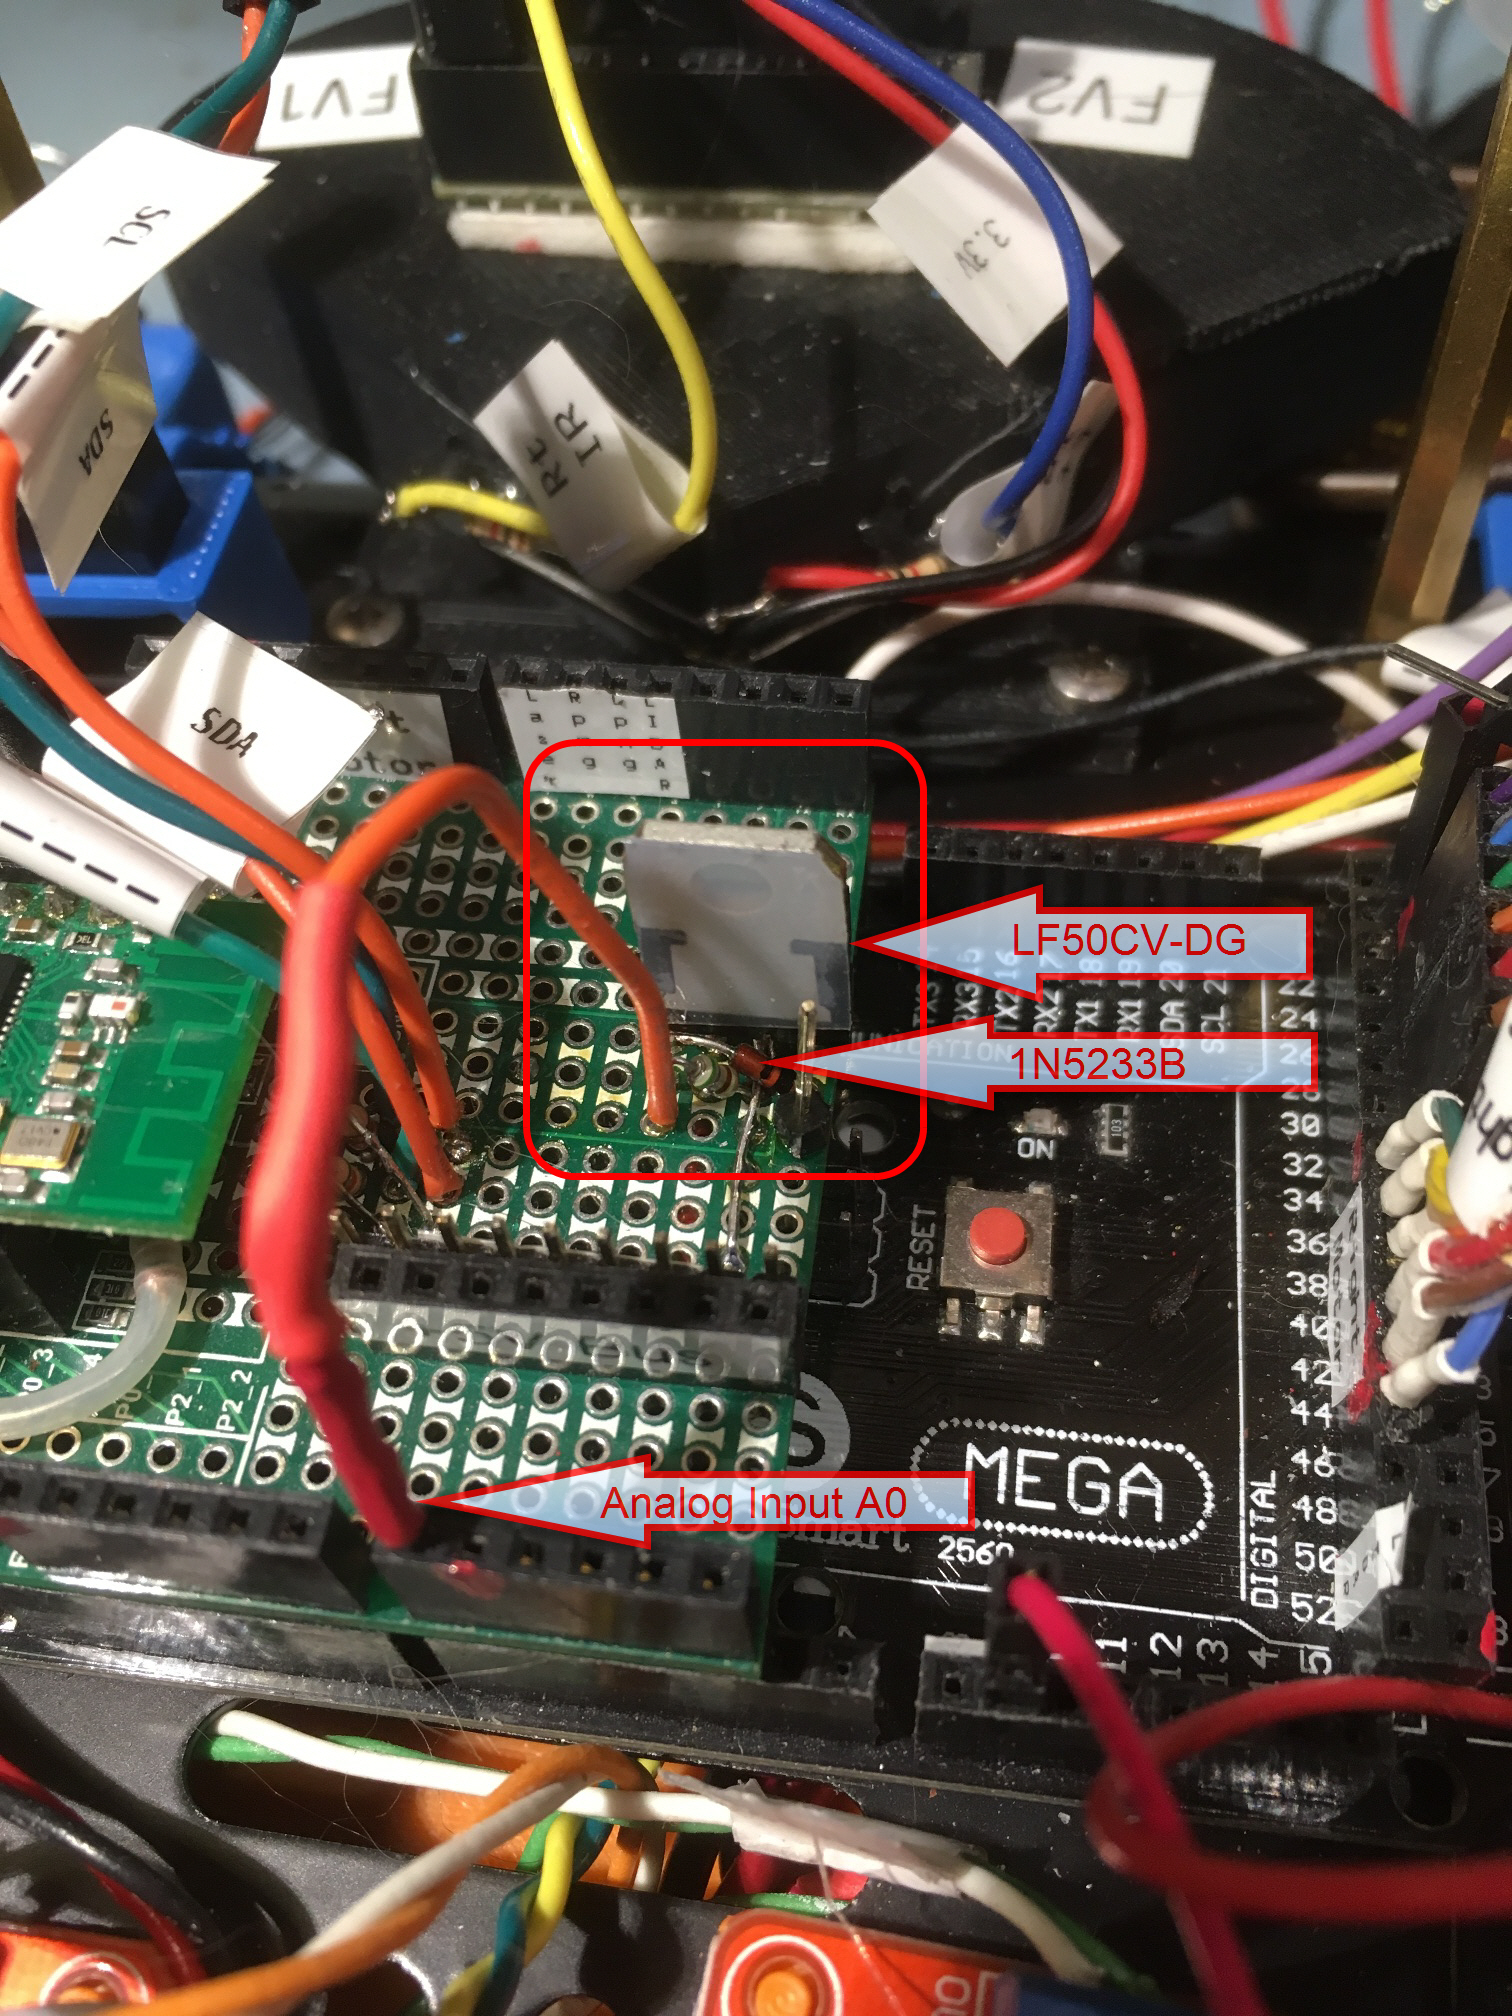
LF50CV-DG LDO 5V regulator and 1N5233B 6V Zener diode installed on Wixel shield

Rear of Wixel shield showing regulator output connection to +5V bus
25 March Update:
While testing the above arrangement, I managed to somehow kill my Mega 2560 SBC (I think my old power supply did it in, but I’m not sure). So, in the process of recovering from this mess, I also decided to replace my old Wixel shield for the latest version (v1.1) with updated level-shifting circuits and carry-throughs for the added pins on the UNO R3, Mega, and cousins. The new layout is shown below
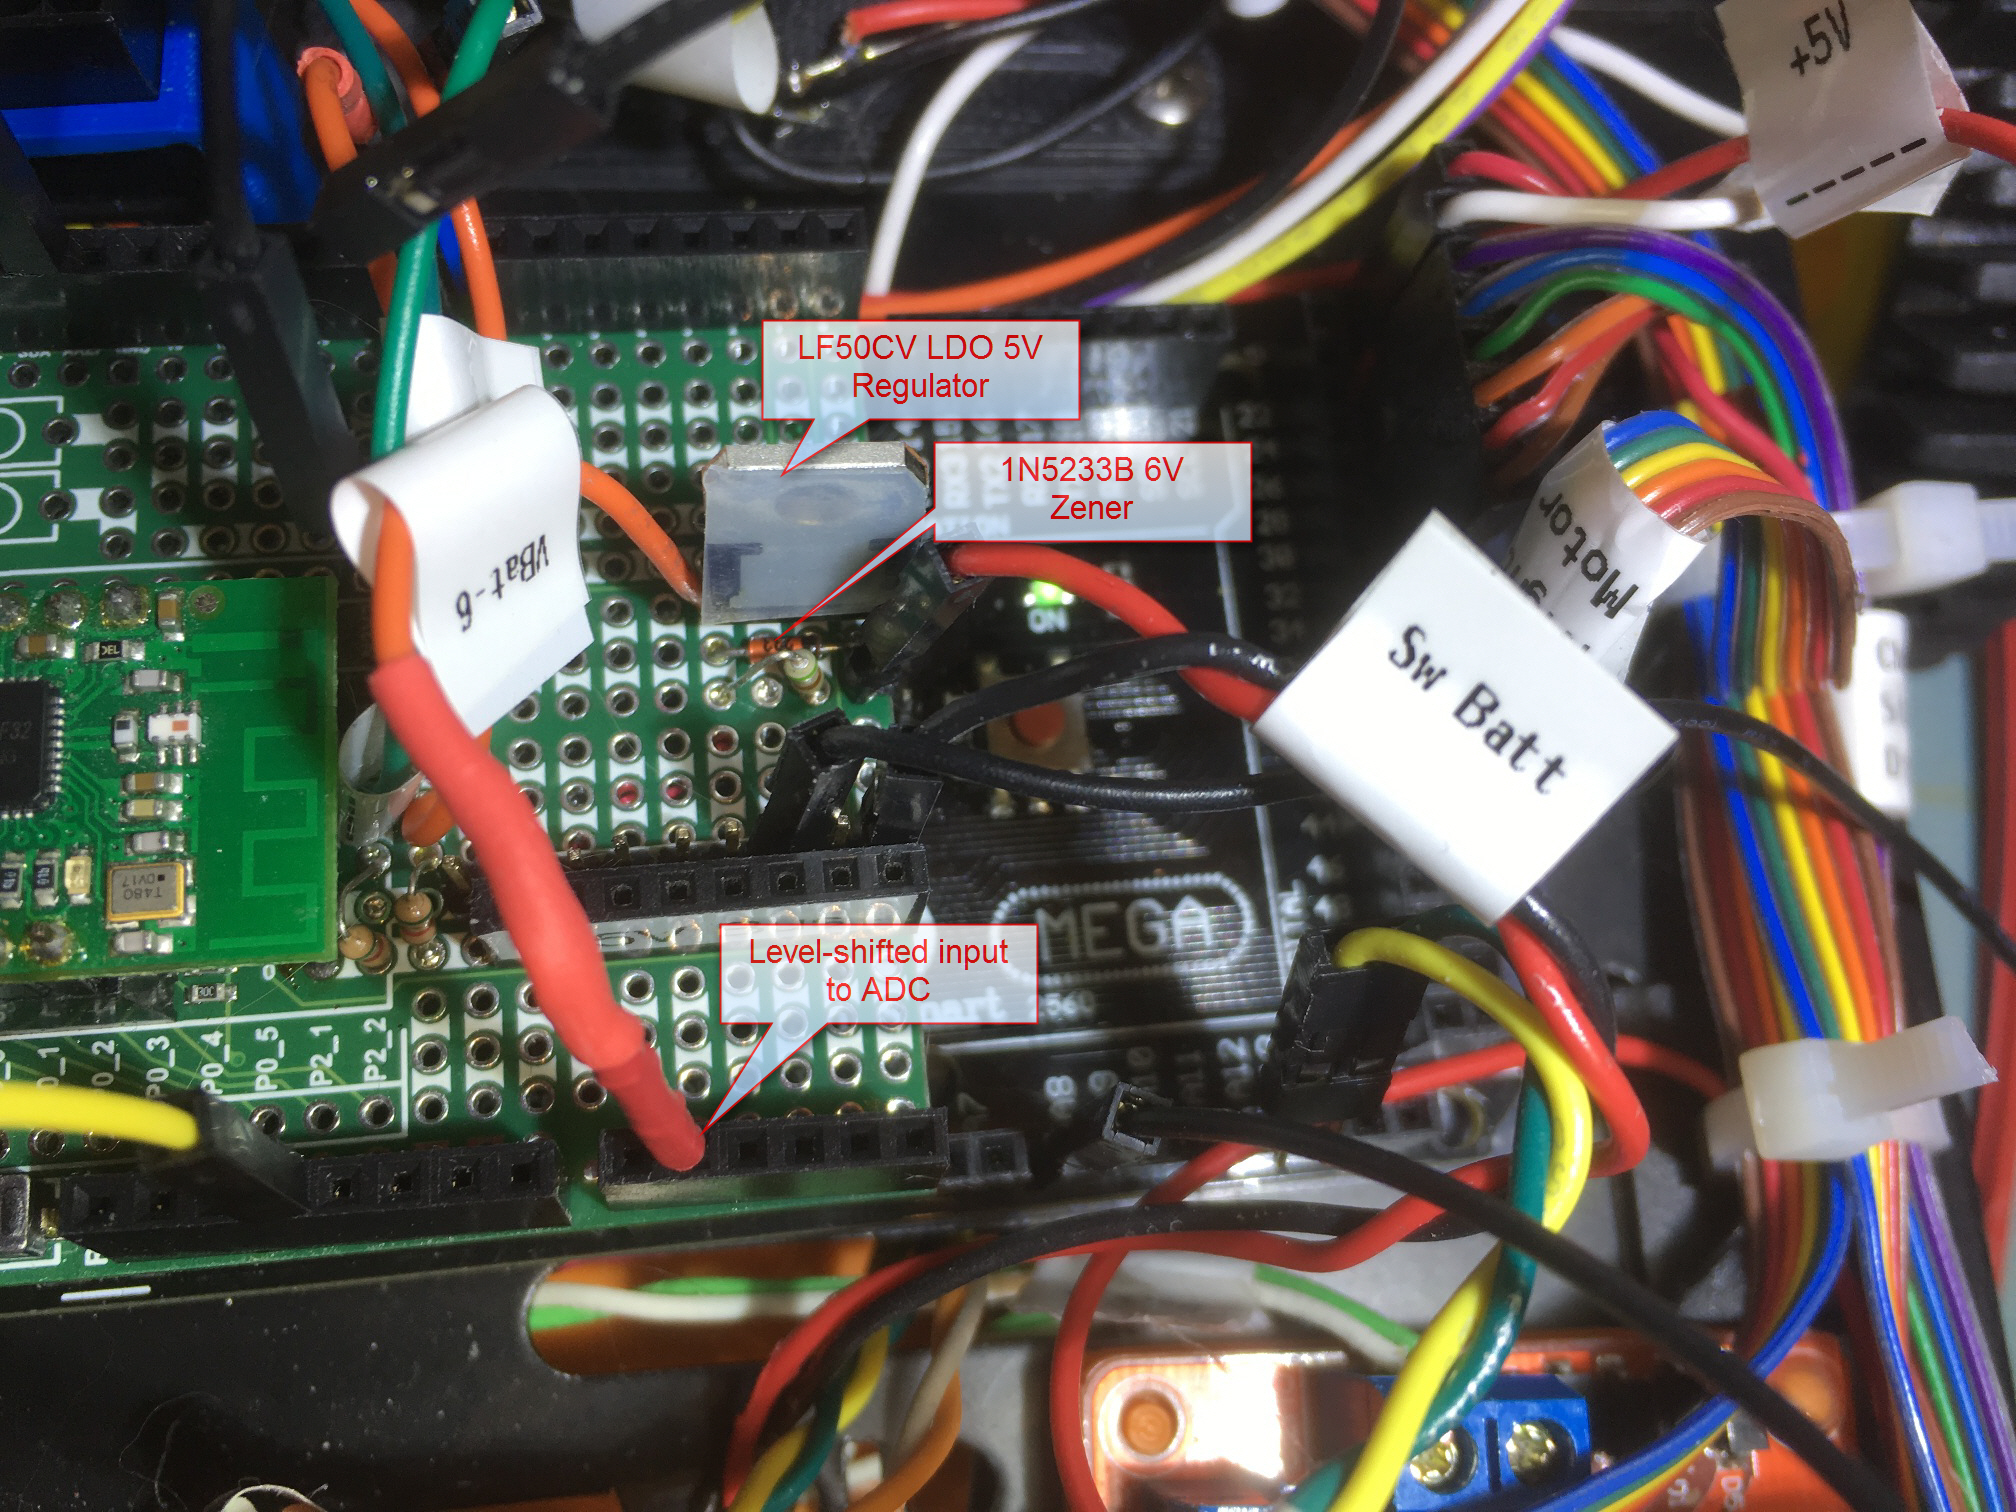
Updated Wixel shield board with LDO 5V regulator and level-shifter circuit installed
Once I got everything back together, I started over with testing the LDO 5V regulator and level shifter performance, and ran into another problem. The original idea was to use the 1N5233B 6V zener to level shift 6-8.4V to 0-2.4V so the range would fit into the range obtainable using the Mega’s internal 2.56V ADC reference. This worked almost perfectly, but the combination of a slightly lower Vz (5.84 vs 6.00V) and a slightly lower Vref (2.42 vs 2.56V) caused the ADC to hit full scale (1023 counts) at about 8.26V (2.44Vref + 5.84Vz = 8.26V). Most unfortunate, as I really needed to accurately measure Vbatt to at least 8.4V, nominal end-of-charge voltage for a 2-cell LiPo stack.
So, I needed to expand the measurable voltage range at least a little bit on the top end. With the installation of the LF50CV LDO 5V regulator, I could now do that by reverting to the internal 5V reference, as the LDO easily maintains 5V output all the way down to 6V, the cutoff voltage for my battery stack. But, this wastes half the available ADC range, as the ADC input voltage for Vbatt = 8.4 is only 8.4-5.84 = 2.56V. So, after some more Googling through Arduino-space, I realized I could tie the Mega’s AREF pin to the Mega’s 3.3V output line and use ‘analogReference(EXTERNAL)’ to obtain an ADC range from 0-3.3V, corresponding to a Vbatt range of 0 to (5.84+3.3)= 9.14V – perfect!
After making this change I ran some measurements to verify the input range and accuracy, as displayed in the following Excel plot
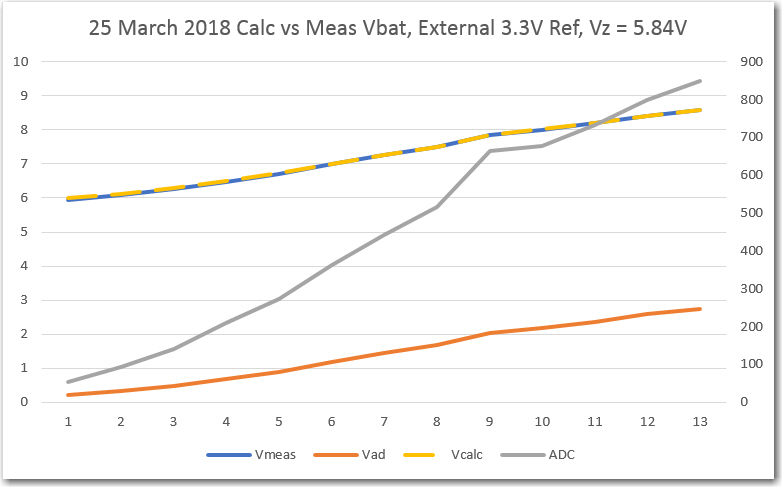
Measured vs Calculated Vbatt, with raw ADC values
As can be seen in the above plot, the measured and calculated voltage plots are almost perfectly overlaid, and well within the accuracy requirements for effective battery management.
Summary:
As usual, what started out as a simple plan (in this case, to accurately measure the battery voltage) rapidly metastasized into a full-blown hardware and software project, complete with howls of anguish and gnashing of teeth. The first idea was to use a simple 1/3 resistive voltage divider input to a ADC port referenced to 5V. This worked OK, but failed at battery voltages below 7V because the Mega’s onboard voltage regulator requires an approximately 2V input-output offset. Since I needed to measure Vbatt down to 6V, this was never going to work. In addition, the available measurement accuracy sucked because the 2.5V range of interest was being compressed into 2.5/3 = 0.833V, and with a 5V reference I was using less than 20% of the available ADC counts. The next idea was to replace the onboard regulator with the LF50CV LDO regulator, and use a 6V zener to level shift the range of interest to under 2.56V so that the Mega’s internal 2.56V reference could be used. This almost worked, but I ran out of ADC counts before I ran out of battery voltage – oops. The third (and last, I hope) idea was to change the ADC reference from internal 2.56V to external 3.3V using the AREF pin tied to the Mega’s 3.3V regulated output. This allowed the top voltage to go to a little over 9V, just about perfect for this application.
Stay tuned,
Frank