Posted 28 March 2017
After my cleanup-and-label campaign documented in my last post, I was ready to get back to PID tuning for homing in on the charging station. When my grandson was here, he pretty much took over my primary work area, so I was forced to move my bench-top testing range to another part of my bench. This was not quite as convenient for reprogramming the bot, but it did give me a bit more distance between the initial bot position and the IR LED in the charging station, as shown in the following photo
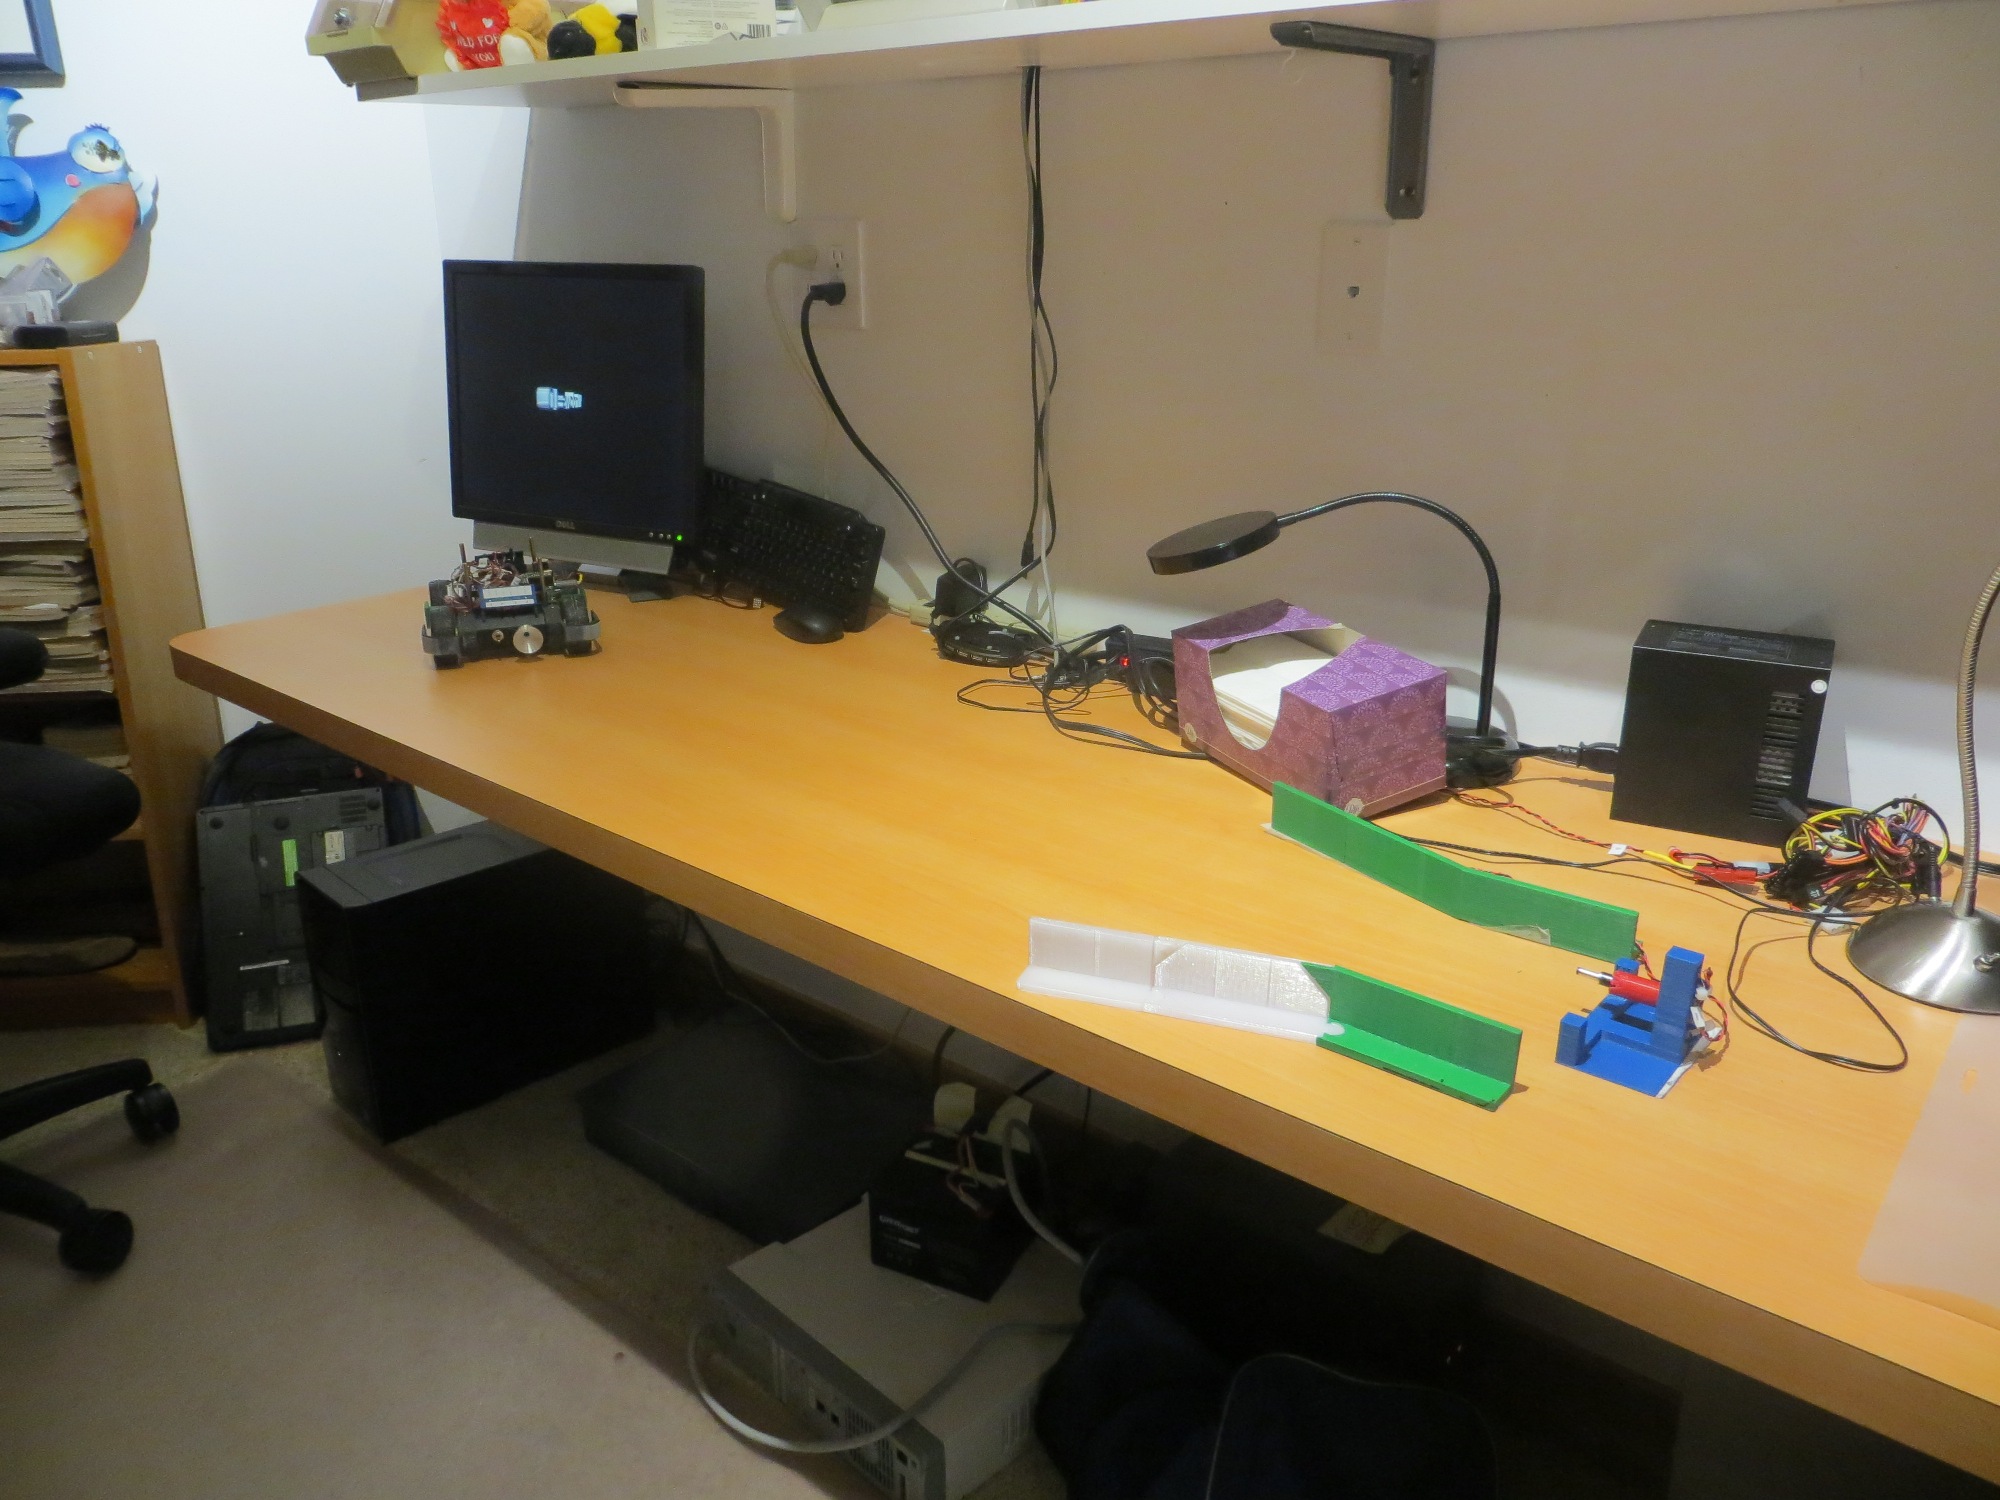
Wall-E2’s new PID test range
I started out by going back to the simplest possible PID setup – namely (p,i,d) = (1,0,0) and ran a series of range tests, as shown in the following video.
As is evident in the video, Wall-E2 has no difficulty homing into the charging station when initially placed near the edge of the bench, but won’t home properly from the other side. After thinking about this for a bit, I came to the conclusion that the reason for this is that the center of the charging station is physically located near the edge of the bench, so when the bot starts at that edge, it is actually close to the centerline of the charging station, and therefore is almost perfectly lined up at the start. When starting from the other side however, the initial position is not lined up with the charging station centerline and therefore has to make more of a correction to get lined up. From this I hypothesized that the PID setting of (1,0,0) doesn’t provide enough of a wheel-speed correction to make the required turn.
So, next I tried a PID of (2,0,0), and this worked much better, as shown in the following video
As can be seen from the first run above, the robot is doing a much better job of homing, but unfortunately ran into the left side rail instead of being captured. This turns out not to be a PID tuning issue, but rather a problem with the IR beacon pattern relative to the lead-in rail arrangement. The line from the robot’s starting position to the IR LED unfortunately intersected the outside of left lead-in rail instead of the inside.
As an experiment to confirm the IR beam pattern hypothesis, I printed up an auxiliary part to restrict (not collimate, as that implies shaping) the beam to a narrower pattern, as shown in the following photos ( taken with a digital camera with a wavelength range that covers the IR wavelength being used)
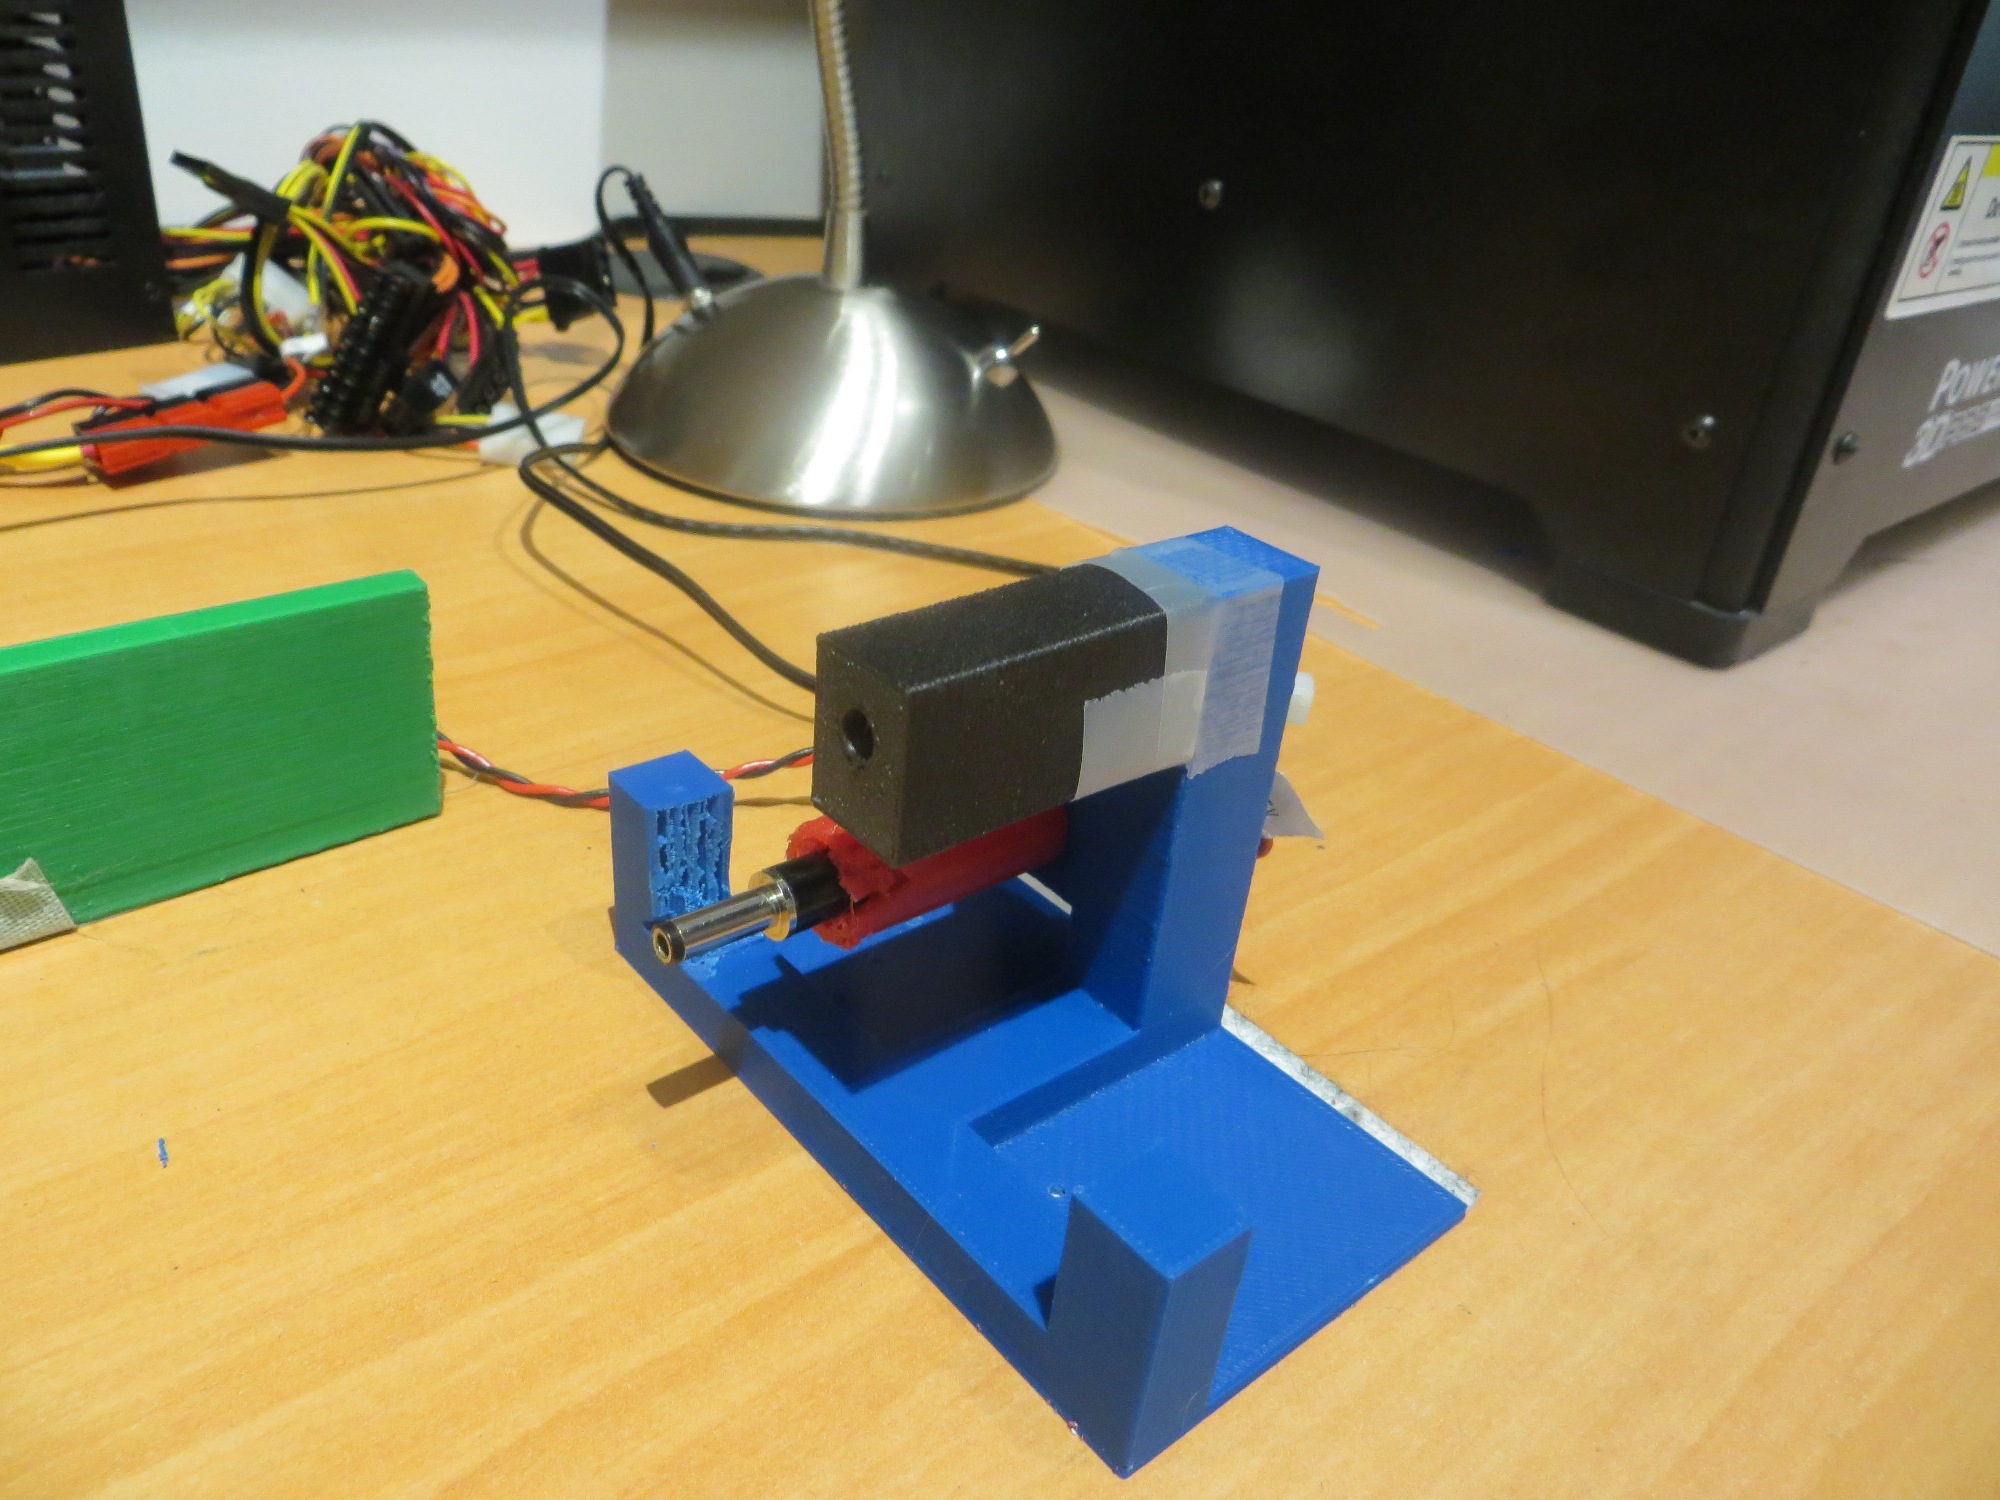
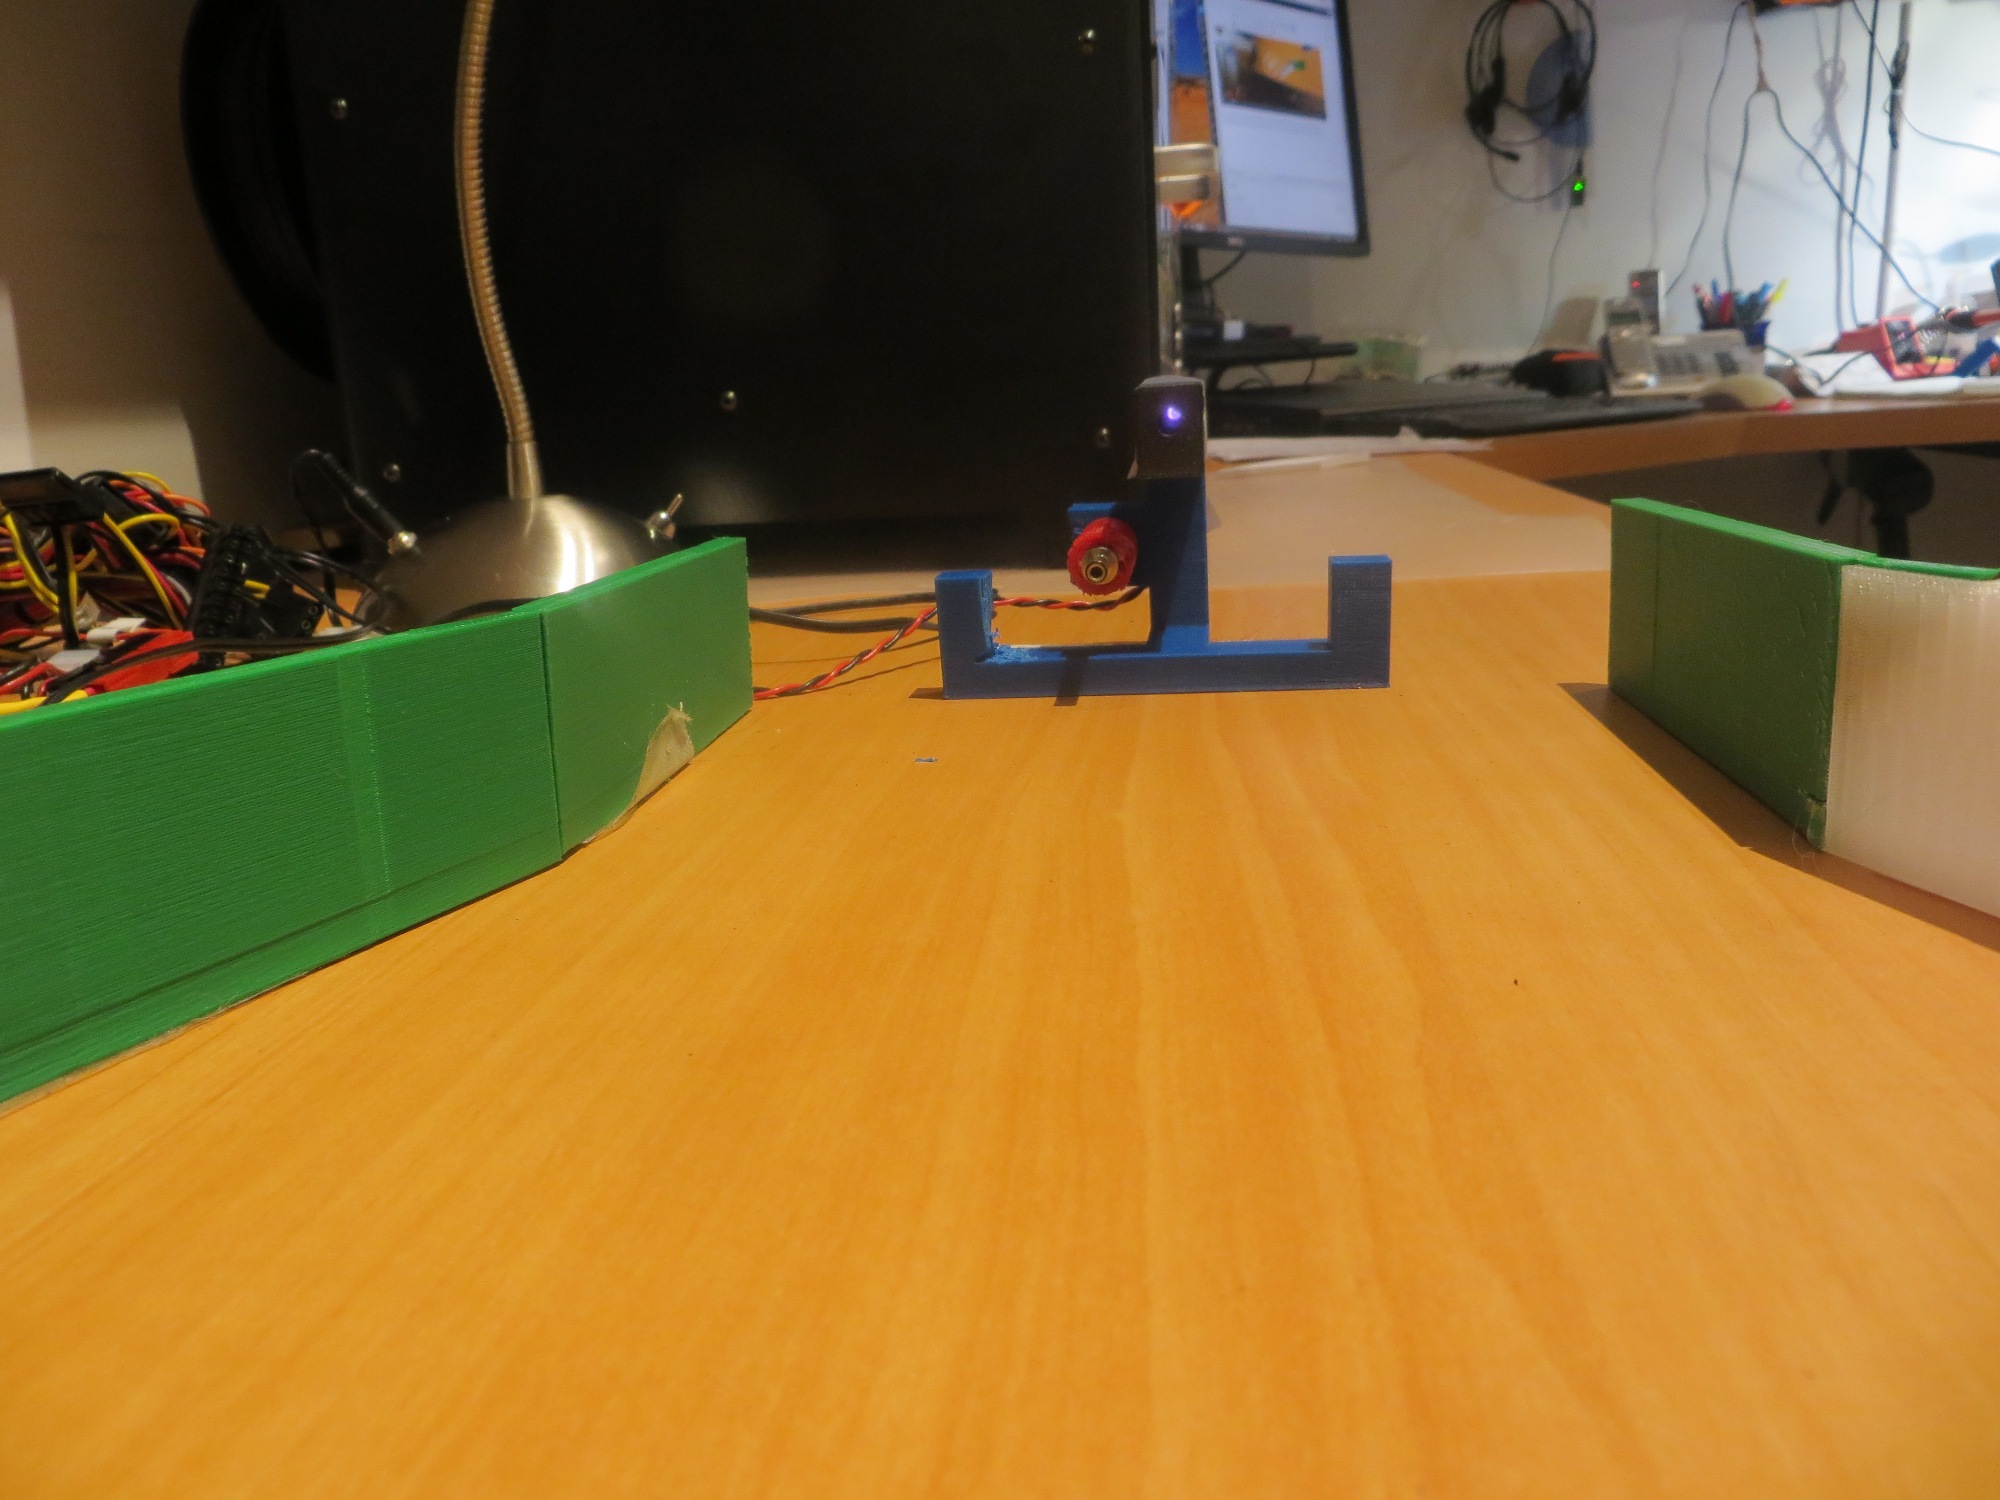
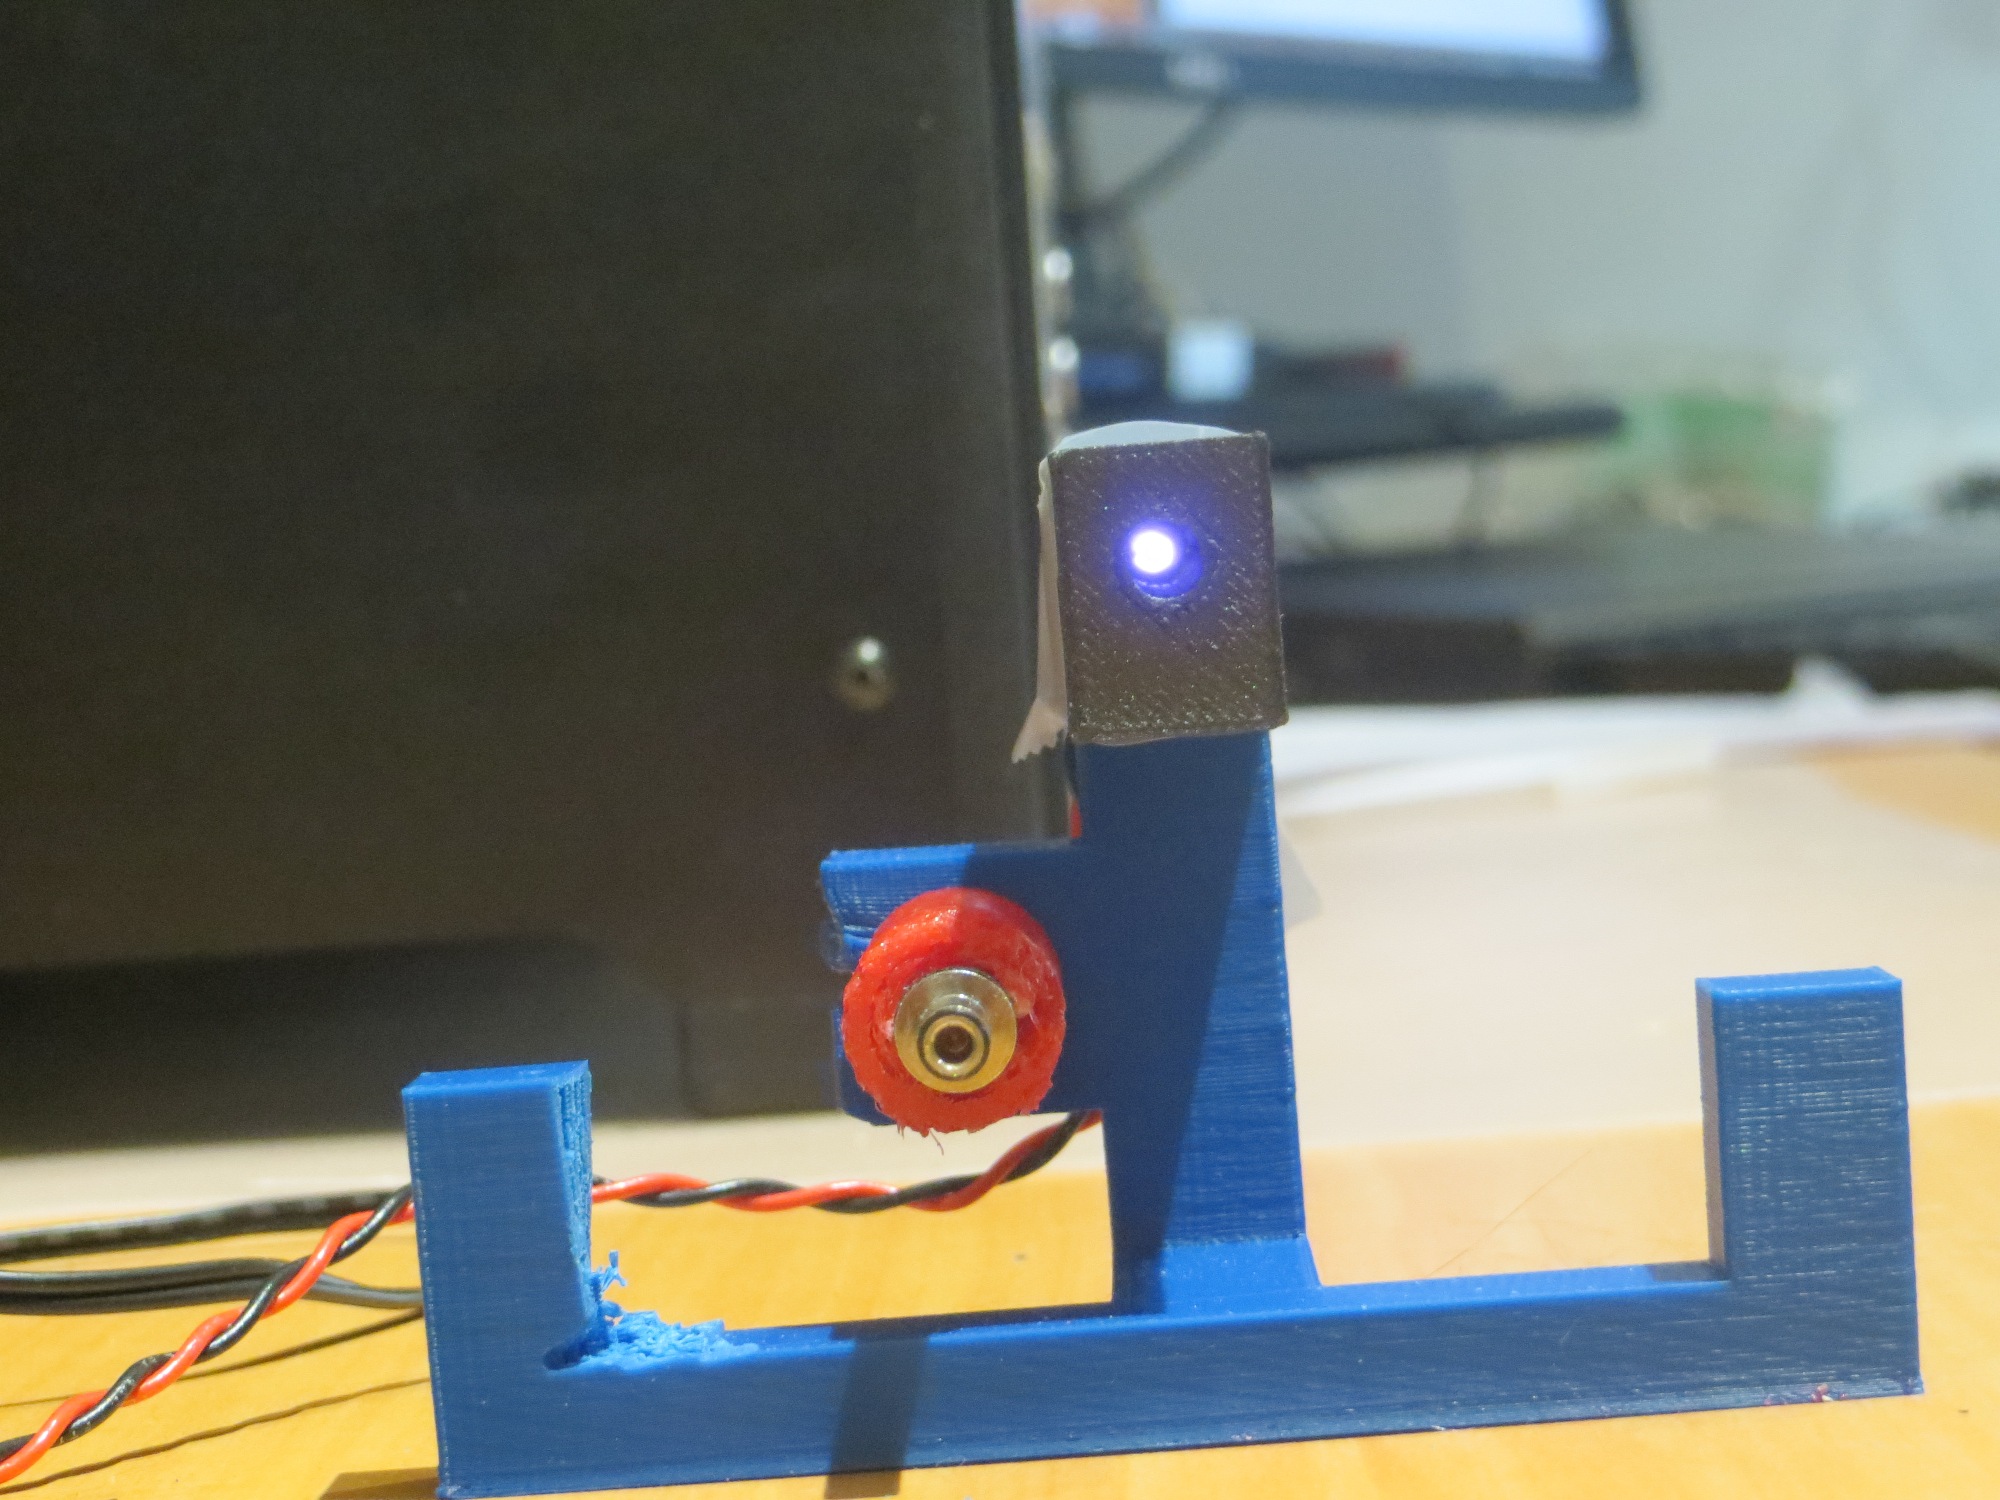
This experiment ‘worked’ in the sense that it showed that the IR beam was no longer visible outside the lead-in rail aperture, but it also made it so narrow that the robot had to be right on the centerline to sense the IR beam at all. Although this solves the problem of hitting the rail, it would make it very difficult for the robot to ever find the charging station in the first place when approaching at the typical wall-following standoff distance.
So, although I plan to do a bit more fine-tuning of the PID parameters, it appears that the basic homing problem is solved, but the challenge now is getting the robot into a position where it can home in on the IR beam without running into a side rail. The current wall-following algorithm doesn’t have a set stand-off distance, so the robot may be ‘cruising’ at anywhere from 10-70 cm from the wall being tracked. Assuming that one lead-in rail is against the wall, the IR led is located about 20 cm out, and the front end of the outside lead-in rail is about 35 cm out. When the robot is just captured by the outside rail, its centerline is about 16 cm out. The angle from the IR LED to the center of the robot at this point is about 11-12 º. So, assuming the robot is wall-following and at some point intersects the IR beam and starts homing, the angle from the robot to the IR LED has to be less than 11-12 º or the robot will not be captured by the lead-in rails. The situation is shown graphically in the following diagram.
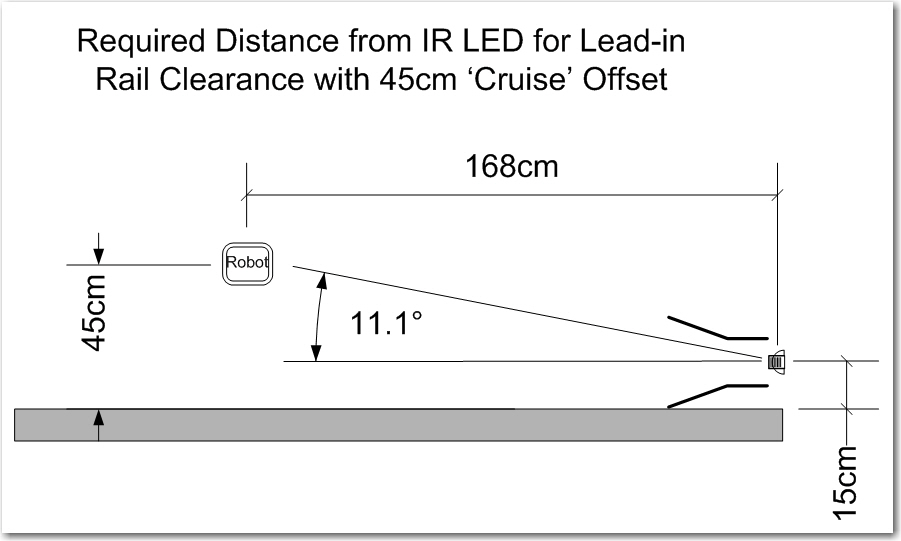
Capture parameters for the robot approaching a charging station
As shown above, if the robot is ‘cruising’ at 45 cm from the wall, then it has to start homing from no less than 1.7 m or so from the charging station in order to get captured by the lead-in rails. This is a large, but impossible distance. The robot can currently home from about 1 m out, so getting out to 1.7 m might be as easy as increasing the IR LED current; it is currently running at about 30 mA, and it is rated for 100.
Another possibility is to angle the capture gate out slightly with respect to the wall. There’s no real reason the charging station rails need to be parallel to the wall – it’s just my neat-freak mentality that makes me do things that way. If I angle it such that the inside lead-in rail touches the wall at both its forward and trailing ends, that will angle the beam out at about 13 º, and move the minimum capture distance in to about 1.0 m, as shown in the following diagram. 1.0 m is just about where the robot is capturing now – yay!!
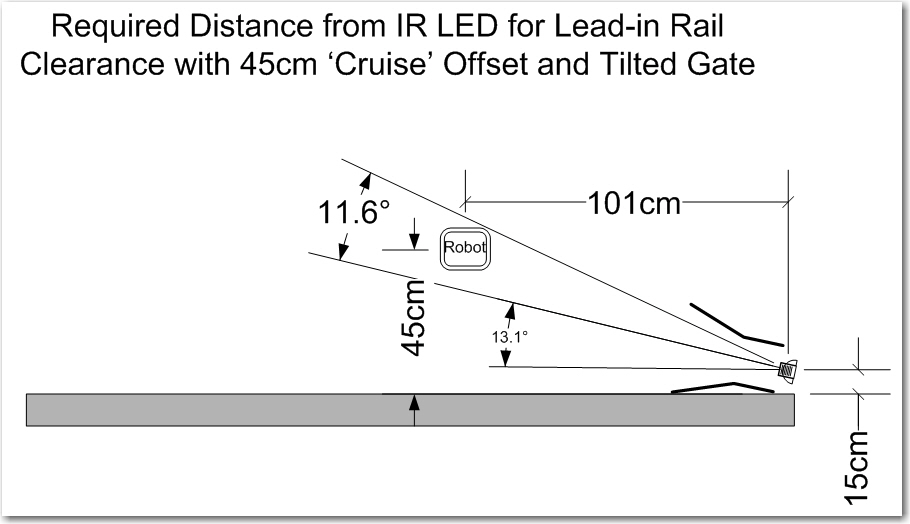
Tilted gate option. The tilt decreases the minimum required IR beam capture distance from about 1.7m to about 1.0m
So, it appears that tilting the capture gate is the way to go; this doesn’t cost anything but a slight ding in my ‘neat-freak’ index, and should eliminate or greatly reduce problems with charging station capture failures.
Stay tuned,
Frank
Pingback: Charging Station System Integration - Part I - Paynter's Palace
Pingback: Charging Station System Integration – Part III - Paynter's Palace
Pingback: IR Phototransistor Sensitivity/Dynamic Range Study - Paynter's Palace
Pingback: Another Try at Charging Station Homing PID Tuning | Paynter's Palace