My grandson Danny and I have been working on a wall-following robot project, just for grins. The general idea is to create a semi-autonomous robot as animated prey for our two cats. I’m not sure I really care too much whether or not we ever get something the cats will actually run toward instead of away from; it’s the adventure that counts ;-). There is also the hope that the robot adventure will (or can be made to) intersect/overlap with my 3D printing capabilities/interests.
Because I’m an old broke-down engineer, I have tried to imagine the general requirements for our semi-autonomous prey robot. So far as we have been able to enumerate them to date, they are:
- Follow walls and not get stuck
- Find and utilize a recharging station
- Act like a cat prey animal (i.e. a mouse or similar creature)
- Generate lots of fun and waste lots of time for the humans (me and my grandson) involved
The first three requirements actually seem pretty complete, although maybe not that easy to realize. However, the fourth requirement should be easy to meet, and in fact I can report that it has already been partially achieved (we have already wasted lots of time and had lots of fun!)
To get started, I did what I always do – research!! In the bad old days I did this by raiding technical libraries for books/magazines/articles relevant to the subject, and then going after everything referenced in the first round of material. It wasn’t unusual for me to go through dozens or even hundreds of citations in a short period, after which I was usually able to create an effective approach to the challenge, whatever it was. These days I start by throwing out a wide search loop on Google, and then following whatever trails seem productive. At this stage I’m not at all picky about what I look at, and not at all picky about discarding materials or leads that weren’t relevant.
In the case of DIY robots, there is a lot of educational material out there, along with lots of DIY parts, development tools, and other goodies. For our first try at this, I acquired the following parts:
- A Chinese Arduino Uno clone (http://www.ebay.com/itm/US-UNO-R3-ATmega328P-ATmega16U2-2012-Version-Board-Free-USB-Cable-for-Arduino-/251459710321?ssPageName=ADME:X:RRIRTB:US:3160), $8.99 ea. I purchased 3 and was glad I did, as one arrived DOA (I got a full refund – thanks!), and I almost always manage to kill at least one of everything I try ;-).
- A DIY robot chassis with a dual-motor L298 controller (http://www.ebay.com/itm/161246592134) for $24.99. This turned out to be way huge for a ‘cat prey animal’, but hey – ya gotta start from somewhere! ;-).
- 5ea HC-SR04 Ultrasonic distance sensors. Prices for these varied all over the lot, from almost $10 each to $6.14 for a pack of 5 (guess which one I picked).
- A Solarbotics L298 Motor Driver kit from the local Micro Center, to replace the one that came with the robot chassis – the one I burned up shortly after it arrived 🙁
- A set of 5ea Linear Technology LT3081 1.5A programmable voltage regulators, to replace the 2N3055/LM317t – based home-brew lab power supply I managed to burn up while burning up the dual motor driver 🙁 :-(.
While waiting for the parts to arrive, I worked on setting up the development environment for Arduino coding. I already had VS2008 on my machine, so I utilized Visual Micro’s integrated IDE add-on for Arduino development, and found Virtronic’s very nice Simulator for Arduino – PRO version (www.virtronics.com.au). Danny and I worked out the basic structure diagram, and we were able to get an early version of the software running on the simulator during a 3-4 day visit to the kid/grandkid abode over Christmas
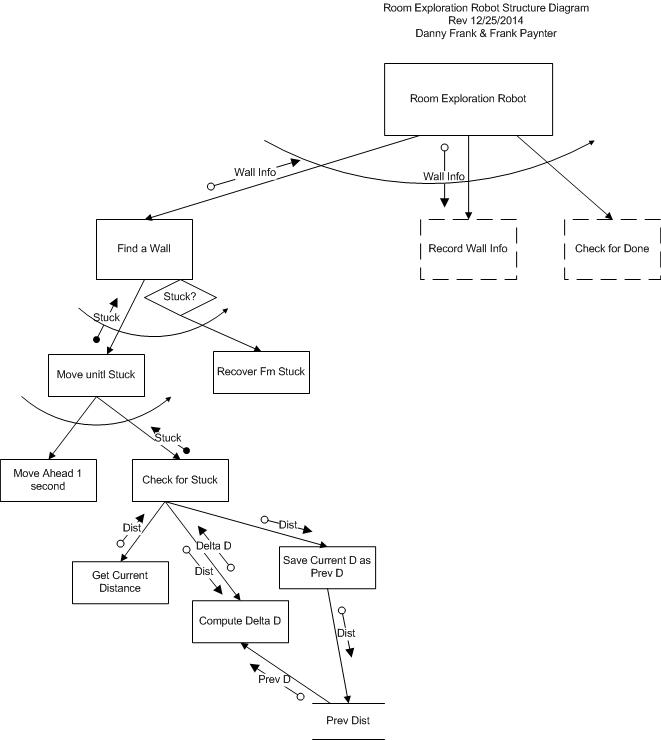
First-cut structure chart for the wall-following robot
After getting the parts in and assembling the robot chassis (and burning up/replacing the motor driver), I was able to get the robot to the ‘first baby steps’ stage fairly quickly (where the term ‘quickly’ is used somewhat loosely!)
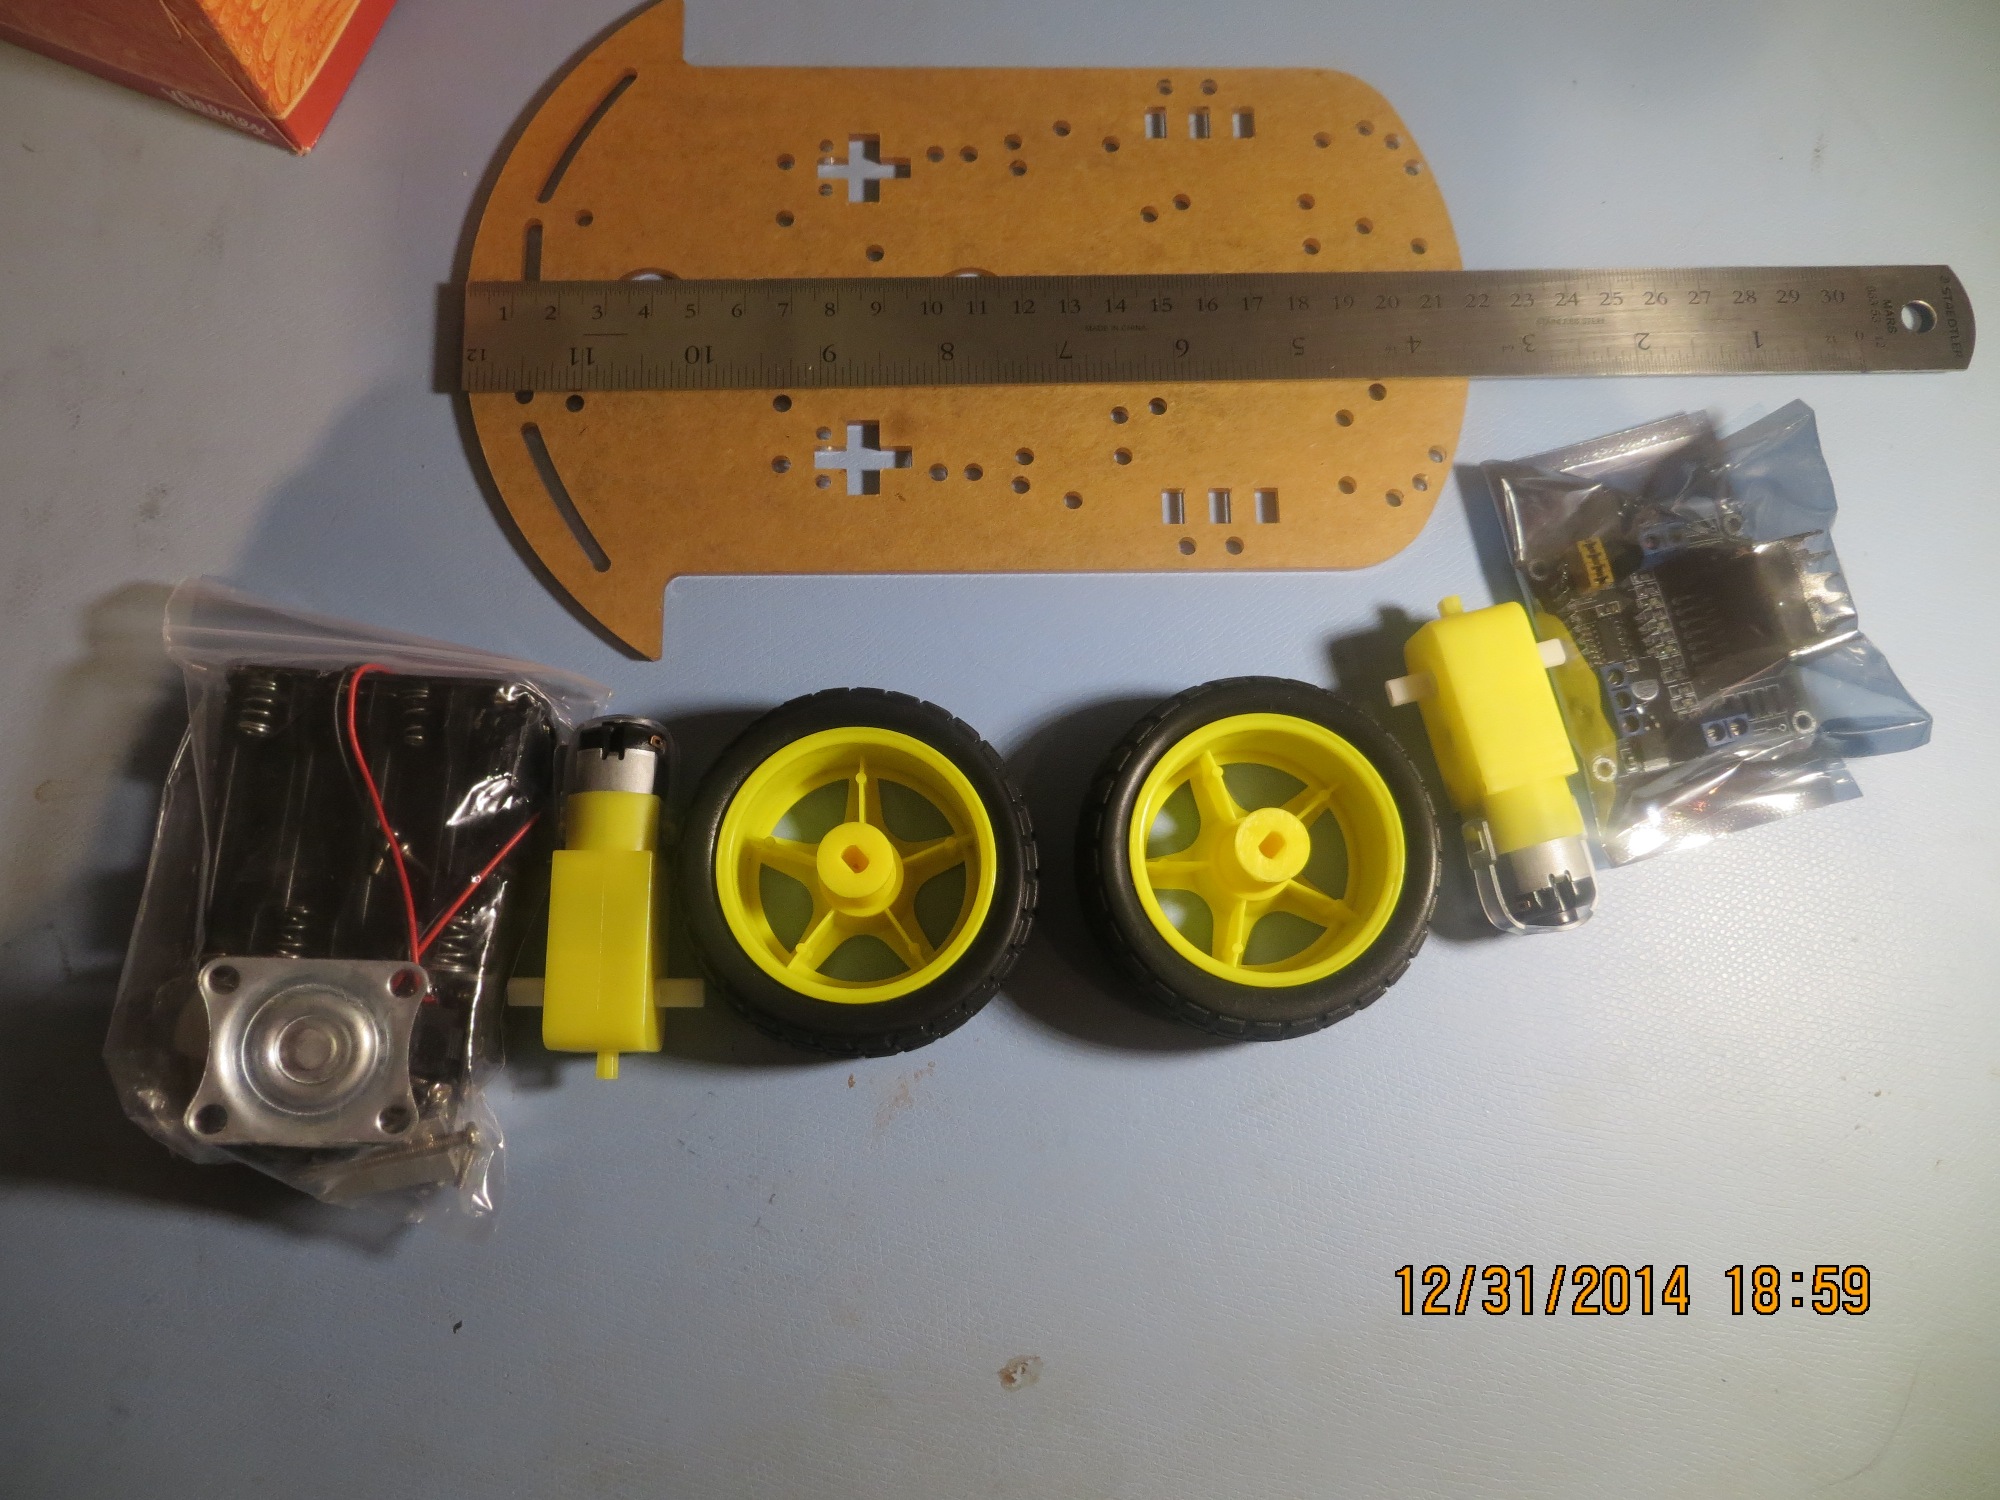
Robot kit as delivered
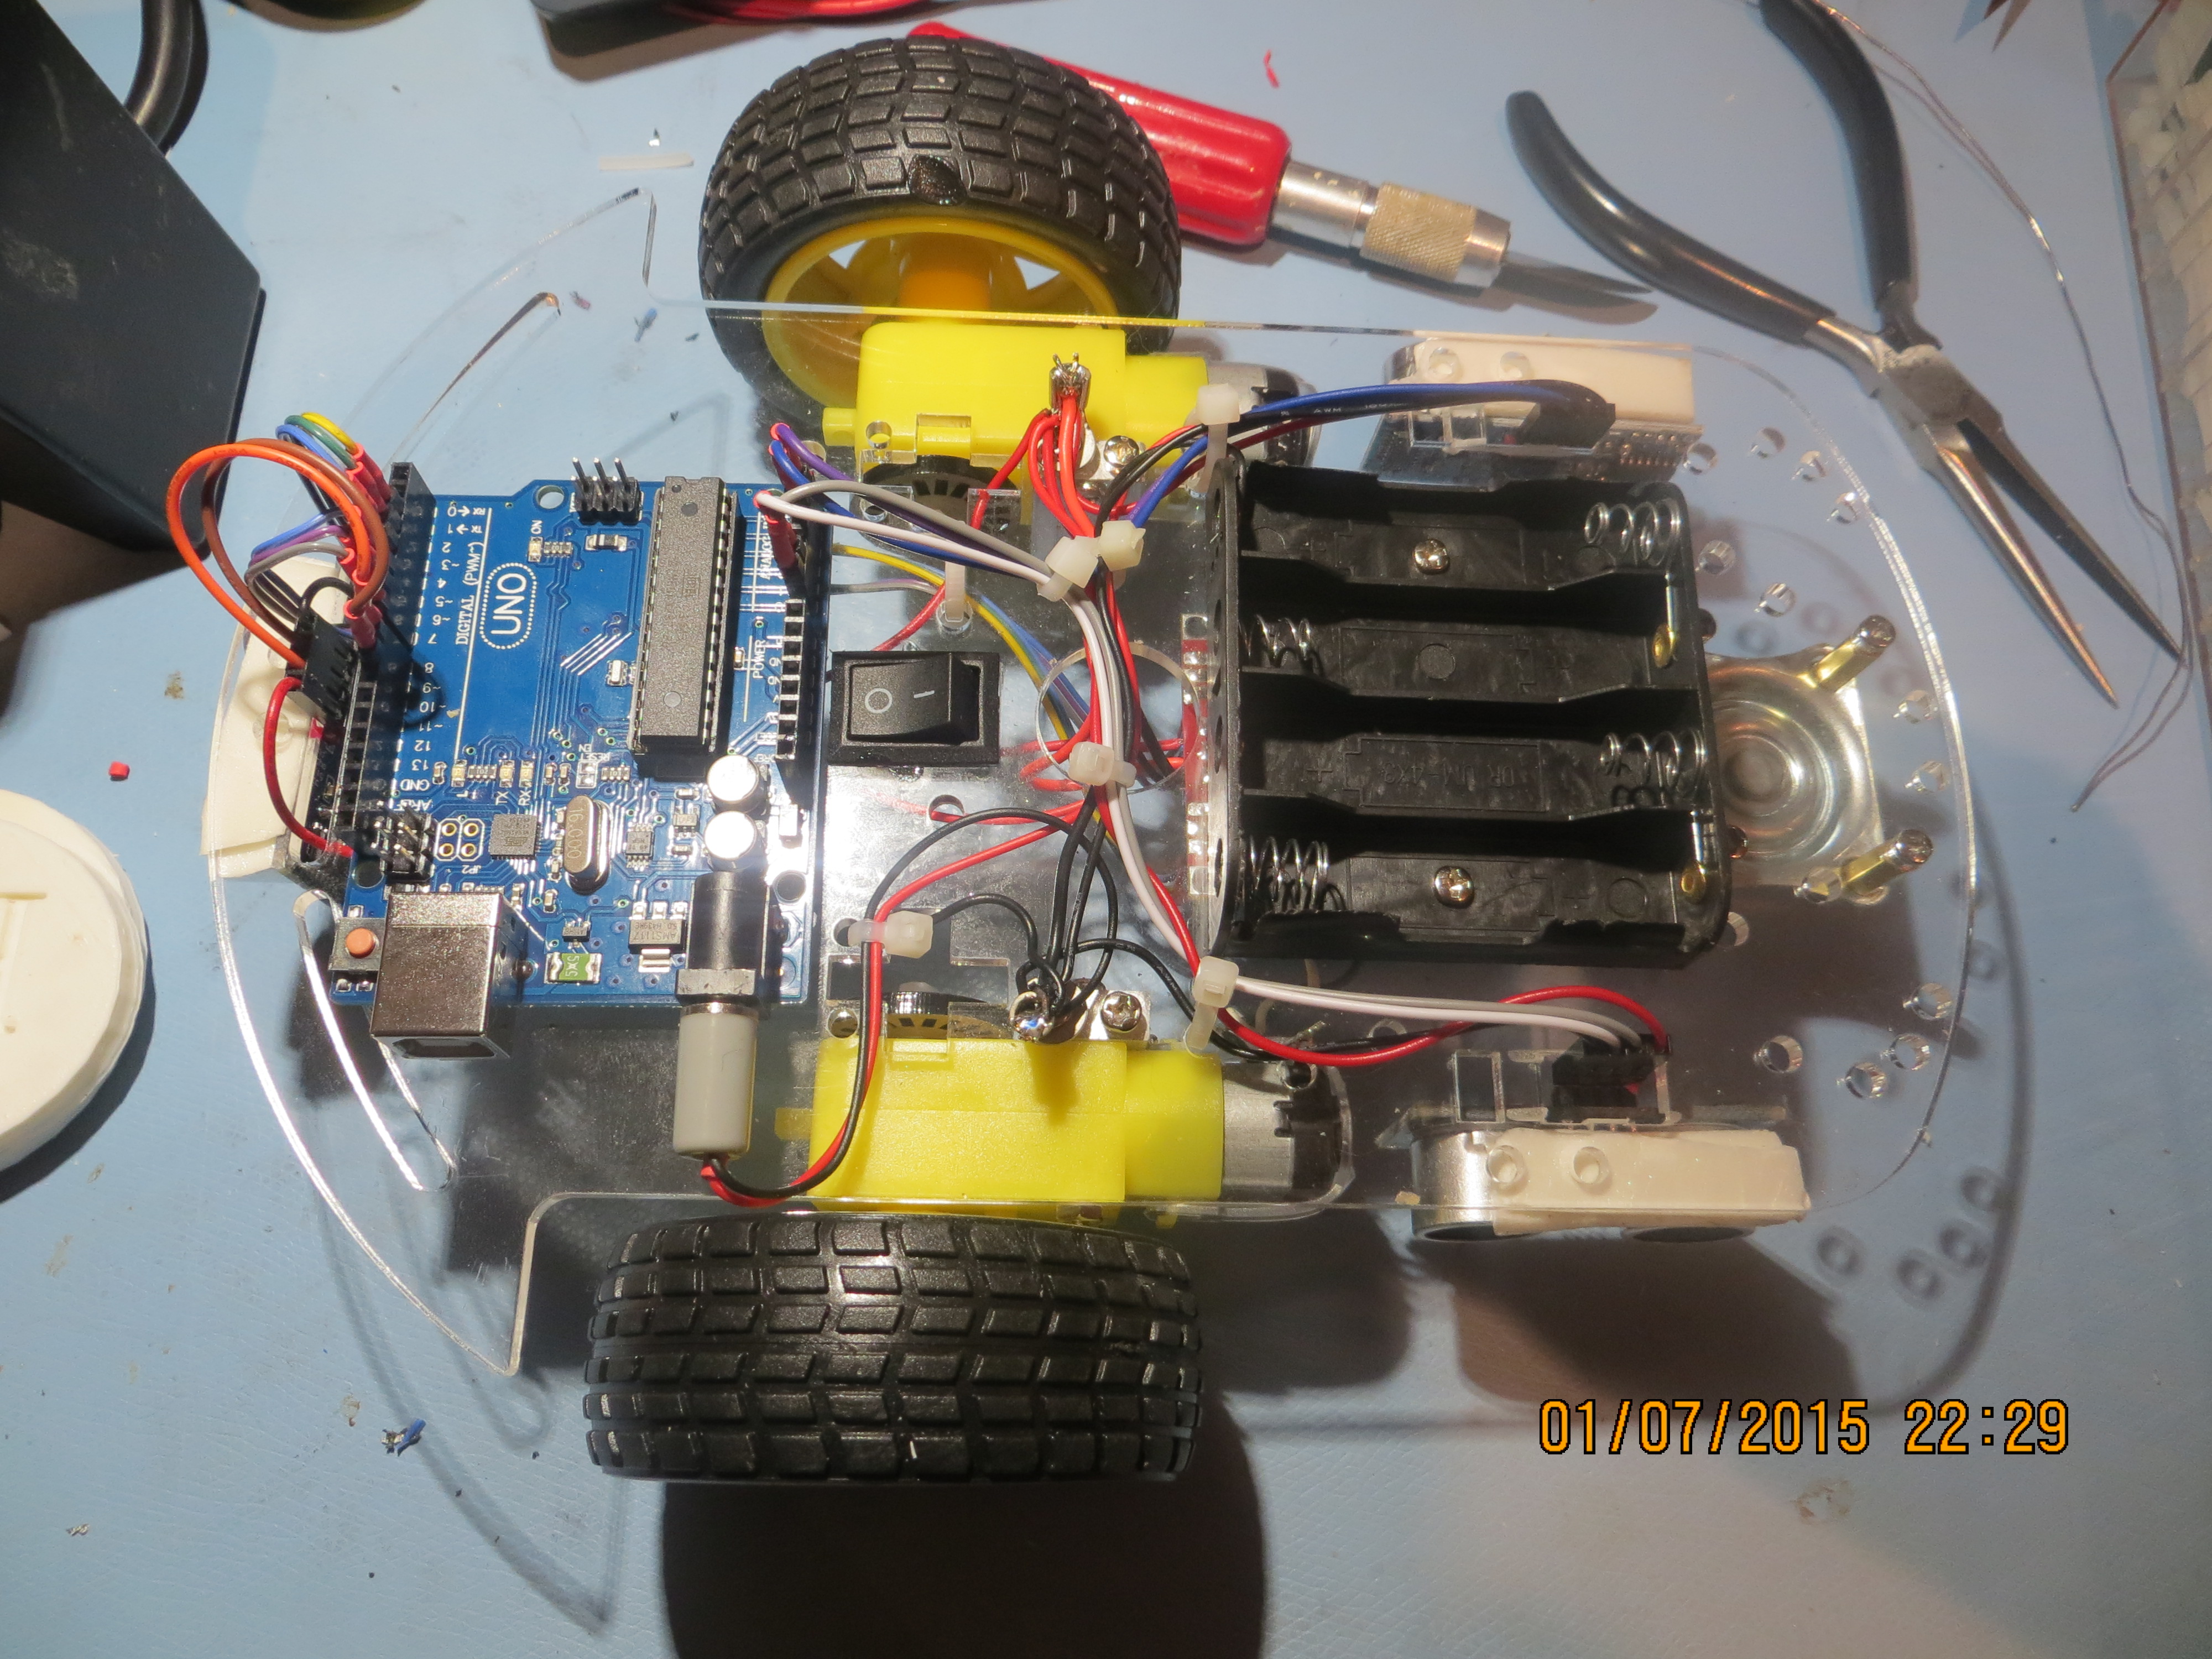
Finished robot – top
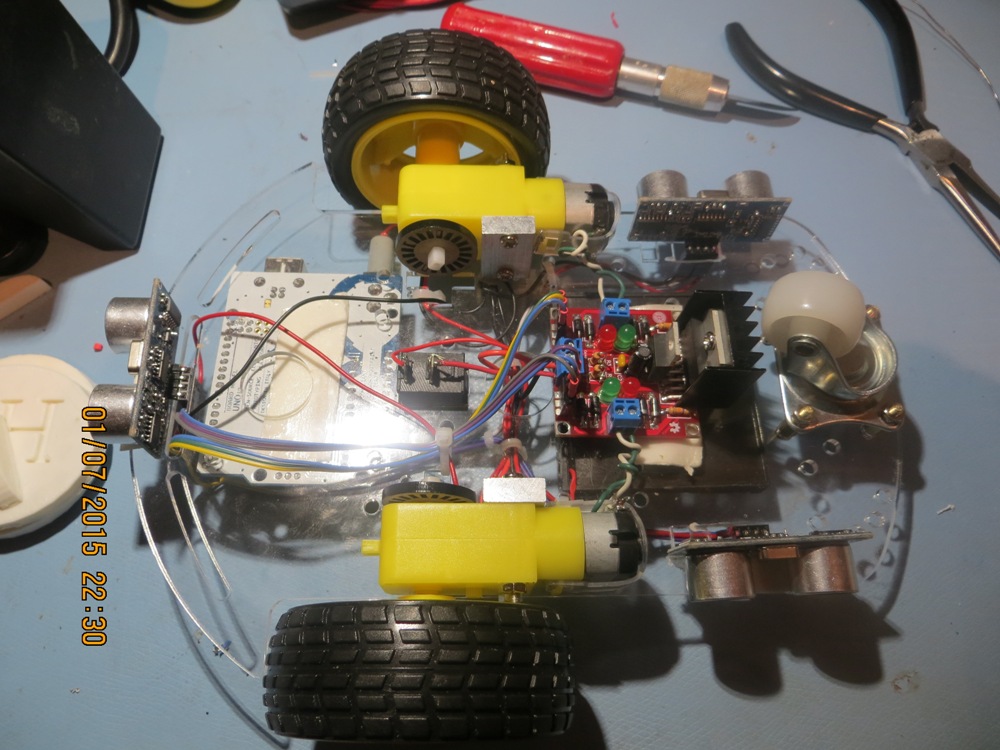
Finished robot – bottom
And speaking of ‘baby steps’ – here is a short movie of the first really successful run of the wall-follower. In this case, ‘success’ means that the robot recognized that it was stuck, and backed up/turned to recover from the stuck condition.
There’s lots more work to do before this particular robot has any chance of attracting a cat or two. It doesn’t run in a straight line for crap, and is much better at bumping into walls than following them. But hey, it is already over-achieving on technical requirement #4 (generate fun, waste time!) 😉
Stay tuned!