I have a really nice DeWalt DCD710 3/8″ cordless drill/driver, and I think it’s the greatest thing since sliced bread. It’s small, light, very powerful, and the lithium Ion batteries last forever and charge quickly. What more could a guy ask for, anyway?
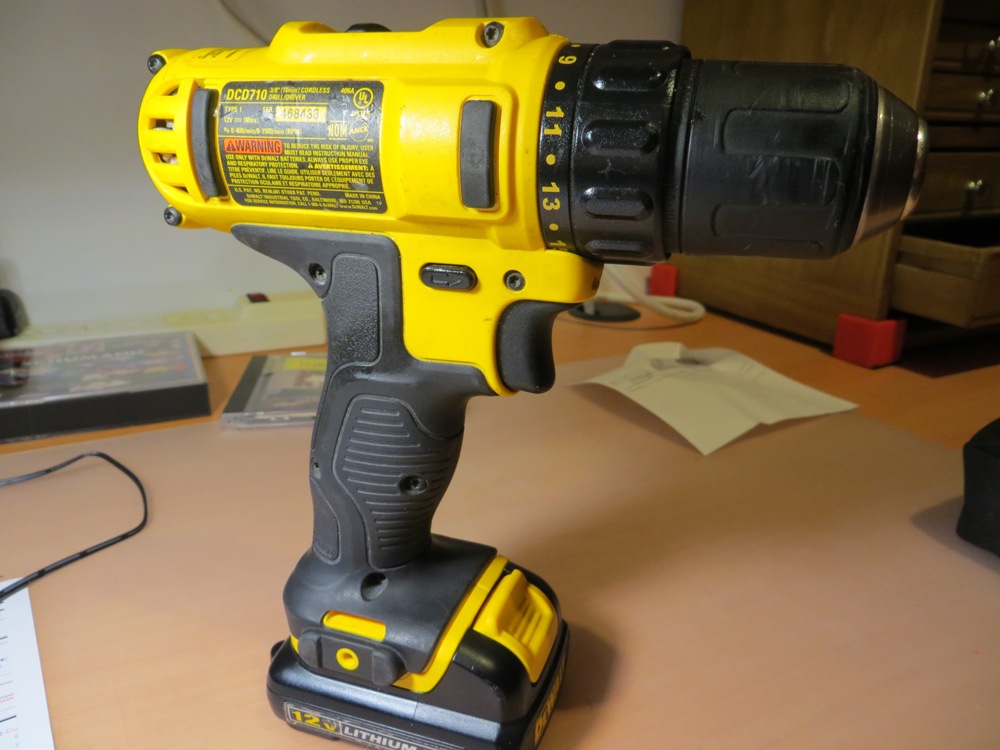
Well, what I could ask for, but didn’t get, is a convenient way to carry extra (or any, for that matter) driver bits with the cordless drill. My previous drill had a nice bit caddy built onto the case, and this was a very nice feature. I tried gluing a metal clip onto the side of the DeWalt, but that lasted only a day or so before it broke off again, leaving only an ugly scar. So, now that I have my own 3D printing factory, I thought I’d give this another whirl.
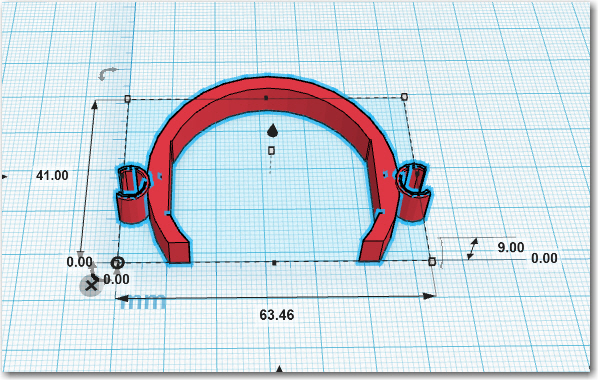
The first step was to find a shape that would fit snugly over the top of the drill body, out of the way of normal use. I started with a circular ring with a rectangular cross-section, and adjusted the diameter and thickness to get what I wanted. Initially I kept the width small to cut down on printing time
First try at the body clip ring
After three more tries, I got a body clip that I liked, complete with a prototype bit clips attached. The bit clips were actually the body clip scaled down, rotated, and translated to attach the sides. Unfortunately, the details in the body clip didn’t scale well down to the bit clip size, so I basically had to start from a fresh sheet of virtual paper for the bit clip.
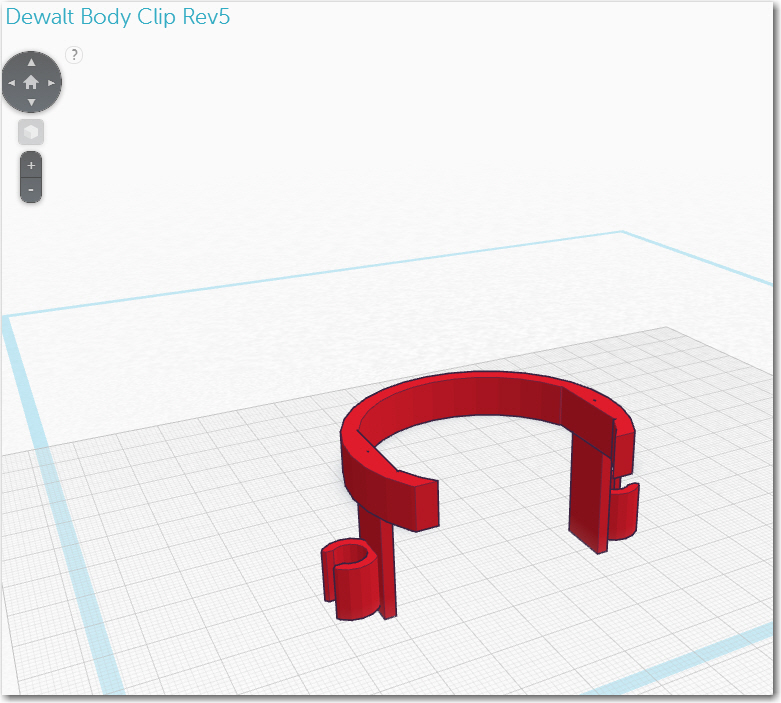
TinkerCad drawing for the final body clip, with prototype bit clips attached
Again it took 3/4 revs to get the bit clip geometry the way I wanted it – with a good, firm grip on the bit, but not so ‘firm’ that it would be impossible to get the bit out of the clip without a broken fingernail or two.
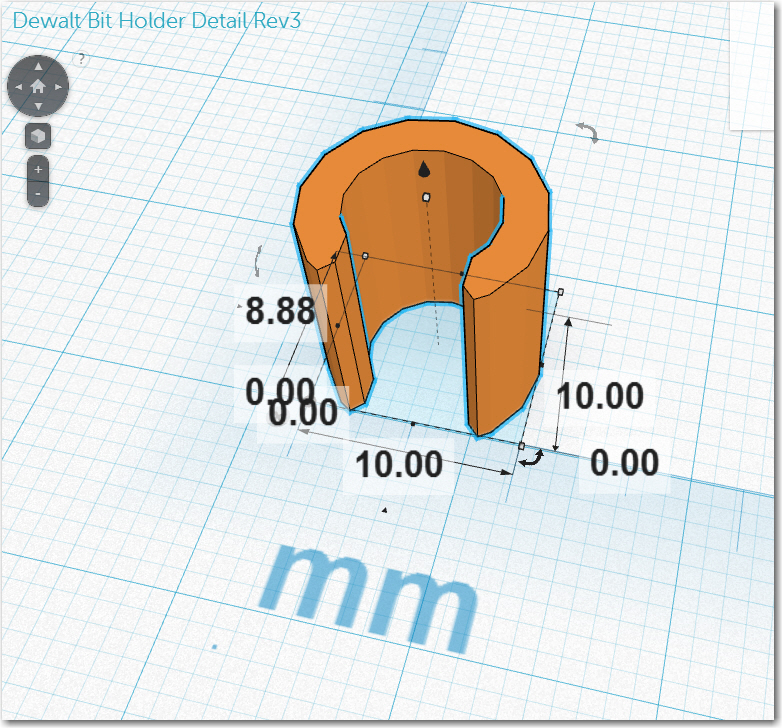
Final bit clip detail. Note the beveled edges (done with a wedge and a rectangle hole
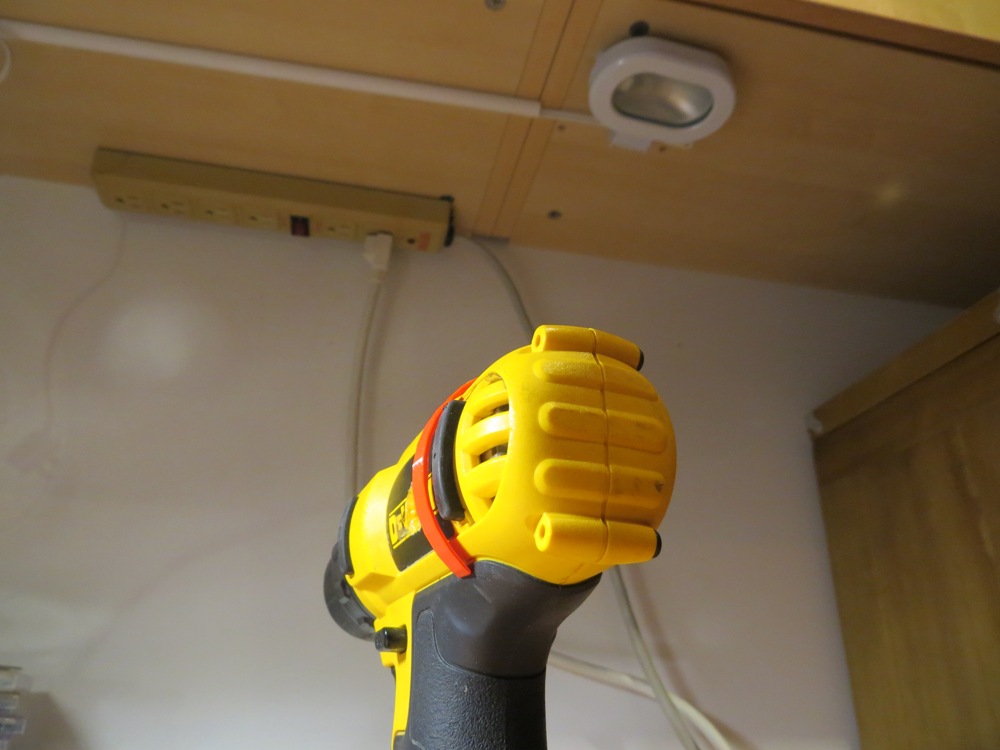
Now to combine the body clip and the bit clip into a final product. Rather than attach the bit clip to the outer surface of the body clip as I did with the prototype, I had the brilliant idea that I could create an outrigger from the body clip that went forward along the drill body, and then attach the clip to the outrigger. This would get the stored bits closer to the drill body, and hopefully make them less prone to being pulled off or snagging.
Final body/bit clip fixture. The clip was copy/pasted into the overall design